It’s finally time to talk about The Refashioners 2016!

I’ve been waiting a long time to share my #jeanius project with you.
The Refashioners is a challenge created by Portia Lawrie of Makery that showcases creative ways to refashion whatever the chosen garment for that year’s challenge is. If you’ve been following along, you already know that this year’s garment of choice is jeans (#jeanius!). Check out what I made!


I’ve written about my creative process over on Makery, but if you want more details on working with the particular pattern I chose, Vogue 8750, you’ve come to the right place.

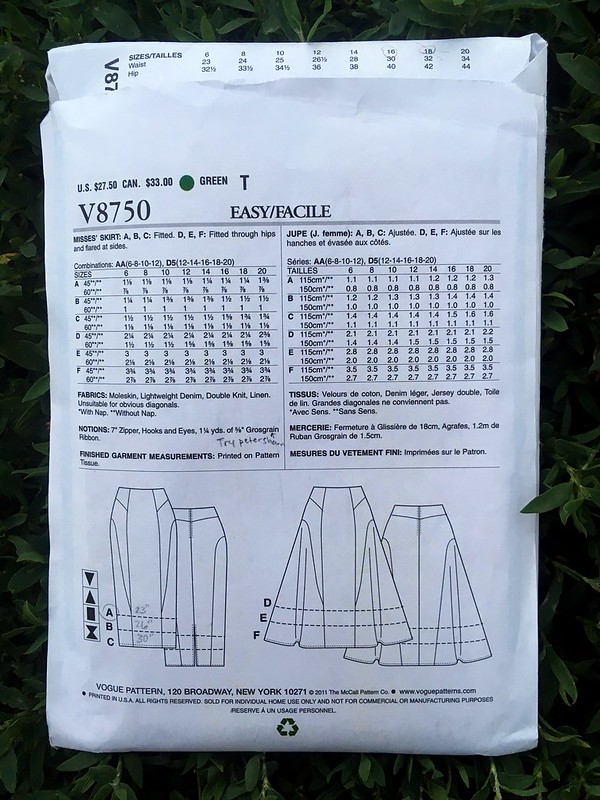
As soon as Portia sent us our brief for this year’s Refashioners challenge, the gears in my mind started turning. My local big box fabric store was having a pattern sale, so I went down there with notebook and pencil in hand, sat down in front of the big pattern catalogue books, and started making list. Lists and lists of patterns that I might be able to create out of different pairs of jeans. I decided to look for something that had multiple narrow pieces so I could cut them out of jeans legs. I finally settled on Vogue 8750, a skirt pattern. I chose View A, which is the shorter (but not actually short) pencil skirt. This looked like it had a lot of possibility for color-blocking, and I was hoping to find some super-cool denim at my local thrift store.
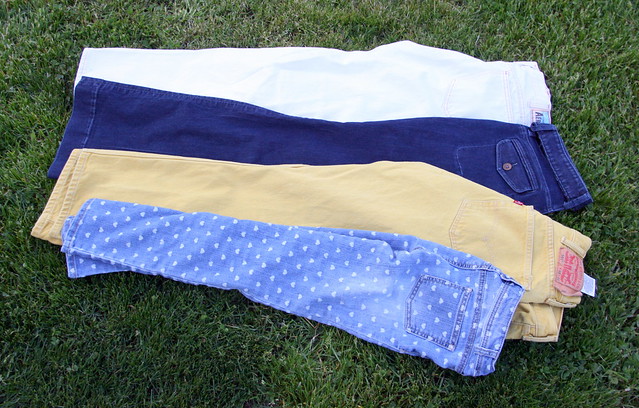
With the help of a pattern and all the inspiration on my then-secret Denim Pinterest board, I went to my thrift store looking to find some railroad denim or…something inspiring. (I have a little railroad denim obsession at the moment). No railroad denim. But I did find…THIS! Yellow denim, white, denim with hearts, and my own older pairs of dark blue. Now it was all coming together!
Last year’s Refashioner’s contest helped me make a move up from beginner to intermediate sewist. However, still not being super experienced, I don’t always make a muslin. (Who am I kidding? I skip it whenever I can.) I know…I know… It’s helpful, and I’m moving in that direction, but I’m not there for every project. I actually DID make a practice garment for this one, though. I made two, even!

The first showed me that I needed to size down.

A lot of people say they find this with Big 4 sewing patterns–I typically don’t, but in this case it was necessary, so it’s a good thing I made a muslin. I used the second muslin to try lowering where the skirt sat on my hips and practice putting it all together a bit more. The pattern tells you to ease the top of the skirt to the ribbon facing, but I had a lot of trouble with this and didn’t really want the skirt up at my natural waist. I found that skipping the easing and just cutting a ribbon to match the top of the skirt solved both problems.
Muslins can also be a great way to procrastinate on cutting into your final fabric while appearing busy. 😉 I finally got up my courage, though, and found that I could easily fit my pattern pieces onto the jeans I had chosen (large men’s jeans for the white and yellow). I tried out using one pair of children’s jeans for my middle panel, but had to backtrack when I saw that it just didn’t work.

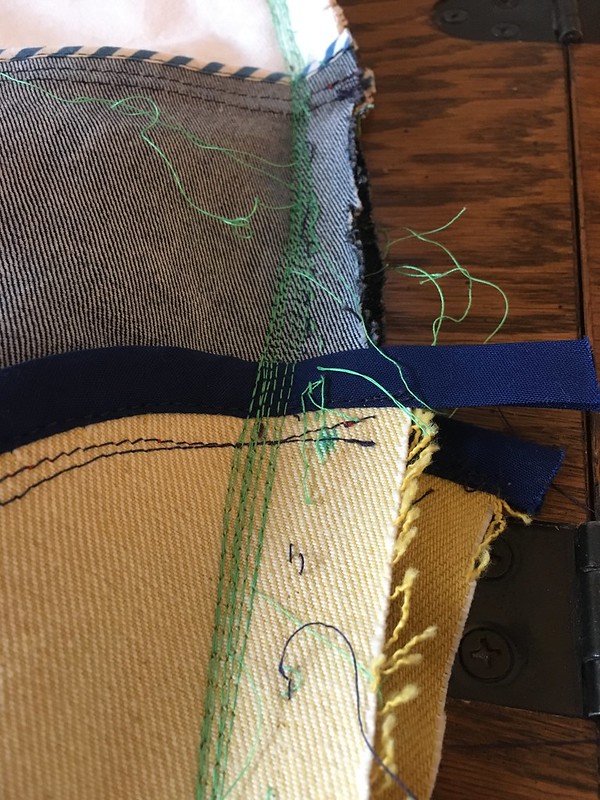
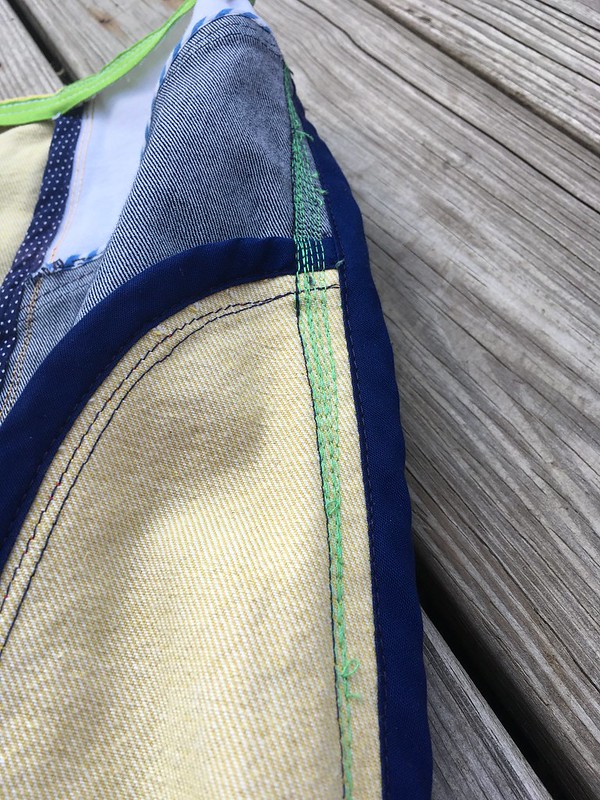
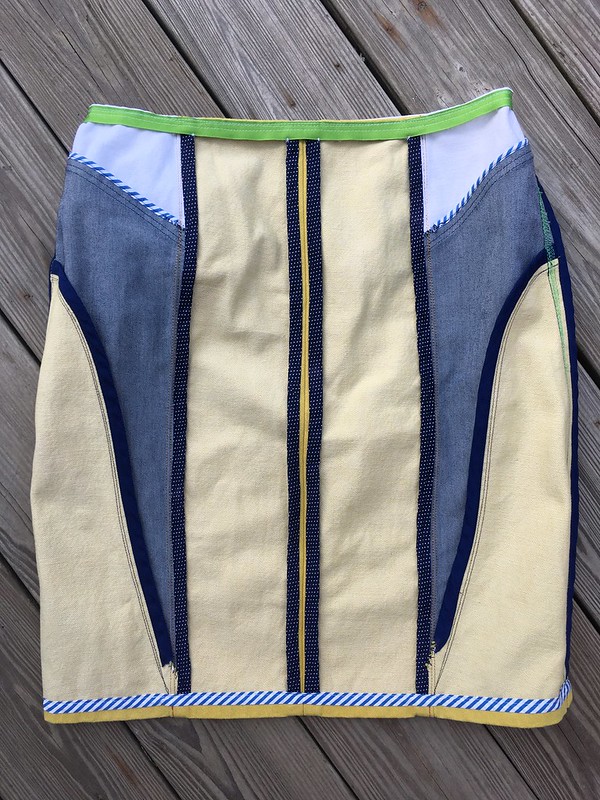
The thing I wish I had done (and I’m still not sure how or why I didn’t after two practice garments) was think about how and when I was going to finish my seams. I realized part way into my final draft that I really wanted to bind the edges of the seams with bias tape. This is something best done as you go along and before you join various parts. You can see a few places where my bias binding doesn’t go all the way to the edge of the seam. Lesson learned. I actually contemplated starting over when I realized that (plus, I was getting pretty good at making this pattern after a couple of versions), but it seemed to defeat the purpose of refashioning to throw an otherwise good garment-in-the-making out because of one little detail.

The other interesting thing I discovered was that sometimes, in matching up seamlines (namely on the sides), it wasn’t about moving the pieces up or down to get them to match, but making the seam allowances the correct width for them to match. One of my sides matched immediately, and the other took several passes through the machine, taking the side in millimeter by millimeter in order to get it to match. The skirt in-progress looked messy and crazy, but as I got things lined up, trimmed and bound my seams, and finished edges, it came together into something that looked polished.
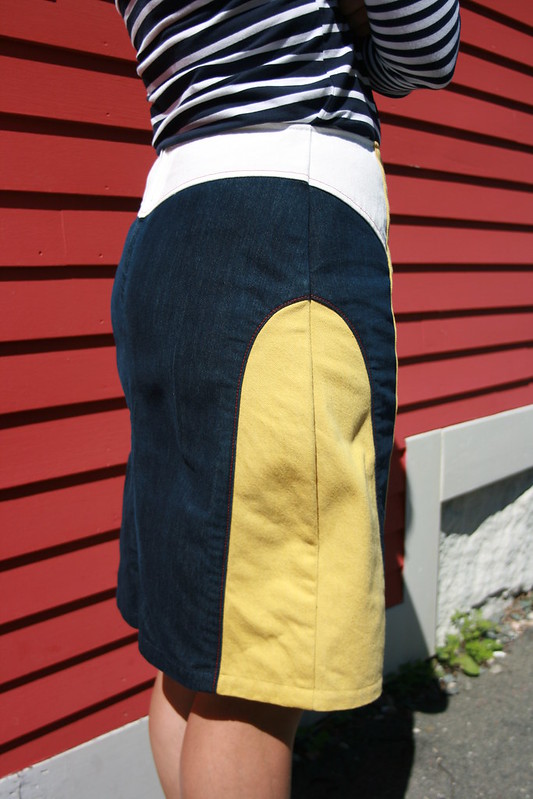

When I finally finished, I had a thing of beauty. It’s certainly not perfect, but I’m proud of it. I think the best compliment I got was when I was in Rockport, Massachusetts shooting pictures, and I stopped in an art gallery. Rockport is famous for its artists, and one of the artists in the gallery complimented me on my outfit. When a person who spends their life looking for beauty compliments you on your outfit, you know you’ve done something right! 😉


My favorite thing about this challenge is that it makes me think like an artist. You get your parameters, but within them you have freedom. How far can you push it? What will you do to make your garment distinctive? Will it be simple and sleek or heavily embellished? This is what I talk about in more depth in my post on the Makery blog. If you haven’t already, I hope you check it out and look through all the other posts as well to get some inspiration. What do you think? Will you be diving in? There’s a pretty tempting prize package!
Last, but never least, thank you to my photographers–my husband Scott and my friend Colleen. I appreciate your help SO MUCH!

Your skirt looks fantastic! I absolutely love the colour blocking that you did – and it was really interesting seeing your line drawings over on Makery showing all the other options you didn’t go with – It’s really quite amazing how the different colours change the whole look completely. I think the combination you ended up with is great. And I’ve definitely been inspired. I finally came up with an idea for what I wanted to do for the challenge – it’s taking me soooo long to get it finished though. And thanks for the reminder to think about seam finishes – I need to figure out what I’m going to do before I start the final sew.
LikeLike
Thanks! I’m so glad you are participating, especially since you already do so much refashioning. I think my husband may have come up with the idea to color in line drawings. It really does help. Can’t wait to see what you make! I got the most done last year once my kids started school.
LikeLike
Ahhh I LOVE your skirt!!! I love the color blocking. It’s very flattering on you too. I love to upcycle denim….have you ever read “Reinvention” by Maya Donenfeld? Theres a whole chapter on Denim. You inspire me!
LikeLiked by 1 person
Thanks so much! I haven’t read that book. I’ll have to see if the library has it. You should submit a project to the contest!
LikeLike
I’ve got that pattern. I never thought to colour block it though! Nice idea!
LikeLiked by 1 person
Thanks!
LikeLiked by 1 person
I’m obsessed with this skirt! Love it SO much! When will you start making clothing for other people, because I. NEED. THAT. SKIRT.
LikeLike
You know what would be even more fun? 😉 Join the crazy world of sewing! If you do, I’ll teach you to MAKE the skirt over Skype! I’m always looking to suck more people in!!!! WAHAHAHAHA!!! 😀 (Although, actually, I think Nicole would like it if I sewed for other people, too.)
LikeLike
Gorgeous skirt! What a fab refashion. Really great pattern choice with all the color blocking. I love all the different colors of denim you used. Well done!
LikeLiked by 1 person
Thanks so much, Rebecca!
LikeLike
This is AWESOME and super flattering on you. Great job again, Lisa!!!
LikeLiked by 1 person
Thanks so much!
LikeLike
Pingback: Summer Skirt Awards 2016 - Skirt Fixation