Tag Archives: skirt

McCall’s 7834: Easter Dress Revealed! After Only Five Months!

Standard
McCall’s 7834:  Easter Dress Revealed!  After Only Five Months!

Here’s a long overdue blog post–it’s my Easter outfit from April! I’ve been stalling a bit because this is going to be a long one, so buckle up! Hahaha.

After years of saving clothing inspiration via my camera, my brain, drawings, magazine clippings, and Pinterest, I’ve noticed that I like clothes and even decorative patterns that are outlined. Lots of outlining was even one of my failings in college drawing classes. I just like it. I finally started a “Fashion: Outlined” Pinterest board after noticing this preference in myself. Gucci has some of my favorite examples, but they’re certainly not alone. It’s also something I love in a Western shirt where the yoke is piped. I wanted a shirt dress of my own with outlining.

What better occasion than Easter? I had two colorways of a precious Rifle Paper Co. design in rayon that I had been saving for a dress where I could use both fabrics. With piping and trim to set off different sections and some black rayon to make a standout tie at the neck, this seemed like the right project. I’ve had limited experience applying piping (see my Western shirt), but I figured diving in was a great way to learn.

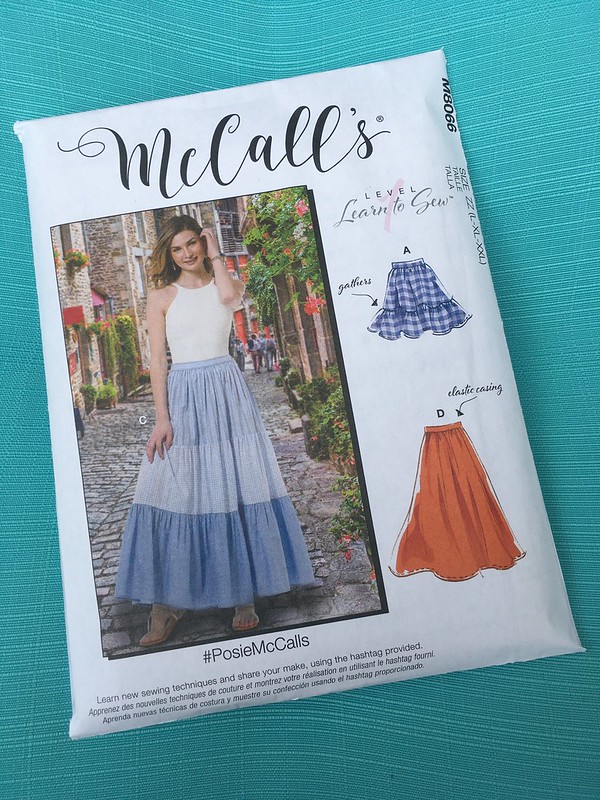
I chose McCall’s 7834, View D, sans slit, as my starting point.

McCall's 7834:  Easter Dress Revealed!  After Only Five Months!

I traced a size 20 for the bust, grading out to a 22 at waist and hip. I made sure to use a 70/10 Microtex needle and my walking foot for sewing. My original design plan?

*pink background fabric as my main fabric, with green background fabric as the contrast, and black rayon for my tie; contrast fabric would be used at button plackets, cuffs, and top and bottom skirt tiers (the bottom skirt tier could be left off if there was not enough fabric)

McCall's 7834:  Easter Dress Revealed!  After Only Five Months!

*black piping around my collar, sides of my top/visible buttonhole placket, and cuffs

*wider black velvet trim at the bottom of the bodice (if flexible enough to work with back bodice elastic), as well as at the bottom of the top two skirt tiers

McCall's 7834:  Easter Dress Revealed!  After Only Five Months!

*black dot buttons

McCall's 7834:  Easter Dress Revealed!  After Only Five Months!

Happily, most of these plans came to pass, more or less, although I did have to leave off the bottom tier due to lack of fabric, making the dress the length of View B.

I made a lot of little adjustments beyond my initial grading from one size to another. One of the most important: ADDING POCKETS! Of course, this was crucial. 🙂

I had some concerns about the width of the sleeve, so after a lot of deliberation, I swapped out the McCall’s sleeve for one from my current favorite dress pattern, Simplicity 8689.

McCall's 7834:  Easter Dress Revealed!  After Only Five Months!

I used the sleeve from Views B and D, which I had used before in my pink gauze dress. The length of the size 20 sleeve cap was similar to that of the size 22 sleeve cap from McCall’s 7834, although it was flatter.

McCall's 7834:  Easter Dress Revealed!  After Only Five Months!

Luckily the sleeve itself was wider, and I already knew that I liked it from the pink dress, although I did lengthen it by one inch. I also used the Simplicity cuff, splitting it in half and adding seam allowance so I could–you guessed it–add piping to the top and bottom. (Piping for everyone! Piping everywhere!)

McCall's 7834:  Easter Dress Revealed!  After Only Five Months!

This, helpfully, eliminated the need for four buttons, which meant I could use what I had in my stash without hunting down more.

Other fitting and design tweaks I made:

*added one inch of length to the bodice

*dropped the dart down 1 9/16″

McCall's 7834:  Easter Dress Revealed!  After Only Five Months!

*made an extra right button placket pattern piece so I would be able to pipe the top layer of my button plackets and make it in contrasting fabric (the original pattern has grown-on button plackets rather than separate plackets)

McCall's 7834:  Easter Dress Revealed!  After Only Five Months!

*added a one inch strip of interfacing to both button plackets

*added pockets about 21″ down from collar/shoulder

And behind all of this, imagine a million little decisions, choices, rabbit trails through books and the internet concerning techniques and the possible need for additional buttons, hand sewing of the backs of plackets, cuffs, and collar, and you begin to get a sense of the scope of this project. It was a big one.

After fitting and sewing, piping and deciding, I tried the dress on.

It didn’t look good.

I hated how it looked. The waist hit in the place I least wanted it, and it was so wide, it was sack-like (and not in a good way). It was bad.

So, I put it aside, and thought about it.

Hanging it up next to the aforementioned pink gauze Simplicity 8689 dress, I realized that the waist seam on the pink gauze one was about four inches higher.

McCall's 7834:  Easter Dress Revealed!  After Only Five Months!

Interesting.

I don’t like changing course once I get going, but I really wanted to love this dress. I decided it was time for some surgery, even though it was a scary prospect.

I took off the black velvet ribbon I had sewed to the waist and seam ripped the waist seam. Then I evened out the whole thing at my stitching line because after all the trimming I had done to the seam allowances, that was my best hope of getting a straight line. I also used my rotary cutter to even out the top of the skirt. My plan was to raise the waistline, but after pinning things in place, I came up with a new idea! Why not lengthen the top, and put a waistband onto the skirt so that it could be a set?

And that is what I did.

The placket, which I had painstakingly piped, posed a problem (alliteration!). I ended up using my dark background fabric to lengthen the top by 7 1/4″, and my light background fabric to lengthen the placket.

McCall's 7834:  Easter Dress Revealed!  After Only Five Months!

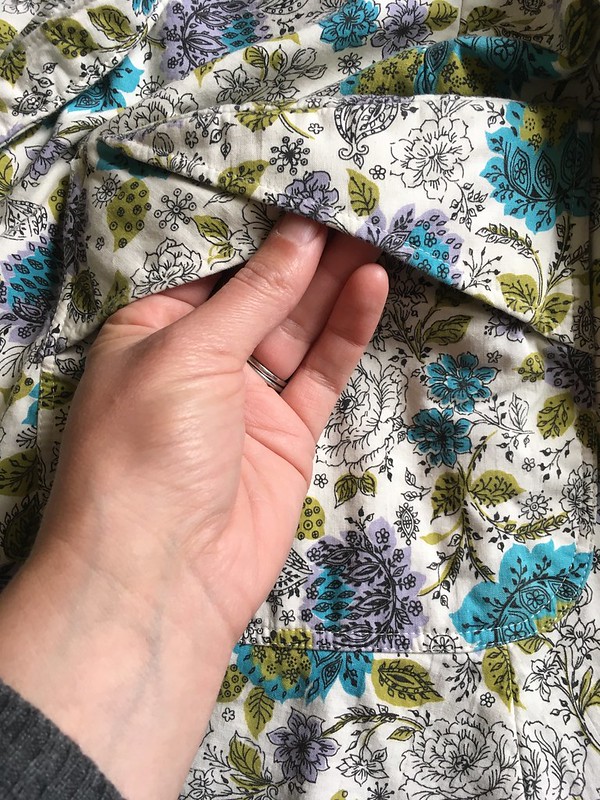
I had to pipe it separately from the original placket, and although I tried to cut down on the bulk at the join by pulling the inner cord out a bit and snipping it shorter before easing it back in and sewing things together, it’s not perfect.

McCall's 7834:  Easter Dress Revealed!  After Only Five Months!

And yet…I still really like it. To get the buttonholes in, I put tissue paper underneath my placket while sewing.

McCall's 7834:  Easter Dress Revealed!  After Only Five Months!

shirt without tie

McCall's 7834:  Easter Dress Revealed!  After Only Five Months!

And shirt with tie

McCall's 7834:  Easter Dress Revealed!  After Only Five Months!

Please note the MANY French seams–I wasn’t messing around! 😉

McCall's 7834:  Easter Dress Revealed!  After Only Five Months!

Success!

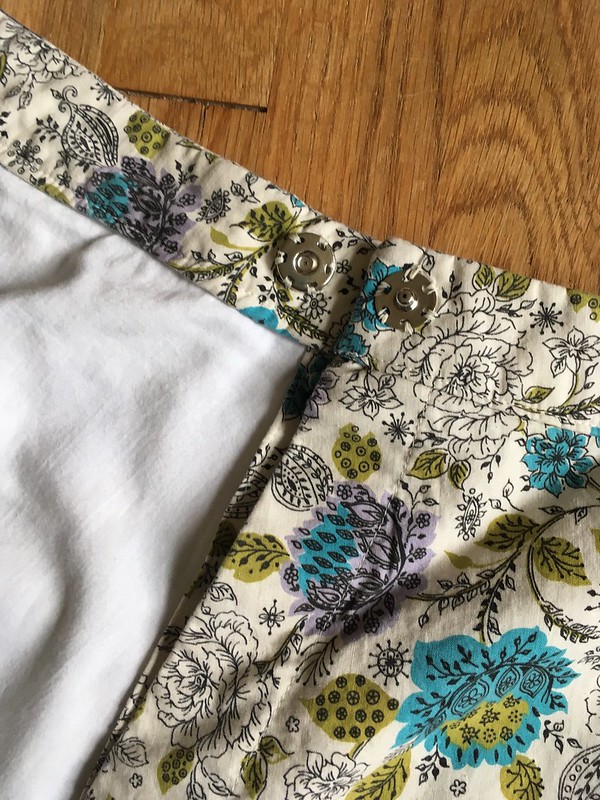
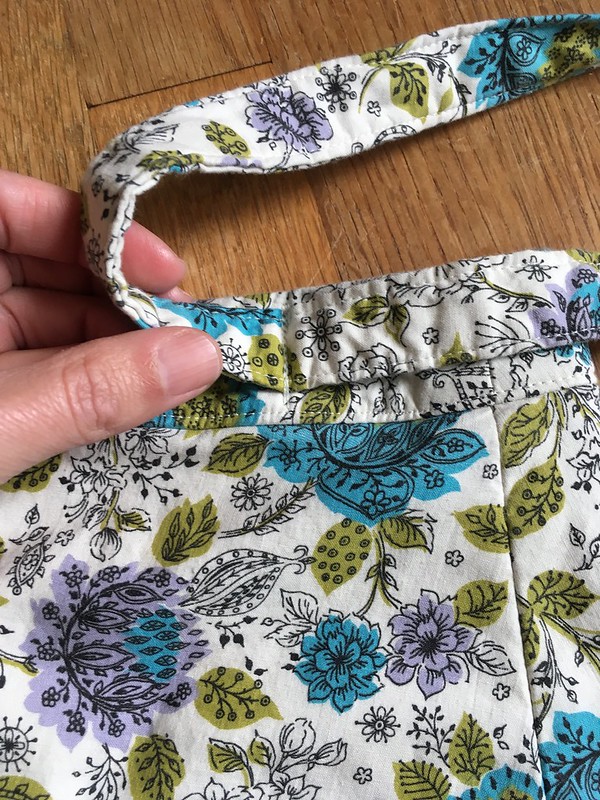
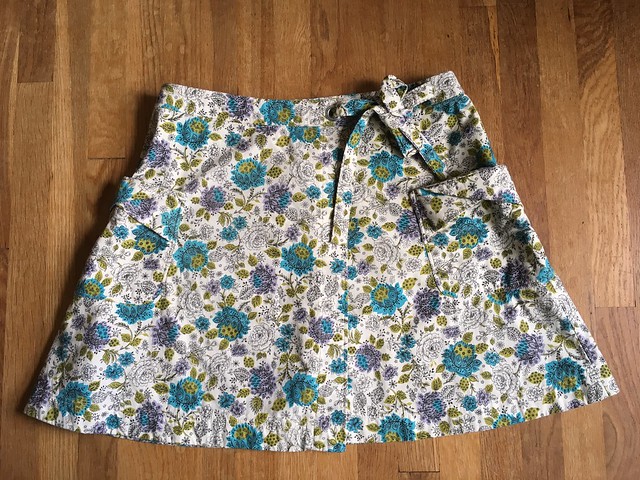
The skirt got an interfaced flat-front, elastic-back waistband in the black rayon I made the tie out of. I cut it so that the finished waistband would be two inches wide. The front was the length of my front waist, and I gathered the skirt into it.
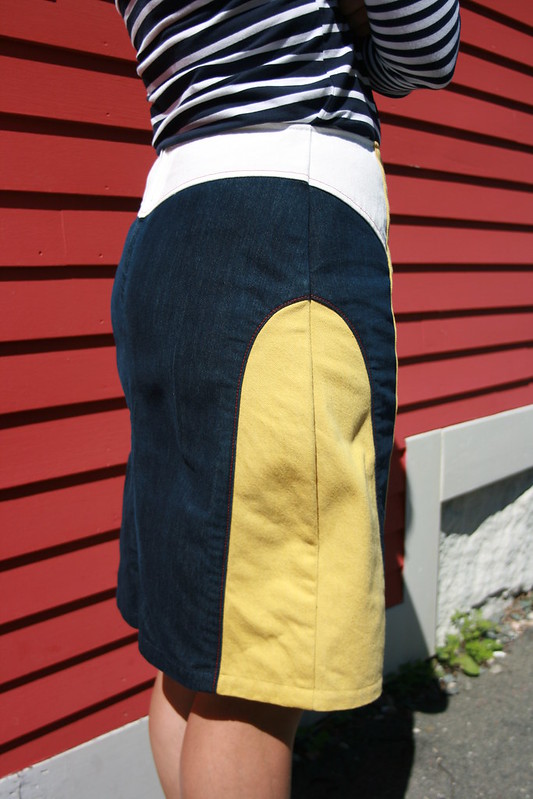
McCall's 7834:  Easter Dress Revealed!  After Only Five Months!

skirt front

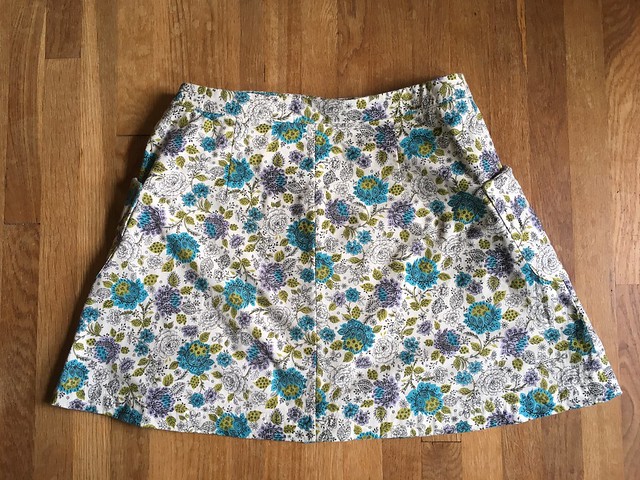
The back was the length of the ungathered back skirt, and was pulled in by elastic.

McCall's 7834:  Easter Dress Revealed!  After Only Five Months!

skirt back

McCall's 7834:  Easter Dress Revealed!  After Only Five Months!

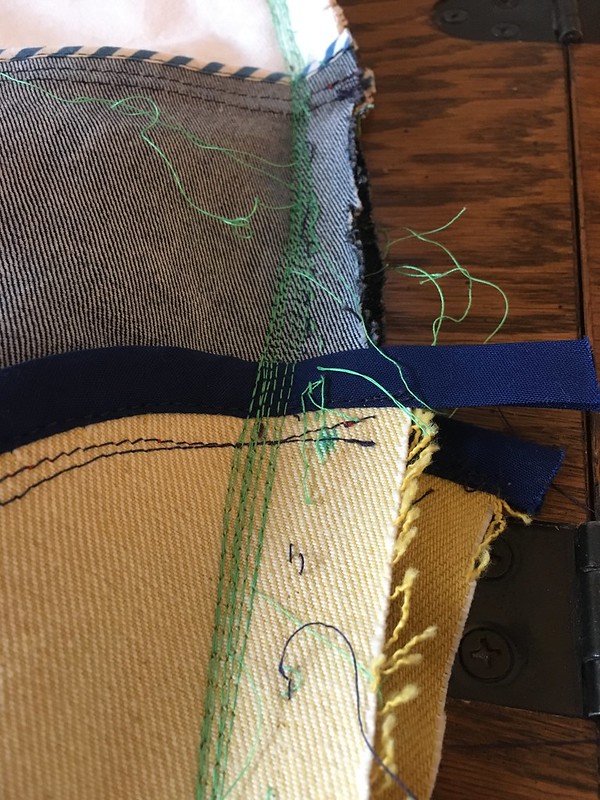
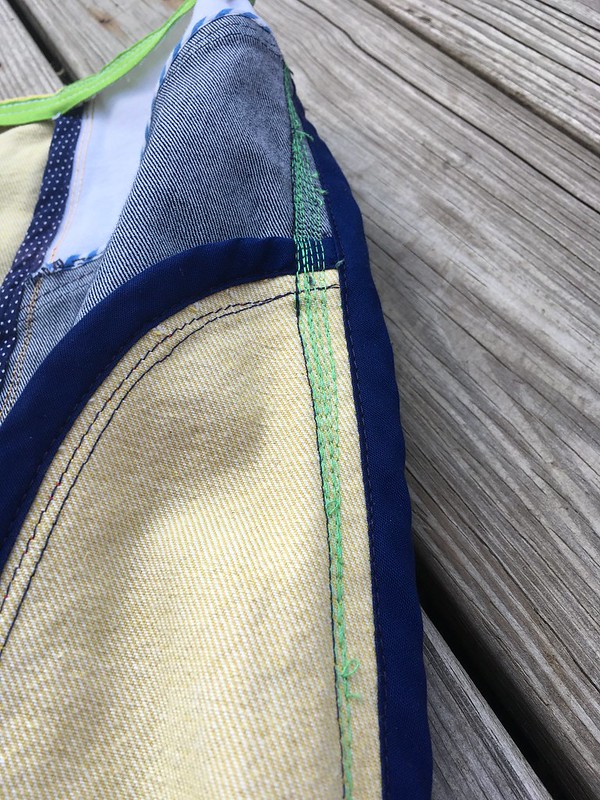
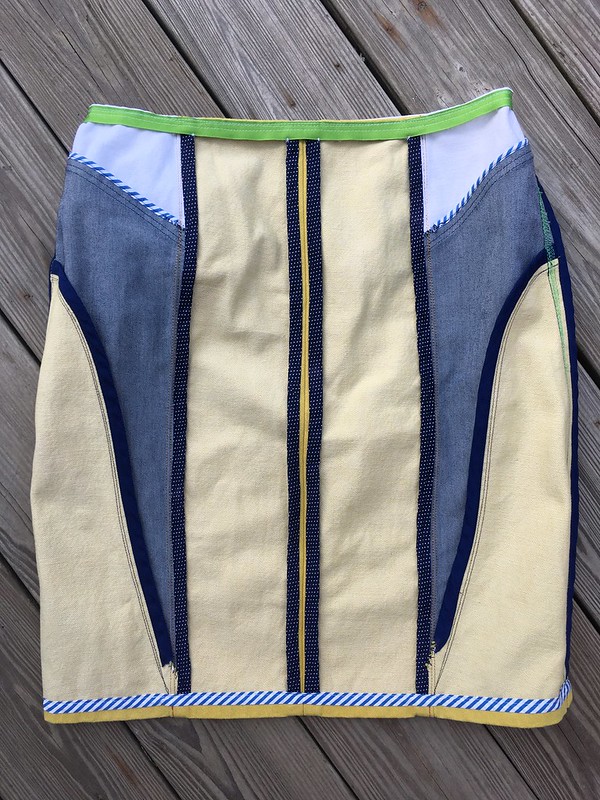
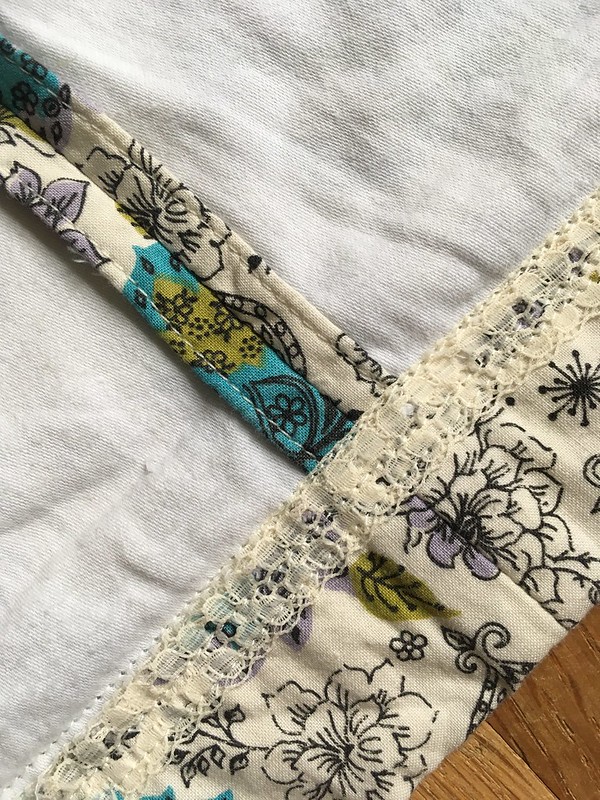
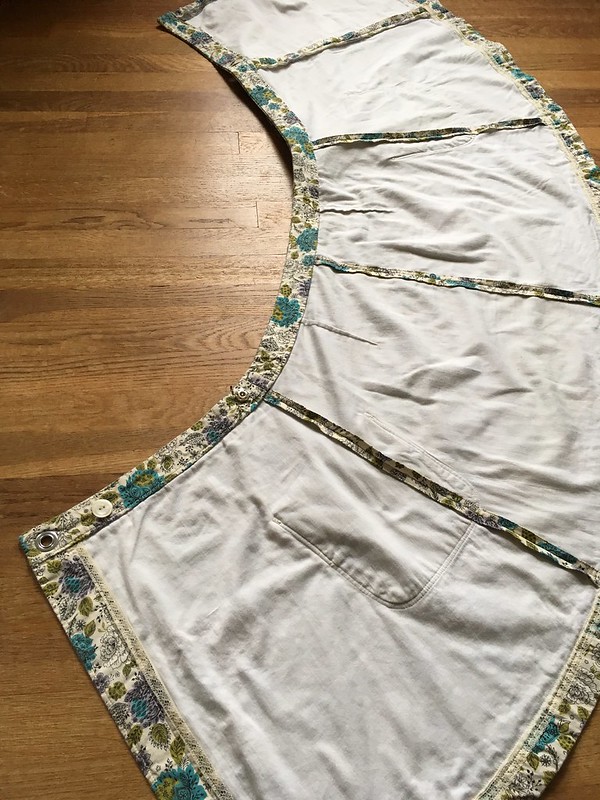
Sewing this was as dicey as you might expect. Within the skirt, the stays I had added to finish the tiered seam remained intact, even though I had to remove all the original finishing at the waist seam.

McCall's 7834:  Easter Dress Revealed!  After Only Five Months!

stayed, gathered skirt tier seam–I had fun using seam binding from my stash

McCall's 7834:  Easter Dress Revealed!  After Only Five Months!

Separating the garment into two turned out to be a great idea, because my waistband could be wherever I wanted it, and it would always be comfortably gathered in. I absolutely LOVE the beautiful shirt and skirt that resulted from this drastic surgery, and I think I will get a lot more wear out of them this way.

While the contrast between my two fabrics was more subtle than I had imagined it would be, I ended up really liking it.

McCall's 7834:  Easter Dress Revealed!  After Only Five Months!

It’s like a visual surprise for the observant, and just the kind of detail that delights me when I am looking at clothes.

McCall's 7834:  Easter Dress Revealed!  After Only Five Months!

Worn together, this set looks just like the shirt dress I was originally going for, but as a set, it’s even more versatile!

A few of my modifications turned out to have been unnecessary. My darts seem slightly off and, really, in this drapey fabric and looser fit, they probably could have just been eliminated. However, the busy print and flowy fabric really hide that. I thought that lengthening my sleeves was unnecessary, but looking at the pictures now, I’m glad I did it. And I guess I didn’t need the original lengthening I did to the bodice…I just need to add a bunch of length is a contrasting fabric, although I certainly didn’t realize that when I started!

McCall's 7834:  Easter Dress Revealed!  After Only Five Months!

I used a number of really excellent and helpful resources for all the techniques I employed in making this set. In case you have questions about some of these things, here they are:

*How much positive ease do you need in a sleeve? Check out The Perfect Fit, p. 89 in the Singer Sewing Reference Library. If you end up needing to make a Full Upper Arm Adjustment, check p. 90. This book is great for all sorts of adjustments and can usually be bought secondhand for a few dollars.

*To figure out how long I wanted my bodice, I looked at p. 73 of the aforementioned book.

*To decide if I needed to move my dart, I looked in the book above as well as at “How to Change the Height of a Bust Dart” on the Cashmerette blog.

*To master the art of applying piping, I consulted my Reader’s Digest Complete Guide to Sewing (my favorite sewing reference book) and The Vogue Sewing Book, p. 205. Reader’s Digest, p. 153 was the most helpful of the two. It was, as always, excellent.

McCall's 7834:  Easter Dress Revealed!  After Only Five Months!

*To finish the seams of my skirt tiers (and initially my waist seam), I used the “Staying a Gathered Seam” section in the Reader’s Digest book, on p. 179.

And guess what? I finished my ensemble on the Saturday night before Easter, and wore it the next day!

McCall's 7834:  Easter Dress Revealed!  After Only Five Months!

The whole Easter outfit. I love that this print works with many, many colors!

I really like how it turned out. I’m proud of the work I did on this set. And…I’m even going to enter it in the Topsfield Fair this year. Here’s hoping I win! 🙂

Update

I entered this outfit in the Topsfield Fair and won a Third Place ribbon. 

McCall's 7834:  Easter Dress Revealed!  After Only Five Months!

After my phenomenal start last year winning Best in Show, I was a little bummed not to do better, even though I was happy that I had gotten a ribbon. One thing that was really helpful, however, was the feedback I got from the judges. They complimented my colorful skirt and said that I should take care to make sure my gathers are even, something I never even think about. It’s not something I care much about, but it’s absolutely something I should have thought about if entering in a competition like this, so that was really helpful. They said that my sleeves were set in very well, which was really nice. They also noted that my button plackets were not equal in length…and they were completely right! Oops! Not sure I noticed that. 

McCall's 7834:  Easter Dress Revealed!  After Only Five Months!
I almost reached over the surrounding fence and tucked my top in, but I resisted. :)

It was really helpful to get that feedback, and it made me realize that I can’t expect to coast just because there are not that many garment sewers around here. I really appreciated their compliments, and now I have some new things to keep an eye on if I want to strive for excellence. :)

A McCall’s 8066 Summer Skirt in Black Double Gauze

Standard
A McCall’s 8066 Summer Skirt in Black Double Gauze

Welcome back for another summer clothing post! During fall! Yep, I’m behind on posting, and if I don’t post everything, there’s a real chance I will forget what I made. Crazy, I know, but the struggle is real. 🙂

So here’s a quick project that could work in many seasons depending on the fabric you choose. McCall’s 8066 (aka “Posie”) is a simple skirt, with several variations, with and without tiers.

A McCall's 8066 Summer Skirt in Black Double Gauze
McCall’s 8066
A McCall's 8066 Summer Skirt in Black Double Gauze
McCall’s 8066

I made View B. Like the other views, it has a flat front and an elastic back. There are no pockets, but I added some in the side seams.

A McCall's 8066 Summer Skirt in Black Double Gauze

My skirt is made of black cotton double gauze from Joann Fabrics. They had this double gauze in several nice colors as well as a few stripes this summer, and I bought it in more than one shade. It washes up really nice and soft. I love it! Joann’s website calls it bubble gauze, although it’s different than bubble gauze I’ve bought elsewhere. This is a double layer of gauze, whereas the bubble gauze I bought before was a single layer. I don’t have enough experience with bubble gauze to tell you which is the norm.

A McCall's 8066 Summer Skirt in Black Double Gauze
McCall’s 8066, View B, front
A McCall's 8066 Summer Skirt in Black Double Gauze
McCall’s 8066, View B, back

This skirt should be a quick sew, but I got a little paranoid when my measurements for hip and waist put me in two different sizes. I measured an XL at the waist and an XXL at the hip. With the style of this pattern, I would have been fine making the XL, but instead, I cut an XXL for waist and hip because I was worried that the XL wouldn’t fit over my hips to take the skirt on and off. Well, as you can probably imagine, the skirt was too large on me. So, I spent some time taking it partially apart at the side seams and taking in the front and back waistband, always making sure the back waistband would stretch enough to go over my hips. I cut it down as much as I dared, but it still looks a bit bulky to me. Oh, well! I’m only willing to mess with a project so much before I want to move on.

A McCall's 8066 Summer Skirt in Black Double Gauze

I borrowed a pocket pattern piece from another pattern and added inseam pockets. Because of my alterations, they are back a bit far on my hips, but not too bad.

A McCall's 8066 Summer Skirt in Black Double Gauze

Since I made this toward the end of summer, I haven’t worn it a lot, so I’m reserving final judgement for next year when I have some distance from the project and more chances to wear it.

A McCall's 8066 Summer Skirt in Black Double Gauze

My first impressions, though, are that this is a good, simple pattern, with great possibilities. Don’t let my mistakes keep you from adding McCall’s 8066 to your pattern library (yes, that is how I think of my pattern stash–it’s a pattern library). Could you draft this yourself? Yes. It’s a lot of rectangles, but one thing I like about commercial patterns is that someone did the work for me. 🙂 This is a great pattern for a beginner or someone who has been sewing longer and wants a quick project. Wouldn’t view D would be amazing in a few layers of silk/cotton voile?

A McCall's 8066 Summer Skirt in Black Double Gauze

Wrap Skirt in Vintage Fabric: Burda Style 6375

Standard
Wrap Skirt in Vintage Fabric:  Burda Style 6375

I love going antiquing.  A month or two ago, I went to my local flea market and got a deal on some vintage quilting cotton.  Three dollars for 2–3 yards!  I thought about what to make with it, and finally settled on Burda Style 6375, a cute wrap skirt with interesting pockets.  The plan was to underline it with a cotton sheet for opacity and to reduce wrinkling.  It seemed like a fun project to make as the weather is changing.

Wrap Skirt in Vintage Fabric:  Burda Style 6375

The Pattern

This pattern has two views, a shorter skirt designed for leather or imitation leather, and a longer skirt created for woven fabrics.  I opted to make the woven fabric version (View A) in the shorter length.

Wrap Skirt in Vintage Fabric:  Burda Style 6375

l

Wrap Skirt in Vintage Fabric:  Burda Style 6375

My measurements put me just one size outside of Burda’s range, so I looked at the pattern and noted how much space was between each size, and then enlarged the largest size by that amount, creating the next size up.  Before cutting, I layered my fabric on top of the sheet with right sides facing out, trying to keep the grainlines going in the same direction.  Then I cut both layers out together.

Wrap Skirt in Vintage Fabric:  Burda Style 6375

Sewing Notes

  • I underlined each of my pattern pieces—and by underlined, I just mean that I cut them out of both fabrics and then treated the double layers as one.  Since neither fabric was slippery, they stayed put once paired together, and I didn’t have to baste them together as is traditional when underlining.  For the pockets, the double layers of cotton were a bit too bulky.  Perhaps the little triangle pieces on the outside of the pockets could have been underlined in silk organza, but I just forged ahead with my double layers of cotton.

Wrap Skirt in Vintage Fabric:  Burda Style 6375

  • I left off the the narrow leather bands shown in the illustrations, but they would certainly be a good addition if they fit the look you are after.  In retrospect, I wish that I had finished the edge of the facing inside the pocket to prevent fraying.  For durability, I stitched two lines around the pockets instead of one and added bartacks to the top corners.

Wrap Skirt in Vintage Fabric:  Burda Style 6375

  • Due to the bulk of the underlining and fashion fabric, I made sure to grade my seams whenever necessary (waistband and tie especially!).
  • I tried to use up whatever lace seam binding I could on the inside of the skirt.  It’s such a fun trim, and I have a good amount thanks to the generosity of various people.  On seams that weren’t covered in seam binding, I turned and stitched my seam allowances.  To do this, you press your seams open, then turn each edge of the allowance under and press again.  Finally, you sew each seam allowance, making that last crease permanent and hiding the raw edges from view.

Wrap Skirt in Vintage Fabric:  Burda Style 6375

l

Wrap Skirt in Vintage Fabric:  Burda Style 6375

The Confusing Part

The tie, eyelet, and snap closure were a little confusing, but I finally figured it out.  I’m putting a lot of pictures in this section in case others get confused.  There aren’t a lot of posts or reviews about this pattern, so hopefully this will help.

The snap is meant to go on the inside layers to hold the underlap to the outer layer of the skirt.

Wrap Skirt in Vintage Fabric:  Burda Style 6375

The large metal eyelet goes on the outside corner of the waistband.

Wrap Skirt in Vintage Fabric:  Burda Style 6375

The tie is a long finished rectangle of fabric that gets sewn to the waistband.  Half gets threaded through the eyelet and tied to the other half of the tie.

Wrap Skirt in Vintage Fabric:  Burda Style 6375

l

Wrap Skirt in Vintage Fabric:  Burda Style 6375

l

Wrap Skirt in Vintage Fabric:  Burda Style 6375

I also added a button inside the overlap and a buttonhole on the underlap so that I could be sure my skirt wouldn’t come untied and fall open with only the snap to hold it on.

Wrap Skirt in Vintage Fabric:  Burda Style 6375

l

Wrap Skirt in Vintage Fabric:  Burda Style 6375

My Big Mistake

I did make one rather large mistake…  When the skirt was all finished except for the closures, I tried it on, and found that the underlap just wasn’t long enough.  One gust of wind, and I would have a problem on my hands.  I knew that I had just measured myself and compared my measurements to the pattern.  Why on earth hadn’t Burda made a longer underlap?  What were they thinking?  How was I going to fix this?

The skirt went in “time out” for a few days while I thought this problem over.  I figured I could add more fabric to the underlap, which sounded kind of annoying, but doable (I hate going back to fix things when I’m almost done).  Something was bugging me, though.  The part of the waistband that was supposed to be attached to the underlap only had fabric hanging down from half of it.  That seemed weird.  So I went back and studied my pattern pieces.  And you know what?  The underlap pattern piece said “cut 1 ON FOLD“.  By not cutting on the fold, I had only half of the piece!  It was all my fault!  Rookie mistake.

Luckily, I had just enough fashion fabric and sheet fabric to cut the other half of my skirt piece plus a double seam allowance.  I unpicked my finished edge and waistband, attached the other half of the underlap and finished all my edges.  NOW I had a skirt that had an EXCELLENT and substantial underlap.  No more fear of wind gusts.  I hate fixing things, but it didn’t actually take that long, and it was completely worth it.

Wrap Skirt in Vintage Fabric:  Burda Style 6375

l

Wrap Skirt in Vintage Fabric:  Burda Style 6375

l

Wrap Skirt in Vintage Fabric:  Burda Style 6375

Success!

I really like this skirt now!  It turned out cute and very comfortable.  I’m happy that I used my vintage find, and with the addition of some bike shorts underneath, I feel really good in this.

Attempted: Ankara (Wax Print) Maxi Skirt

Standard
Attempted:  Ankara (Wax Print) Maxi Skirt

This week’s project was an attempt to tick several boxes:  using some of my fabric stash, making a maxi skirt, and learning another method for adding side-seam pockets to garments.  I wanted a basic design–rectangles gathered into a waistband, but a waistband with an elastic back so it would be really comfortable.  This seemed like a brilliant way to use the last three yards of ankara (also known as wax print) fabric that I had bought a few years ago, but it also preserved the fabric in nearly whole form in case things didn’t work out, since it’s just large gathered rectangles.  (In case you are curious, I also made a shirt and a pair of shorts from this fabric.)

Ankara (Wax Print) Maxi Skirt

For my starting point, I used the Elastic Back Skirt Tutorial from Cashmerette.  I got this some time ago by signing up for their newsletter.  I also used the Ankara Skirt Tutorial from the KLKC Collections blog.  These tutorials were helpful in guiding me through what math I would need to get the result that I wanted, which was a waistband that looked flat in the front and was elastic in the back, with a finished height of two inches.  I made the flat front wrap slightly to the back before incorporating the elastic.  So far, so good. This wasn’t too difficult.

Ankara (Wax Print) Maxi Skirt

But I wanted pockets.  That’s where things got tricky.

I used the directions found in “The Low Profile Pocket” by Kathleen Cheetham in Threads magazine, issue #195 (Feb./Mar. 2018), p. 36-41 (the pocket pattern piece is available on the Threads website).  This article was excellent!

Ankara (Wax Print) Maxi Skirt

l

Ankara (Wax Print) Maxi Skirt

I sewed my BEST in-seam pockets to date.

Ankara (Wax Print) Maxi Skirt

l

Ankara (Wax Print) Maxi Skirt

l

Ankara (Wax Print) Maxi Skirt

However…

The article has you sew part of the pockets and the side seams together before attaching the waistband.  My skirt tutorials have you construct the front and back separately and then sew the side seams.  So I had a quandary.

I wanted to interface the front of my waistband and then fold it over, covering the seam allowance at the top of my gathered skirt so everything would look nice and neat.  I couldn’t quite figure out how to cover those seam allowances with all the other things I had to take into consideration.

Ankara (Wax Print) Maxi Skirt

What ensued was a lot of thinking about process, and adapting.  I was going to write it all out for you, but it’s a lot.

The end result is some good sewing and some ugly sewing.  One thing I’m really glad I thought about was how to keep the back elastic stretchy.  In order to do that, I sewed with a zigzag stitch while stretching my elastic, but choosing two-inch wide elastic and gathering 53″ of fabric per panel adds up to a lot of bulk.

Ankara (Wax Print) Maxi Skirt

I got it done in the end, but I’m going to have to wear this a bit to decide if I like it.

Here are the pros and cons.

Pro:

  • nice, full, dramatic, long skirt
  • having pockets that disappear beautifully (and trying a new technique!)
  • general structure:  flat front, elastic back, pockets
  • using a bunch of stash fabric in one fell swoop
  • if I don’t like this, my fabric is still nearly whole and can be reused

Ankara (Wax Print) Maxi Skirt

Things that would have made this project easier:

  • omitting the pockets or sewing different ones
  • assembling the front and back separately (need to alter pocket directions or use a different method)

Things that could have been better:

  • place the pockets lower
  • make pocket opening wider (it’s a close fit to get my hands in and out)

Other options I could have used:

  • narrower waistband, which would have allowed for narrower elastic
  • elastic + zipper at the back and less gathered fabric to reduce bulk

Ankara (Wax Print) Maxi Skirt

l

Ankara (Wax Print) Maxi Skirt

So, I like and don’t like this skirt.

Ankara (Wax Print) Maxi Skirt

l

Ankara (Wax Print) Maxi Skirt

It’s really bulky at the waist, which I don’t love, but I love the drama of the big skirt and being able to see that much of the fabric at once.  I love the length that I can wear leggings under if necessary.  I do think that there is probably a nicer way to produce a comfortable maxi skirt with pockets (if you have pattern recommendations, please leave them in the comments!).  I feel mixed about this one.  We’ll see  how it fares over time or if I remake it.  If you have ever made a maxi skirt, feel free to share a link in the comments so I can see.  I’d like a good TNT maxi skirt and maxi dress pattern I can use over and over.

Ankara (Wax Print) Maxi Skirt


Refashion: Down Jacket Into Down Skirt…or…Struggle. Victory.

Standard
Refashion:  Down Jacket Into Down Skirt…or…Struggle.  Victory.

It was a grey and stormy day when I finally cut into a project I had long been contemplating.  It was a refashion, but not just any refashion.  This one involved sewing with a material I had never tried before:  a down jacket.  I had chosen the patterns that were going to help me achieve my goal and planned a little more than half of the project, but there were still questions in my mind about how I was going to finish the rest.  Inspiration images had been pinned to my Pinterest board, but still I mulled it over…until the snow day.  It was finally time.

Refashion:  Down Jacket to Down Skirt

I had already been scheming about refashioning a down jacket into a scarf after seeing these ones, which was the product of a collaboration between Patagonia and Alabama Chanin, but my down-sewing plans expanded when we visited Colorado last winter and I saw a woman wearing a down skirt.  It was such a brilliant idea.

Google revealed that down skirts are actually a thing, even though the Colorado one was the only one I had seen in real life.  So, after a ton of thought, I chose New Look 6843 for the skirt portion, and the waistband from the leggings in McCall’s 7261 for my stretchy waistband.  Since I wanted this to be a pull-on skirt, a waistband and some gores/gussets/godets in the side of the skirt were in order (after seeing the skirt, you can tell me which term is the right one for what I did 😉 ).

Refashion:  Down Jacket to Down Skirt

l

Refashion:  Down Jacket to Down Skirt

I managed to turn the back skirt into a single piece and eliminate the zipper.  All of that fit onto the back of the coat, allowing me to use the bottom of the coat as my hem.  It got tricky when I came to the front because that was supposed to be one piece, too.  I really wanted to incorporate the coat zipper in a decorative way (although I planned to sew it shut), and I also wanted the pockets both for decorative and functional purposes, but in the end, it was too much of a struggle.  I realized that by opening my sleeves and sewing them together, I would have enough for my front piece.  I still had plenty of the stretchy fleece left from my Toaster Sweaters for my waistband and gores/gussets/godets.  Then it was all construction.

This is probably the point when you are asking how in the world I cut and sewed that crazy stuff.  That is a very important question.  Here is what I did:  I marked my cutting lines with a water-soluble pen and sewed with a straight stitch on either side of my cut line in the hopes that it would hold all the down in.

Do you think it worked?

Refashion:  Down Jacket to Down Skirt

l

Refashion:  Down Jacket to Down Skirt

Well, it sort of did.  Not ALL of the down came out.  But some did.  Here’s how I had to sew.

Refashion:  Down Jacket to Down Skirt

You can’t see it in this picture, but I also had pink-eye (conjunctivitis) at the time.  Nice, huh?  (Luckily no down got in my eye.  That would have been…um…gross.)

Refashion:  Down Jacket to Down Skirt

I had the BRILLIANT idea of vacuuming off the edges after I cut them.  I do not recommend this.  Maybe you thought of the problem with this.  It actually dislodged things, so it was sort of like it was snowing outside and snowing inside.  That was the point at which I realized I really needed to get this finished that same day.  We had some sickness in our house that week, and I wasn’t feeling my best, but I decided to power through in the hopes that it was all in my head.  (It wasn’t all in my head, but I powered through anyway!)

Refashion:  Down Jacket to Down Skirt

l

Refashion:  Down Jacket to Down Skirt

l

Refashion:  Down Jacket to Down Skirt

I also realized that I needed to cover every seam on the inside if I didn’t want to perpetually shed feathers.  This was the point where things got a little…”Becky-home-ecky” (sorry if your name is Becky).  The finishing, while functional and necessary, didn’t meet the vision I had in my head, but I was sort of racing against the down and my nausea.  The good news is, when I’m wearing it, I think it looks like something I could have bought at an outdoor store.  (If you disagree, you don’t have to tell me.)  It’s only if you get up close or look inside that you see the craziness, and since people don’t do that when I’m wearing it (thank goodness!), I think I’m safe.  Want to see it?  Check it out!

Refashion:  Down Jacket to Down Skirt

l

Refashion:  Down Jacket to Down Skirt

l

Refashion:  Down Jacket to Down Skirt

l

Refashion:  Down Jacket to Down Skirt

l

Refashion:  Down Jacket to Down Skirt

This skirt has the added benefit of a little puffy booty enhancement up top.  It’s too high for people to think you pooped in your pants, so I like to think of it as booty enhancement.  Maybe it’s because I sewed all the darts in the skirt, even though I basically negated them with those side triangles.  I needed the triangles, though because if you’re going to eliminate the zipper, you need some way to get your skirt on!

Refashion:  Down Jacket to Down Skirt

Skirt front (above)

Refashion:  Down Jacket to Down Skirt

Skirt back (above)

Refashion:  Down Jacket to Down Skirt

Side view (above). I folded the front of the skirt down at the top a bit because it was originally higher in the front and lower in the back, but that feels weird to me.  I want it the other way around.

Refashion:  Down Jacket to Down Skirt

Inside front (above).  I covered my seams with fleece, but didn’t sew with a wide enough seam allowance, so I ended up sewing extra lines and hand-tacking things just to get all those feathery seams covered.  I also covered my top seams with wide fold-over-elastic (although I didn’t fold it), and used a zig-zag stitch to hold it down and allow for a little stretch at the waist.  That doesn’t look great, either, but again, you don’t really notice it that much when I’m wearing it, so whatever!

Refashion:  Down Jacket to Down Skirt

Inside back (above)

Refashion:  Down Jacket to Down Skirt

Inside side view (above).  Here’s where it started to get ugly, but I just wanted to finish at this point.  It was helpful to have the coat lining as a lining for my skirt because I could hand tack the fleece to it.

Refashion:  Down Jacket to Down Skirt

Despite any deficiencies in the finishing, I LOVE THIS SKIRT!!!!  When I wear it, I feel ready to take on winter!  The fit is great and it is so cozy that I wore it for two days straight after making it (and vacuuming my work room a.k.a. our living room…twice).  In January I made these fleece leggings and the Toaster Sweater that I’m wearing in this picture, and this outfit is pretty much winter perfection.  I love it so much.

After I finished, I contemplated making a scarf from the remnant of the jackets, but I decided to just put it away for now.  I DID NOT like sewing with all that down.  However…my husband had the brilliant idea to make a scarf from it in the summer…while sewing outside.  He’s so smart!

Recommendations

  • On Wednesday I made the Blueberry Poppyseed Snacking Cake from the Seven Spoons cookbook, and now I just want to eat that all the time.  I know this would be unwise, so I gave the last piece away before I could eat it.
  • I have some old gaiters from L.L. Bean that I just love.  They don’t sell the exact style I have anymore, so this is the closest I could find, but they are great if it’s snowy out and I don’t feel like putting snow pants on.  I can walk through several inches of snow without it getting in my shoes or on my pants.  I used them for a walk on Thursday, and it just reminded me of how much I love them.
  • Is orange the new black?  Are doughnuts the new croissants?  Do you like to say that _____ is the new ______ ?  Then check out this fun and funny website, where each time you click, you get a new ‘this is the new that’.
  • This week I found out that everything is better with doodles.  😉

The Refashioners 2016

Standard

It’s finally time to talk about The Refashioners 2016!

Refashioners 2016

I’ve been waiting a long time to share my #jeanius project with you.

The Refashioners is a challenge created by Portia Lawrie of Makery that showcases creative ways to refashion whatever the chosen garment for that year’s challenge is.  If you’ve been following along, you already know that this year’s garment of choice is jeans (#jeanius!).  Check out what I made!

Refashioners 2016:  Jeanius

Refashioners 2016:  Jeanius

Refashioners 2016:  Jeanius

I’ve written about my creative process over on Makery, but if you want more details on working with the particular pattern I chose, Vogue 8750, you’ve come to the right place.

Refashioners 2016:  Jeanius

Refashioners 2016:  Jeanius

As soon as Portia sent us our brief for this year’s Refashioners challenge, the gears in my mind started turning.  My local big box fabric store was having a pattern sale, so I went down there with notebook and pencil in hand, sat down in front of the big pattern catalogue books, and started making list.  Lists and lists of patterns that I might be able to create out of different pairs of jeans.  I decided to look for something that had multiple narrow pieces so I could cut them out of jeans legs.  I finally settled on Vogue 8750, a skirt pattern.  I chose View A, which is the shorter (but not actually short) pencil skirt.  This looked like it had a lot of possibility for color-blocking, and I was hoping to find some super-cool denim at my local thrift store.

With the help of a pattern and all the inspiration on my then-secret Denim Pinterest board, I went to my thrift store looking to find some railroad denim or…something inspiring. (I have a little railroad denim obsession at the moment).  No railroad denim.  But I did find…THIS!  Yellow denim, white, denim with hearts, and my own older pairs of dark blue.  Now it was all coming together!

Refashioners 2016:  Jeanius

Last year’s Refashioner’s contest helped me make a move up from beginner to intermediate sewist. However, still not being super experienced, I don’t always make a muslin.  (Who am I kidding?  I skip it whenever I can.)  I know…I know…  It’s helpful, and I’m moving in that direction, but I’m not there for every project.  I actually DID make a practice garment for this one, though.  I made two, even!

Refashioners 2016:  Jeanius

The first showed me that I needed to size down.

Refashioners 2016:  Jeanius

A lot of people say they find this with Big 4 sewing patterns–I typically don’t, but in this case it was necessary, so it’s a good thing I made a muslin.  I used the second muslin to try lowering where the skirt sat on my hips and practice putting it all together a bit more.  The pattern tells you to ease the top of the skirt to the ribbon facing, but I had a lot of trouble with this and didn’t really want the skirt up at my natural waist.  I found that skipping the easing and just cutting a ribbon to match the top of the skirt solved both problems.

Muslins can also be a great way to procrastinate on cutting into your final fabric while appearing busy.  😉  I finally got up my courage, though, and found that I could easily fit my pattern pieces onto the jeans I had chosen (large men’s jeans for the white and yellow).  I tried out using one pair of children’s jeans for my middle panel, but had to backtrack when I saw that it just didn’t work.

Refashioners 2016:  Jeanius

The thing I wish I had done (and I’m still not sure how or why I didn’t after two practice garments) was think about how and when I was going to finish my seams.  I realized part way into my final draft that I really wanted to bind the edges of the seams with bias tape.  This is something best done as you go along and before you join various parts.  You can see a few places where my bias binding doesn’t go all the way to the edge of the seam.  Lesson learned.  I actually contemplated starting over when I realized that (plus, I was getting pretty good at making this pattern after a couple of versions), but it seemed to defeat the purpose of refashioning to throw an otherwise good garment-in-the-making out because of one little detail.

Refashioners 2016:  Jeanius

The other interesting thing I discovered was that sometimes, in matching up seamlines (namely on the sides), it wasn’t about moving the pieces up or down to get them to match, but making the seam allowances the correct width for them to match. One of my sides matched immediately, and the other took several passes through the machine, taking the side in millimeter by millimeter in order to get it to match.  The skirt in-progress looked messy and crazy, but as I got things lined up, trimmed and bound my seams, and finished edges, it came together into something that looked polished.

Refashioners 2016:  Jeanius

Refashioners 2016:  Jeanius

Refashioners 2016:  Jeanius

Refashioners 2016:  Jeanius

When I finally finished, I had a thing of beauty.  It’s certainly not perfect, but I’m proud of it.  I think the best compliment I got was when I was in Rockport, Massachusetts shooting pictures, and I stopped in an art gallery.  Rockport is famous for its artists, and one of the artists in the gallery complimented me on my outfit.  When a person who spends their life looking for beauty compliments you on your outfit, you know you’ve done something right!  😉

Refashioners 2016:  Jeanius

Refashioners 2016:  Jeanius

Refashioners 2016:  Jeanius

Refashioners 2016:  Jeanius

Refashioners 2016:  Jeanius

Refashioners 2016:  Jeanius

My favorite thing about this challenge is that it makes me think like an artist. You get your parameters, but within them you have freedom.  How far can you push it?  What will you do to make your garment distinctive?  Will it be simple and sleek or heavily embellished?  This is what I talk about in more depth in my post on the Makery blog.  If you haven’t already, I hope you check it out and look through all the other posts as well to get some inspiration.  What do you think?  Will you be diving in?  There’s a pretty tempting prize package!

Last, but never least, thank you to my photographers–my husband Scott and my friend Colleen.  I appreciate your help SO MUCH!

Rainbow Skirt: Simplicity 2215

Standard

Let’s pretend that Jackson Pollock was a finger-painter instead of a paint flinger.  Then, we can pretend he painted the fabric for my skirt.

Simplicity 2215; Skirt

This is not what happened since Jackson Pollock is no longer with us and I don’t think the little I know of his personality matches up with a rainbow skirt, but oh well.  Sometimes it’s fun to imagine things.

So how about a new skirt?  🙂  Here’s what I’ve got for you today.

After the beloved outfit I created to wear to my friend’s wedding in January, I decided that I really wanted to find a pattern that was similar to that skirt.  The original skirt has pockets, pleats, a waistband, and is just the right length.  I could teach myself how to copy or draft this, but I don’t want to!  Right now, I just want to sew.  I came up with a few contenders, but one of the most promising was Simplicity 2215, a Cynthia Rowley design.  I was able to get this pattern at a Jo-Ann’s pattern sale for a few bucks.  I love those pattern sales for building my pattern library (and I do think of it as a library!).

Simplicity 2215; Skirt

Simplicity 2215; Skirt

I decided to pair that pattern with some stretch twill that I got at Hancock Fabrics in Indiana last summer.  I kind of wish I had more of that fabric.  It would be great for a pencil skirt or some close-fitting pants AND it contains nearly every color of the rainbow in the hues that I like to wear.  It does NOT contain purple, but it just so happens that purple looks great with it!

Simplicity 2215; Skirt

The details (a.k.a. a good time to skim if you are not into sewing details):

I made a size 18 with no adjustments, and I made View C, the skirt.  (You can also use this pattern to make a sleeveless button down shirt or dress).

Simplicity 2215; Skirt

There is a note in the pattern that states that the pleats are uneven on purpose.  I was glad for that note, so I didn’t have to waste time wondering what was going on with them.  After cutting out the fabric, I took a long time to mark each pleat and even to draw in the arrows so that I would know which way to fold the fabric.  This was really helpful.

Simplicity 2215; Skirt

Simplicity 2215; Skirt

The only other necessary items beyond fabric that you need for this skirt are some interfacing, a little bit of lining fabric for the pockets (I think I used a scrap of handkerchief linen because I liked the white color), an invisible zipper, a hook closure, and thread.  I bought my zipper at Jo-Ann’s, but everything else was in my stash.  The one great thing that I have never had before but had this time was my new invisible zipper foot!  I got that at Marie’s Sewing Center in Woburn, MA, which is where my Mom got my sewing machine a bunch of years ago.  They gave me a 25% discount on the zipper foot!  🙂

After the cutting, which wasn’t hard, and the marking, which took awhile, the sewing was pretty easy.  I was nervous as I put in the zipper, hardly believing that the whole invisible thing would really work, but it did!  I was so happy!  One sort of odd thing (to me, at least), was that the zipper, rather than being in the back, is right next to one of the pockets.

Simplicity 2215; Skirt

I think I would prefer it in the back, but it’s not really a big deal.  The fit is very comfortable, but maybe on the slightly looser side.  The nice thing is that this allows it to sit a little bit below my natural waist, which I like, but I could potentially size down.  That’s a decision for another time, though.  I also added a little ribbon tag because I was afraid I would put the skirt on the wrong way otherwise!  😉

Simplicity 2215; Skirt

And that was it!  New skirt!  (I may not look excited in these pictures, but don’t worry, I am.  I was just under the weather on photo day.)

Simplicity 2215; Skirt

Simplicity 2215; Skirt

I realized at the end of last spring/summer that I didn’t have many skirts in my wardrobe for those seasons, so I’m very happy to add this one.  I can see wearing it with both my purple button-down, as pictured, and my pink and white gingham shirt (both Butterick 5526).  That last one will be some crazy pattern on pattern…which will be great!  I’d recommend this pattern to anyone who is interested in this type of skirt.  The other views in the pattern look pretty cool, too.

Now for some fun recommendations to enjoy over the weekend (or any time!):

  • I know I’ve reviewed it before, but it’s still a favorite for me:  The King Arthur Flour Whole Grain Baking cookbook.  It doesn’t help you hide gross-tasting, “healthy” whole grains in your food…it has delicious recipes made with whole grains.  In fact, I have a Peach-Blueberry Cobbler in the oven right now!
  • I just checked out Gertie’s Ultimate Dress Book by Gretchen Hirsch from my library.  It’s her newest book, and it looks really good so far.  Whether or not you are a big dress wearer, this book is full of amazing reference material.  I feel that this is a bit beyond my current sewing skills in an exciting way that makes me want to learn more.
  • Spring!  Want to know my favorite source for really interesting seeds?  Baker Creek Heirloom Seeds.  I discovered them through a Martha Stewart Living magazine article years ago.  Their catalogue is one of the highlights of  my winter.  Sadly, this year, garden planning has gone by the wayside (Surprisingly, it is not actually possible to sew all the things, cook and bake all the things, forage for all the things, grow all the things, and decorate all the things plus be a phenomenal wife, mother, and friend!  Who knew?), but most years I order in January or February because it’s just so exciting to think about spring.
  • As an American who wishes we had more bike paths, I find this video on Bicycle Rush Hour in Utrecht (Netherlands) really fascinating:

Happy weekend!

A Vintage Blanket Becomes a Skirt

Standard

Years ago some amazing sewing ladies who are my mother’s friends, gave me a vintage wool blanket (among other things).  They had a business repairing antique quilts, as well as upcycling quilts that couldn’t be repaired and turning them into handmade goods.  When they moved on to other things, they gave me some of their fabric and thread.  I didn’t sew much at the time, but being a creative person, they thought I might be able to use the things.

One of my favorite items was part of a woolen blanket with two sets of initials on it.  It was a winter white with two blue stripes and navy embroidery, and although I didn’t know its story, it seemed special.  I put it aside until just the right project presented itself.  It finally seemed that I had found the perfect use for it when I saw the Brumby Skirt by Megan Nielsen.  I knew it might not work…but I also knew it might.

Brumby Skirt pattern by Megan Nielsen

Brumby Skirt pattern by Megan Nielsen

That idea, that sort of razor’s edge between working or not working is what makes creative endeavors so exciting.  I love to try projects where I am more sure of the outcome.  I get a lot of satisfaction from them, but it really gets interesting when you ask the question, “Will it work?”  I think this is a question that some of the best art and the best fashion have at their heart.  Sometimes the outcome is terrible.  Sometimes it’s ok.  But sometimes it goes beyond what you imagined.

I don’t think this project reached the level of being beyond all I imagined, but the act of walking that line made the project exciting.  Could I create a skirt from this blanket?  Would it be too thick to sew?  Would it lay right?  I’ll tell you from the outset that I love this skirt.  It’s not perfect.  It doesn’t give me an enviable form or lack mistakes.  But I still say it works because some of my big goals in sewing are to create clothing that is unique and interesting.  (And I get to wear a blanket as a skirt in winter!  Always a worthwhile goal!)

Megan Nielsen Brumby skirt made from a vintage blanket

Megan Nielsen Brumby skirt made from a vintage blanket

Megan Nielsen Brumby skirt made from a vintage blanket

So, let’s get into some details.  The skill that I hoped to learn in this project was how to create a lining, so I bought some Bemberg rayon lining from Joann’s and leaned heavily on the book Easy Guide to Sewing Linings by Connie Long.

Easy Guide to Sewing Linings by Connie Long

Megan Nielsen Brumby skirt made from a vintage blanket

Maggie from Pintuck & Purl helped me think through my process for creating the waistband, which included lining it with some fabric from my stash and omitting the interfacing.

Megan Nielsen Brumby skirt made from a vintage blanket

I found a plain navy fabric in my stash for the inside of the pockets.  Since the edge of the blanket was already finished, I decided to omit the hem.  This also saved me fabric, since I had a limited amount of blanket to work with.  In order to do that, I marked the place I would have turned the fabric up to sew the hem and used that as the new bottom line for my skirt.  You can see it faintly below.

Megan Nielsen Brumby skirt made from a vintage blanket

Like vintage fabric sometimes does, this blanket had some light stains.  I tried using a stain remover to get them out, but it didn’t work, so I did my best to cut around the ones I could.  The rest just had to remain.  I did run into a little bit of trouble while sewing in the zipper.  It wasn’t quite even at the top, but since this is for me, and I get to decide what I will and won’t fix, I just folded the extra over and sewed it down.  Problem solved.

Megan Nielsen Brumby skirt made from a vintage blanket

Megan Nielsen Brumby skirt made from a vintage blanket

Megan Nielsen Brumby skirt made from a vintage blanket

I also decided to do a decorative topstitch above the seam that joins to waistband to the skirt, just to make sure everything was tacked down.

Megan Nielsen Brumby skirt made from a vintage blanket

Megan Nielsen Brumby skirt made from a vintage blanket

I wanted this done before winter was over, so I was pretty motivated to get it finished.  The days after I finished it were cold, so I could wear it right away!

Megan Nielsen Brumby skirt made from a vintage blanket

Megan Nielsen Brumby skirt made from a vintage blanket

Megan Nielsen Brumby skirt made from a vintage blanket

I really like the skirt.  I don’t think it’s going to be the most flattering look, but I just love its interesting uniqueness.  My sister says I need a clever response when asked what the initials stand for.  Any ideas?  (Keep it clean!)

Megan Nielsen Brumby skirt made from a vintage blanket

Megan Nielsen Brumby skirt made from a vintage blanket

It’s really warm and comfortable and love all the different parts I incorporated–lining, colored pockets, and patterned waistband.  I deem it a sewing success.

Megan Nielsen Brumby skirt made from a vintage blanket

Megan Nielsen Brumby skirt made from a vintage blanket

I haven’t yet had a chance to blog a few of my other winter projects, but as far as sewing things goes, this was my last winter make.  I’m on to spring sewing.  I’ll still post the few made-in-winter projects I haven’t shown you yet, but this is the only garment that will probably be worn exclusively in the winter, so I wanted to blog it before spring came.

Recommendations (Yea!)

  • As I come to love hand-sewing more, I find my interest in embroidery being renewed and growing, too.  In that vein, I’ve found some really fun embroidery artists.  An etsy shop I recently discovered is cozyblue handmade.  They have embroidery patterns, etc.  I’m a fan of the Sea Captain.
  • If you listen to podcasts, I’ve just found a new one that I like:  The Seams podcast.  It’s about clothing and the stories connected to it. Jacki Lyden does a great job of interviewing a wide variety of people and looking at clothing from many angles.
  • If you like to garden, but sometimes feel nervous because you don’t really know your plants’ intentions, you should watch “Indoor Gardening Tips from a Man Who’s Very Scared of Plants”.  Problem:  SOLVED!

Field Trip: Denver, Colorado

Standard

My latest field trip is way outside my normal stomping grounds!  Earlier this month, my husband and I took a trip to Denver, Colorado for a wedding.  We almost never get away just the two of us, and definitely not to far-away places, so this was a pretty big deal!  We had such a great time at the wedding and a lot of fun exploring Denver and the surrounding area.

Of course there was sewing involved.  I used the wedding as a chance to challenge myself to come up with a creative outfit.  In the end, I took apart a bridesmaid dress that I had in storage and turned it into a skirt (which involved a lot more work that I thought it would!).  I also made a button down shirt with a pattern that I had been planning to try out (Butterick 5526).  This included making a broad back adjustment to the pattern before I cut it out (hopefully more on that in a future blog post).  After that, it was all about finding great colors to finish things off.  Here’s my final ensemble:

Fancy Wedding Clothes!

Wedding clothes!

I found the sweater on sale at J.Crew, and the earrings and bobby pin (which are harder so see, but they had gorgeous Swarovski crystals) on clearance at TJ Maxx.  I already had the tights, which was a good thing because white tights for women are harder to find that I thought!

Also…check out these shoes!

Fancy Wedding Clothes!

Thank you, Boden sale (and Christmas money!).  I had been saving up for some black heels, but in the end, the fancy shoes won out.

All of the colors together just made me so happy!  I love color!  This wasn’t anywhere near my original outfit ideas, but I’m so happy with how it all turned out.  It was so comfortable, and I know I’ll wear all the pieces again, both together and separately (actually, I’m wearing the shirt and earrings as I type).

The wedding and reception took place in a really cute barn outside of Denver.  The bride was gorgeous and everything was so beautiful.  Lots of our friends were there, and we all had a great time.

When we weren’t at the wedding, we explored the cute mountain town of Evergreen.  I have to recommend The Muddy Buck coffee shop if you are ever there.  I didn’t get any good pictures of it, but here are a few of Evergreen:

Evergreen, Colorado

Evergreen, Colorado

Evergreen, Colorado

My friend and I kept saying we couldn’t believe it was a real town.  It was so cute.  We felt like we were at a theme park or something.  The only thing I didn’t like was the curvy mountain roads!  They were good highways, but they are so curvy and very dark when the sun is down.

I also got a good (luckily not first-hand) education while in Colorado:

Colorado

Colorado

After spending some time in more mountainous areas, we took a day to head into Denver and explore there.  The bride’s parents had given us a bunch of fun recommendations of things to try in the area, and one of them was the Denver Biscuit Co.  I highly recommend this one.

Denver Biscuit Co.

I ordered the DBC Club.  Delicious.

We also spent a little lot of time in Fancy Tiger Crafts!!!!

Fancy Tiger Crafts in Denver, Colorado

When I got there, it was even bigger better than I had imagined!

Fancy Tiger Crafts in Denver, Colorado

Fancy Tiger Crafts in Denver, Colorado

Fancy Tiger Crafts in Denver, Colorado

And, I must say, their sales staff is just lovely!  I admitted to one of the ladies that I was kind of freaking out inside with excitement.  She said she felt the same way for the first month when she started working there.  🙂  Everyone was very friendly and really helpful.

Fancy Tiger Crafts in Denver, Colorado

Fancy Tiger Crafts in Denver, Colorado

Fancy Tiger Crafts in Denver, Colorado

During this next paragraph, you should read between the lines that MY HUSBAND IS AWESOME.  I was in Fancy Tiger Crafts for 2.5 hours.  Yes.  It’s true.  There was JUST. SO. MUCH.  I couldn’t make a decision.  I knew I wanted a few crafty badges (like Girl Scout badges for crafters), and I decided to get Deer and Doe’s Datura Blouse pattern…but then I got stuck.  I had fabric money, but what to spend it on?  They say that beggars can’t be choosers, but I say that when you are on a budget, every purchase has to count.  I didn’t want to buy something I wouldn’t use or wear.  Choice overload.

Fancy Tiger Crafts in Denver, Colorado

Fancy Tiger Crafts in Denver, Colorado

It was at this point that my husband gently suggested that we might want to go over to the Denver Biscuit Co. (before they closed), get some lunch, and come back afterward.

It was just what I needed.  Food and a little time to think.  When we went back, I found four fabrics to make up two Datura Blouses and with some help on the yardage calculations from the lovely Jaime herself, I was out of there in 15 minutes.

Lesson learned.  Sometimes you need to take a step back when you get overwhelmed to give yourself time to think.

Want to see what I got?

Fancy Tiger Crafts in Denver, Colorado

I also picked up two knitting badges for some friends.  I’m hoping this loot will serve me well when summer sewing fever hits.

Believe it or not, we even had time to do a little more exploring after that!

Denver, Colorado

Other fun highlights from the trip included pizza at Beau Jo’s in Idaho Springs and Evergreen, Tattered Cover Book Store, Revampt, and the mountains!

Colorado

Colorado

These pictures don’t even begin to do them justice.

It was a great trip and a real blessing to be at such a special wedding with so many friends.

Next time (hopefully):  the nitty gritty on sewing Butterick 5526.

The Brumby Skirt from Megan Nielsen Patterns

Standard

Today I’m happy to share with you one of my latest projects, the Brumby Skirt from Megan Nielsen Patterns!

Brumby Skirt pattern by Megan Nielsen

I really went back and forth on this one before starting and did lots of “research” checking out others’ versions of it around the web.  I’m still not super sure if I like the high-waisted skirt look on me, but I thought I would give it one more try before deciding for certain, especially since I won this pattern in the Refashioners contest and had the perfect fabric for it–some linen from Pintuck & Purl!

Brumby Skirt pattern by Megan Nielsen

Brumby Skirt pattern by Megan Nielsen

 I made Version 1, the shortest version, in a large.  My original thought was to make it longer.  If I’m wearing a closer-fitting skirt, like a pencil skirt, I feel ok with this length because I can feel the skirt on the back of my legs and I know I’m not exposing myself.  In a fuller skirt, though, you can’t always feel the back of the skirt, which worries me at times…

So, I planned to make it closer to knee-length.  I had, however, read Lauren/Lladybird’s post on her Brumby skirt and remembered that she said she had been underwhelmed before hemming, but loved the skirt when it was the specified length.  Well, my experience was exactly the same.

Brumby Skirt pattern by Megan Nielsen

I made it up but didn’t hem it, and it was very blah.  So, I decided to pin it up to the length in the pattern…and that’s when it happened.  I don’t know how she did it, but Megan Nielsen put some magic in this pattern.  When you hem it, it transforms!  I love it!

Brumby Skirt pattern by Megan Nielsen

So, here are some details and design decisions I made.  Initially I was going to put in this gorgeous silver zipper that I bought at Pintuck & Purl, but I would have had to shorten it…and it was a metal zipper.  I know it’s possible, but not having ever tried this, I didn’t think I wanted to try it for the first time on a very fancy zipper.  I also thought about topstitching in silver (I was really getting wooed by that silver thread!), but in the end, I decided on black thread and a metal zipper with black tape (that I wouldn’t have to shorten).  I realized this would make the skirt more every-day in a good way (i.e. it will get worn more).  I’ll save my fancy zipper for a future project.

Brumby Skirt pattern by Megan Nielsen

Back view with exposed zipper

Brumby Skirt pattern by Megan Nielsen

Front view–it’s hard to see the topstitching, but it’s there!

 Things I wondered about before starting this project had to do with ease around the waist and the depth of the pockets.  Having only made the one high-waisted skirt (the apple skirt), I wasn’t sure how things would work out if the finished measurement was the same as my actual waist measurement.  I wondered this with the apple skirt, too, so I actually added a few inches to the waistband to be safe.  With this pattern, I decided to risk it and just made it as it was printed, and it worked out great!  It’s very comfortable and not too tight at all.

Brumby Skirt pattern by Megan Nielsen

I noticed in my travels around the web that the pockets looked deep enough that they weren’t actually supporting anyone’s hands–which is the case.  It’s like your hands are straight down at your sides…but I still love those huge pockets.  I can keep things in them and you can’t even tell!

Brumby Skirt pattern by Megan Nielsen

I did end up doing just a little topstitching at the edges of the pockets (which was an optional suggestion) so that they wouldn’t stand out as much, and that has been great.  I also managed to catch the bottom edge of the pockets in my hem on the inside, which tacks them down nicely.

Brumby Skirt pattern by Megan Nielsen

Brumby Skirt pattern by Megan Nielsen

Brumby Skirt pattern by Megan Nielsen

As far as seam finishing goes, I just zigzagged in the seam allowance and then trimmed the seam with pinking shears.  This does lead to some strings and fraying after washing, but I think that will stop soon.  This fabric is a nice, substantial bottom weight, and French seams didn’t sound like fun on this one.

This was a fun and easy pattern.  I am sort of curious about how it would look in wool–I have a few pieces that were given to me.  With these cozy fleece-lined tights, I wore this skirt four out of seven days.  Yes–I totally do that, especially if I’m not going to see the same people every day, but don’t worry–there were some laundry days in there.  😉  I think this will be a great early fall, late spring, and summer skirt.  The more I see of Megan Nielsen’s company, the more impressed I am.

Brumby Skirt pattern by Megan Nielsen

Brumby Skirt pattern by Megan Nielsen

Brumby Skirt pattern by Megan Nielsen

Before I go, I want to let you know that I updated my last post with a few more pictures of the inside of the shirt I made.  Go on over and check it out if you want to see more.  🙂