Tag Archives: details

The Refashioners 2016

Standard

It’s finally time to talk about The Refashioners 2016!

Refashioners 2016

I’ve been waiting a long time to share my #jeanius project with you.

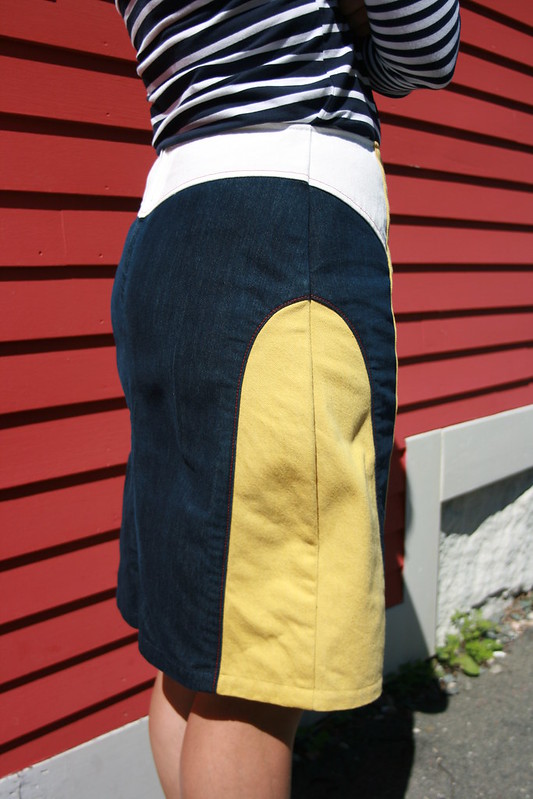
The Refashioners is a challenge created by Portia Lawrie of Makery that showcases creative ways to refashion whatever the chosen garment for that year’s challenge is.  If you’ve been following along, you already know that this year’s garment of choice is jeans (#jeanius!).  Check out what I made!

Refashioners 2016:  Jeanius

Refashioners 2016:  Jeanius

Refashioners 2016:  Jeanius

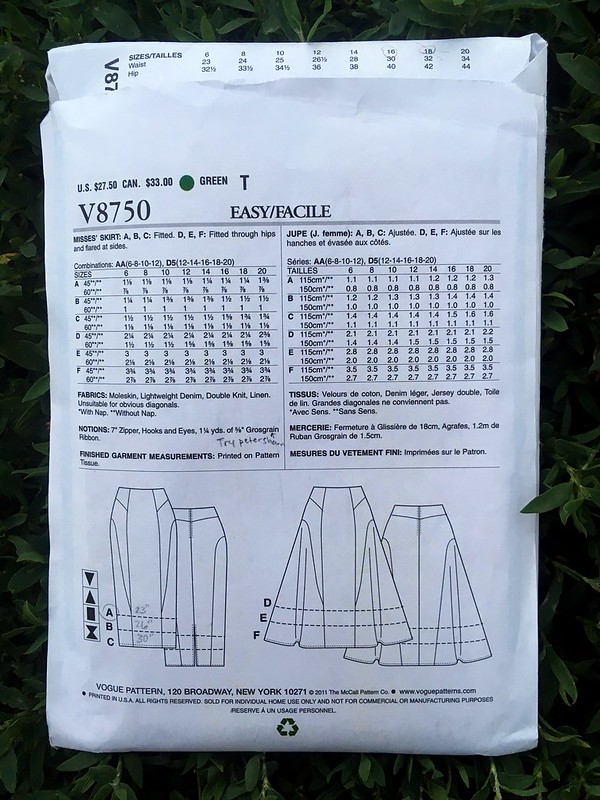
I’ve written about my creative process over on Makery, but if you want more details on working with the particular pattern I chose, Vogue 8750, you’ve come to the right place.

Refashioners 2016:  Jeanius

Refashioners 2016:  Jeanius

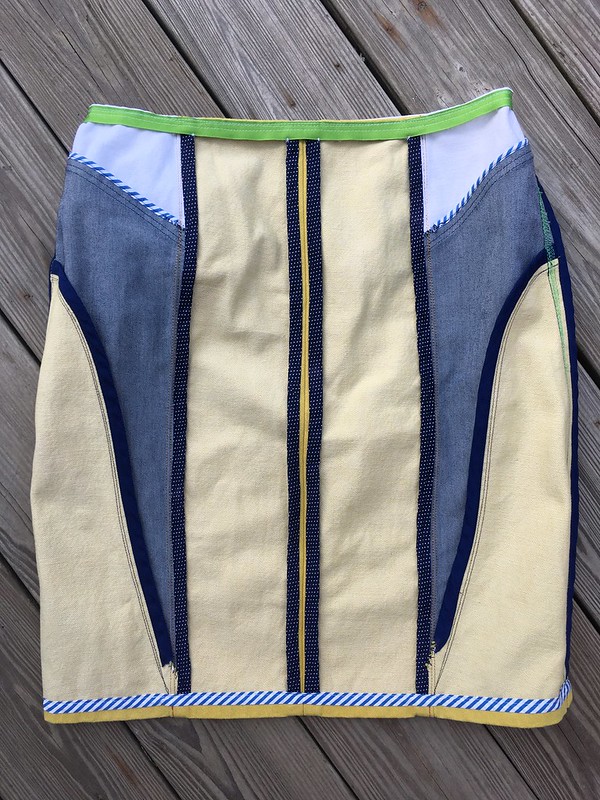
As soon as Portia sent us our brief for this year’s Refashioners challenge, the gears in my mind started turning.  My local big box fabric store was having a pattern sale, so I went down there with notebook and pencil in hand, sat down in front of the big pattern catalogue books, and started making list.  Lists and lists of patterns that I might be able to create out of different pairs of jeans.  I decided to look for something that had multiple narrow pieces so I could cut them out of jeans legs.  I finally settled on Vogue 8750, a skirt pattern.  I chose View A, which is the shorter (but not actually short) pencil skirt.  This looked like it had a lot of possibility for color-blocking, and I was hoping to find some super-cool denim at my local thrift store.

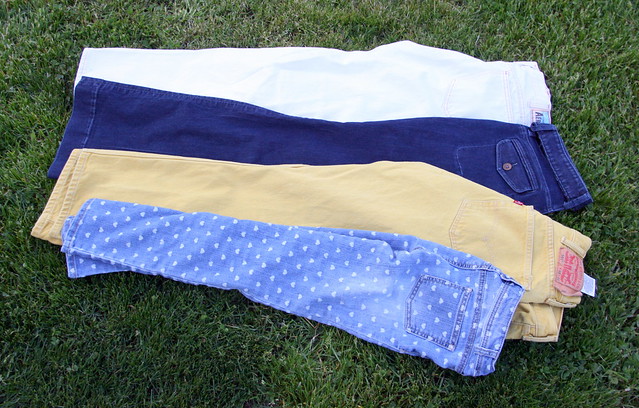
With the help of a pattern and all the inspiration on my then-secret Denim Pinterest board, I went to my thrift store looking to find some railroad denim or…something inspiring. (I have a little railroad denim obsession at the moment).  No railroad denim.  But I did find…THIS!  Yellow denim, white, denim with hearts, and my own older pairs of dark blue.  Now it was all coming together!

Refashioners 2016:  Jeanius

Last year’s Refashioner’s contest helped me make a move up from beginner to intermediate sewist. However, still not being super experienced, I don’t always make a muslin.  (Who am I kidding?  I skip it whenever I can.)  I know…I know…  It’s helpful, and I’m moving in that direction, but I’m not there for every project.  I actually DID make a practice garment for this one, though.  I made two, even!

Refashioners 2016:  Jeanius

The first showed me that I needed to size down.

Refashioners 2016:  Jeanius

A lot of people say they find this with Big 4 sewing patterns–I typically don’t, but in this case it was necessary, so it’s a good thing I made a muslin.  I used the second muslin to try lowering where the skirt sat on my hips and practice putting it all together a bit more.  The pattern tells you to ease the top of the skirt to the ribbon facing, but I had a lot of trouble with this and didn’t really want the skirt up at my natural waist.  I found that skipping the easing and just cutting a ribbon to match the top of the skirt solved both problems.

Muslins can also be a great way to procrastinate on cutting into your final fabric while appearing busy.  😉  I finally got up my courage, though, and found that I could easily fit my pattern pieces onto the jeans I had chosen (large men’s jeans for the white and yellow).  I tried out using one pair of children’s jeans for my middle panel, but had to backtrack when I saw that it just didn’t work.

Refashioners 2016:  Jeanius

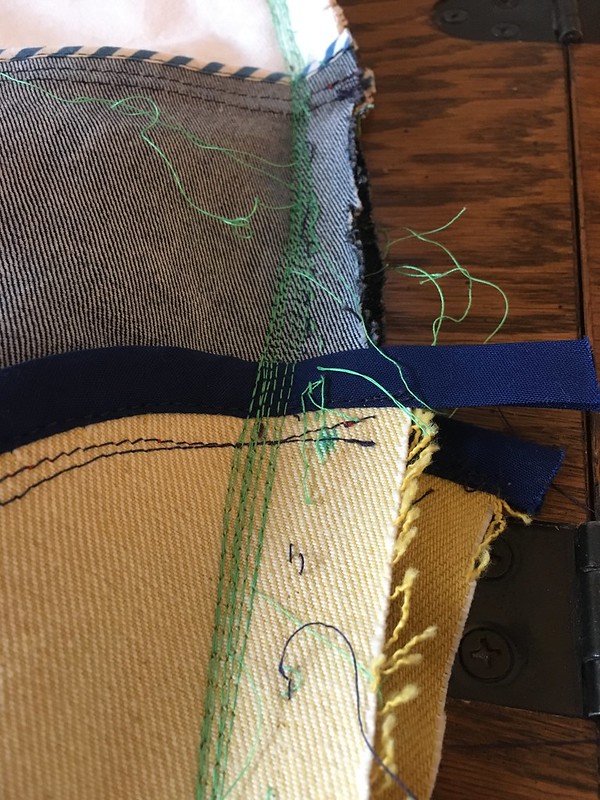
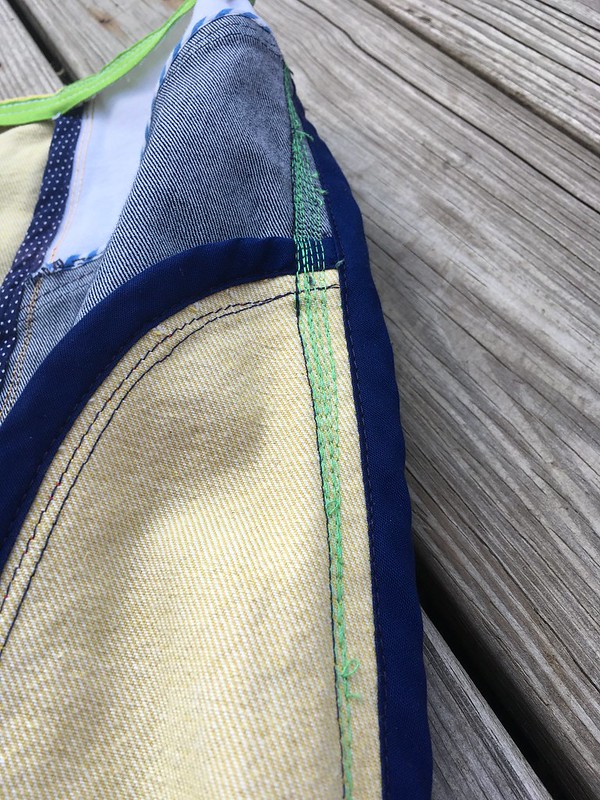
The thing I wish I had done (and I’m still not sure how or why I didn’t after two practice garments) was think about how and when I was going to finish my seams.  I realized part way into my final draft that I really wanted to bind the edges of the seams with bias tape.  This is something best done as you go along and before you join various parts.  You can see a few places where my bias binding doesn’t go all the way to the edge of the seam.  Lesson learned.  I actually contemplated starting over when I realized that (plus, I was getting pretty good at making this pattern after a couple of versions), but it seemed to defeat the purpose of refashioning to throw an otherwise good garment-in-the-making out because of one little detail.

Refashioners 2016:  Jeanius

The other interesting thing I discovered was that sometimes, in matching up seamlines (namely on the sides), it wasn’t about moving the pieces up or down to get them to match, but making the seam allowances the correct width for them to match. One of my sides matched immediately, and the other took several passes through the machine, taking the side in millimeter by millimeter in order to get it to match.  The skirt in-progress looked messy and crazy, but as I got things lined up, trimmed and bound my seams, and finished edges, it came together into something that looked polished.

Refashioners 2016:  Jeanius

Refashioners 2016:  Jeanius

Refashioners 2016:  Jeanius

Refashioners 2016:  Jeanius

When I finally finished, I had a thing of beauty.  It’s certainly not perfect, but I’m proud of it.  I think the best compliment I got was when I was in Rockport, Massachusetts shooting pictures, and I stopped in an art gallery.  Rockport is famous for its artists, and one of the artists in the gallery complimented me on my outfit.  When a person who spends their life looking for beauty compliments you on your outfit, you know you’ve done something right!  😉

Refashioners 2016:  Jeanius

Refashioners 2016:  Jeanius

Refashioners 2016:  Jeanius

Refashioners 2016:  Jeanius

Refashioners 2016:  Jeanius

Refashioners 2016:  Jeanius

My favorite thing about this challenge is that it makes me think like an artist. You get your parameters, but within them you have freedom.  How far can you push it?  What will you do to make your garment distinctive?  Will it be simple and sleek or heavily embellished?  This is what I talk about in more depth in my post on the Makery blog.  If you haven’t already, I hope you check it out and look through all the other posts as well to get some inspiration.  What do you think?  Will you be diving in?  There’s a pretty tempting prize package!

Last, but never least, thank you to my photographers–my husband Scott and my friend Colleen.  I appreciate your help SO MUCH!

Vacation! And a Deer and Doe Datura Blouse

Standard

Hey, friends!  Happy July!  I can’t believe it’s July already.  I feel like summer is just starting.  I’m going to take the rest of the month of July off from blogging (although you can still find me on Instagram @lisa.poblenz).  I’m coming off a number of complicated sewing projects (Refashioners 2016–which you’ll get to see in the not-too-distant future, bathing suit sewing, jeans, etc.), and it’s time to regroup, create some new garments, and do family stuff.  I don’t know about you, but when I finish a big batch of projects, I feel a little discombobulated for a while until I figure out what direction I’m going to pursue next and get going down that road.

I finished one wonderfully quick project on Wednesday, however–a Deer and Doe Datura Blouse.

Deer and Doe Datura Blouse

Deer and Doe Datura Blouse

I’m finding that while I am most drawn to bright colors and fun prints, I need a few neutral garments to wear with the fun and crazy stuff.  So, to test out this pattern, I chose the most basic view and made it up in a white linen-look fabric from Joann’s that I’ve had forever, and a khaki linen that a good friend gave me.  I also took the opportunity to use some vintage buttons from my mother-in-law.

Deer and Doe Datura Blouse

Before beginning, I measured myself to see how high the dart should sit on my body and then checked it on the flat pattern.  It seemed perfect, so other than grading up a size for the waist and hip, I used the pattern as it was.  There were a few tricky parts, mainly having to do with sewing together the shoulders, but once I weathered those, it was a quick sew.  (I used Part 1 of this sew-along to help me out, in case you are considering making this top as well.)  The only potential issue is that the neckline seems to gape just a bit, but I’m going to wash and wear the shirt a few times before I decide if I need to deal with that in any future versions.  They’ve updated the pattern since I bought this one, so maybe they fixed that.  I’m not sure.

Deer and Doe Datura Blouse

Deer and Doe Datura Blouse

Deer and Doe Datura Blouse

(Thanks to my Instagram Husband for taking these pictures of me!)

Expect future versions of this, though.  I want to try the one with the triangle cutouts next…and in crazy fabric.  One neutral garment at a time is about all I can handle!  😉

Deer and Doe Datura Blouse

Deer and Doe Datura Blouse

Do you ever wish you could sew at super speed?  I’ve never really had a handle on my summer wardrobe, but after sewing for a few years, and thinking seriously about what I actually wear (rather than just what I like to look at in fashion, which are often two very different things), I think I’m getting closer to the essence of how I like to dress in summer.  And now I want to sew it all up!!!!  I’ve been stocking up on fabric, but I can’t yet sew at lighting speed or fit garments to myself with shocking perfection.  Alas, my reach exceeds my grasp (but I think they are getting closer!).  Ah, sewing problems!  Ha!

Well, have a great July.  I look forward to more writing and talking with you in August.  We’ll find out then if I spent my time sewing or not!  😉

Recommendations

  • This Piped Floral Shirt Dress from Making It Well is amazing.  I’ll have to pick up some tips from Jo when I finally dive into the wonderful world of shirt dresses.
  • I just have to recommend The Great British Sewing Bee.  As much as I love Project Runway, sometimes it’s just so…ruthless!  The GBSB has a much kinder tone as well as an educational one.  I’ve only watched Season/Series 1 in its entirety, but Series 4 is on now!  You can look at the show’s website here.
  • If you are in the greater Boston area, I highly recommend the magazine edibleBOSTON.  If you aren’t in greater Boston, you may have an edible magazine covering an area near you.  edibleBOSTON is a fun way to learn about farmers, restaurants, small batch food makers, and other foodie things in your locale.  Magazines are free from subscribing businesses and come out quarterly.  You can also read issues online.
  • Aaannnddd…..we’re TOTALLY making this spaghetti and meatballs recipe this summer!

A Vintage Blanket Becomes a Skirt

Standard

Years ago some amazing sewing ladies who are my mother’s friends, gave me a vintage wool blanket (among other things).  They had a business repairing antique quilts, as well as upcycling quilts that couldn’t be repaired and turning them into handmade goods.  When they moved on to other things, they gave me some of their fabric and thread.  I didn’t sew much at the time, but being a creative person, they thought I might be able to use the things.

One of my favorite items was part of a woolen blanket with two sets of initials on it.  It was a winter white with two blue stripes and navy embroidery, and although I didn’t know its story, it seemed special.  I put it aside until just the right project presented itself.  It finally seemed that I had found the perfect use for it when I saw the Brumby Skirt by Megan Nielsen.  I knew it might not work…but I also knew it might.

Brumby Skirt pattern by Megan Nielsen

Brumby Skirt pattern by Megan Nielsen

That idea, that sort of razor’s edge between working or not working is what makes creative endeavors so exciting.  I love to try projects where I am more sure of the outcome.  I get a lot of satisfaction from them, but it really gets interesting when you ask the question, “Will it work?”  I think this is a question that some of the best art and the best fashion have at their heart.  Sometimes the outcome is terrible.  Sometimes it’s ok.  But sometimes it goes beyond what you imagined.

I don’t think this project reached the level of being beyond all I imagined, but the act of walking that line made the project exciting.  Could I create a skirt from this blanket?  Would it be too thick to sew?  Would it lay right?  I’ll tell you from the outset that I love this skirt.  It’s not perfect.  It doesn’t give me an enviable form or lack mistakes.  But I still say it works because some of my big goals in sewing are to create clothing that is unique and interesting.  (And I get to wear a blanket as a skirt in winter!  Always a worthwhile goal!)

Megan Nielsen Brumby skirt made from a vintage blanket

Megan Nielsen Brumby skirt made from a vintage blanket

Megan Nielsen Brumby skirt made from a vintage blanket

So, let’s get into some details.  The skill that I hoped to learn in this project was how to create a lining, so I bought some Bemberg rayon lining from Joann’s and leaned heavily on the book Easy Guide to Sewing Linings by Connie Long.

Easy Guide to Sewing Linings by Connie Long

Megan Nielsen Brumby skirt made from a vintage blanket

Maggie from Pintuck & Purl helped me think through my process for creating the waistband, which included lining it with some fabric from my stash and omitting the interfacing.

Megan Nielsen Brumby skirt made from a vintage blanket

I found a plain navy fabric in my stash for the inside of the pockets.  Since the edge of the blanket was already finished, I decided to omit the hem.  This also saved me fabric, since I had a limited amount of blanket to work with.  In order to do that, I marked the place I would have turned the fabric up to sew the hem and used that as the new bottom line for my skirt.  You can see it faintly below.

Megan Nielsen Brumby skirt made from a vintage blanket

Like vintage fabric sometimes does, this blanket had some light stains.  I tried using a stain remover to get them out, but it didn’t work, so I did my best to cut around the ones I could.  The rest just had to remain.  I did run into a little bit of trouble while sewing in the zipper.  It wasn’t quite even at the top, but since this is for me, and I get to decide what I will and won’t fix, I just folded the extra over and sewed it down.  Problem solved.

Megan Nielsen Brumby skirt made from a vintage blanket

Megan Nielsen Brumby skirt made from a vintage blanket

Megan Nielsen Brumby skirt made from a vintage blanket

I also decided to do a decorative topstitch above the seam that joins to waistband to the skirt, just to make sure everything was tacked down.

Megan Nielsen Brumby skirt made from a vintage blanket

Megan Nielsen Brumby skirt made from a vintage blanket

I wanted this done before winter was over, so I was pretty motivated to get it finished.  The days after I finished it were cold, so I could wear it right away!

Megan Nielsen Brumby skirt made from a vintage blanket

Megan Nielsen Brumby skirt made from a vintage blanket

Megan Nielsen Brumby skirt made from a vintage blanket

I really like the skirt.  I don’t think it’s going to be the most flattering look, but I just love its interesting uniqueness.  My sister says I need a clever response when asked what the initials stand for.  Any ideas?  (Keep it clean!)

Megan Nielsen Brumby skirt made from a vintage blanket

Megan Nielsen Brumby skirt made from a vintage blanket

It’s really warm and comfortable and love all the different parts I incorporated–lining, colored pockets, and patterned waistband.  I deem it a sewing success.

Megan Nielsen Brumby skirt made from a vintage blanket

Megan Nielsen Brumby skirt made from a vintage blanket

I haven’t yet had a chance to blog a few of my other winter projects, but as far as sewing things goes, this was my last winter make.  I’m on to spring sewing.  I’ll still post the few made-in-winter projects I haven’t shown you yet, but this is the only garment that will probably be worn exclusively in the winter, so I wanted to blog it before spring came.

Recommendations (Yea!)

  • As I come to love hand-sewing more, I find my interest in embroidery being renewed and growing, too.  In that vein, I’ve found some really fun embroidery artists.  An etsy shop I recently discovered is cozyblue handmade.  They have embroidery patterns, etc.  I’m a fan of the Sea Captain.
  • If you listen to podcasts, I’ve just found a new one that I like:  The Seams podcast.  It’s about clothing and the stories connected to it. Jacki Lyden does a great job of interviewing a wide variety of people and looking at clothing from many angles.
  • If you like to garden, but sometimes feel nervous because you don’t really know your plants’ intentions, you should watch “Indoor Gardening Tips from a Man Who’s Very Scared of Plants”.  Problem:  SOLVED!

Outside in December…and Merry Christmas!

Standard

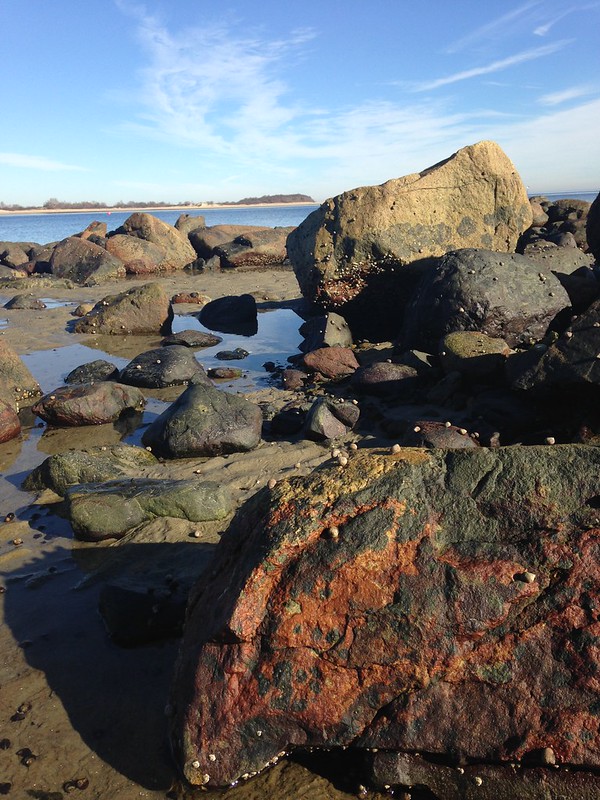
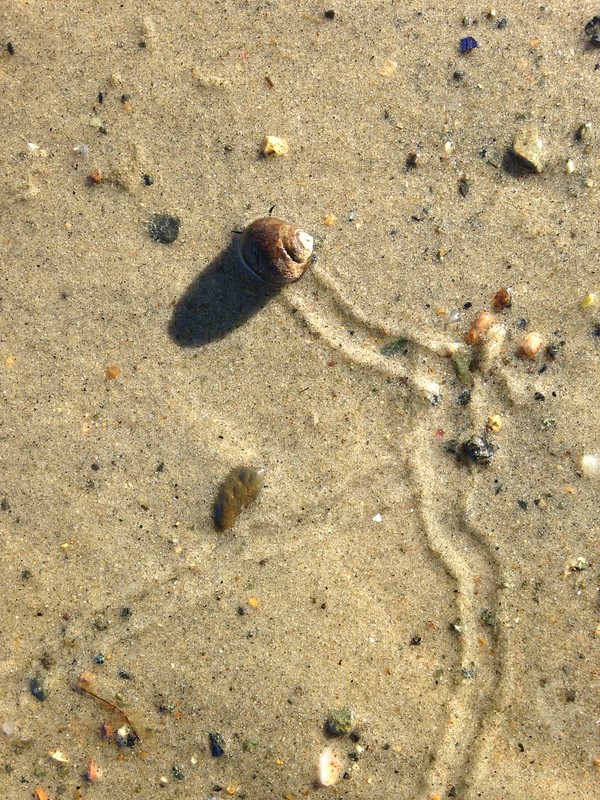
Merry Christmas everyone!  I hope you have a lovely holiday.  I wanted to share a few photos from this month with you.  It’ll be no surprise that these are more beach photos.  This little beach is a great place to look for sea glass or just go to stare out at the water when you need a little silence and beauty.

The beach in December

The beach in December

The beach in December

The beach in December

The beach in December

The beach in December

The beach in December

And that’s it from me for this year.  I’ll see you in the new year.  May it be one of peace and blessing.

The Apple Picking Skirt

Standard

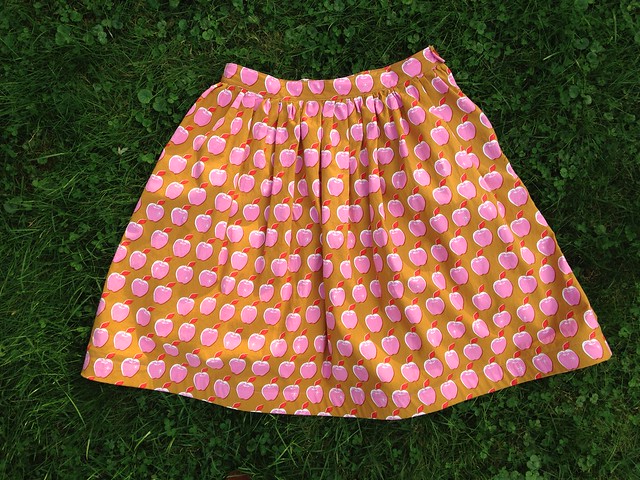
It was time for a crazy-sewing-lady skirt.  What came from this determination was “The Apple Picking Skirt”!

Pink Apples Dirndl Skirt

As I’ve sewn more and more, I’ve used awesomely patterned quilting cotton less and less, but let’s be honest:  quilting cotton has the MOST FUN prints!  So, I decided that I needed a skirt (or a dress or a…something) out of some really cool quilting cotton.  Who should step in the fill the gap but Melody Miller of Cotton + Steel and her super cool Picnic collection.

Melody Miller:  Picnic (Apples Pink)

This was the project I chose after finishing my jacket for the Refashioners challenge.  I still had/have a few projects on my “big ‘ol batch of sewing” list (good name, right?), but I needed something quick and easy…and with only one or two new concepts to learn.  So, I checked out Gertie’s New Book for Better Sewing by Gretchen Hirst from my library for the billionth time (I really need to buy a copy!) and used her instructions to create a dirndl skirt, which is basically two rectangles sewn together with a rectangular waistband at the top.  I’d never made one of these types of skirts before, and I wanted to try it.  I also wanted to try using horsehair braid to make the hem stand away from my body.

Pink Apples Dirndl Skirt

And it was fun!  And easy!

So, let’s talk about a few details.  I ordered my fabric from fabric.com, and got my horsehair braid from Pintuck & Purl.  Maggie, the shop owner, gave me some information on using it, and between that and Gretchen’s book, I was golden.  I got the pink zipper at Joann’s, and in my button collection (a gift from my in-laws’ attic), I found the BEST button!  Check this out!

Pink Apples Dirndl Skirt

It’s a squirrel!  And it looks like it’s holding the apple!  Thanks, Mom!

This was certainly a project of details.  It’s such a simple skirt, that I had fun on those extras.  I’m really convinced that the things that make clothing special (besides quality construction and style lines) are fabric and details.  Even in the thrift store I use fabric as a guide, looking along the rows of clothing for stand-out fabric, and only then considering the garment.

Since I mentioned details, I have another favorite detail on this skirt–the tag!

Pink Apples Dirndl Skirt

I didn’t realize until the last time I was up at Pintuck & Purl and was talking to some of the other ladies at the Sip & Stitch night that Cotton + Steel always has cool selvedges.  This fabric had all the information about the designer and the line and all that, but it also had this cute little section that said, “I made something pretty for you!”  Well, selfish seamstress that I am, I changed “you” to “me”, and I sewed it to the back of my skirt.

Now is when fantasy clashes with reality.  Would I really wear this apple picking?  No.  But I did wear it to church, and it’s making the beginning of fall feel pretty fun (I was having a hard time letting go of summer after the last winter we had.).

Pink Apples Dirndl Skirt

While I was making this, I spotted Jenny’s cool skirt featuring fabric with a map of London on her blog, Cashmerette.  I felt we were thinking on the same wavelength, which I liked, since she’s pretty cool.

Now that all is said and done, I’m not sure this is my favorite silhouette on me, but I think I’m going to try at least one more high-waisted, gathered skirt (from a different pattern) before I decide for sure.  Sometimes new silhouettes just take a little getting used to.

So, what about you?  Do you try to go incognito with your sewing projects so everyone will think they are store-bought or do you like to stand out and embrace looking “homemade”?

Whatever you are sewing, I hope it makes you excited for the season ahead and drives you on to make more projects in the future!

Pink Apples Dirndl Skirt

This is a Test. This is Only a Test. Butterick 6132

Standard

And now, back to what is becoming our regularly scheduled programming–sewing.  This blog certainly didn’t start out as a sewing blog, but it seems to be heading in that direction, something I both love (because I love sewing), and am a little bit surprised at (because I love SO MANY THINGS).  But, I’ll go with the sewing for a little bit.  I do have some non-sewing ideas, but I’m still working on the huge batch of projects I set myself to toward the end of summer, so all the other stuff will have to wait.  Believe it or not, I’m making my first piñata right now, but that will most likely never make it onto the blog.

What I do have is a little bit of a backlog of sewing projects to show you.  You may or may not remember that in August I made myself a huge list of projects, narrowed down alittle, then traced all my patterns, cut out all my fabric, and began to sew.  Then, after getting a bunch done, I put everything on hold to do the Refahioners 2015 contest and my first ever pattern testing for Megan Nielsen (keep your eye on her site–she has a really cute girl’s pattern coming out soon).  One of my goals within the batch sewing that I was doing was to make wearable muslins so that I could determine if I liked the patterns I was trying and if any fitting was needed.  I’ve had a few good makes (the Coco dress from Tilly and the Buttons and McCall’s 6848 shorts) and a not-so-favorite (the Hemlock Tee from Grainline Studio).  Today’s pattern, Butterick 6132 was another win.

IMG_9136

IMG_9137

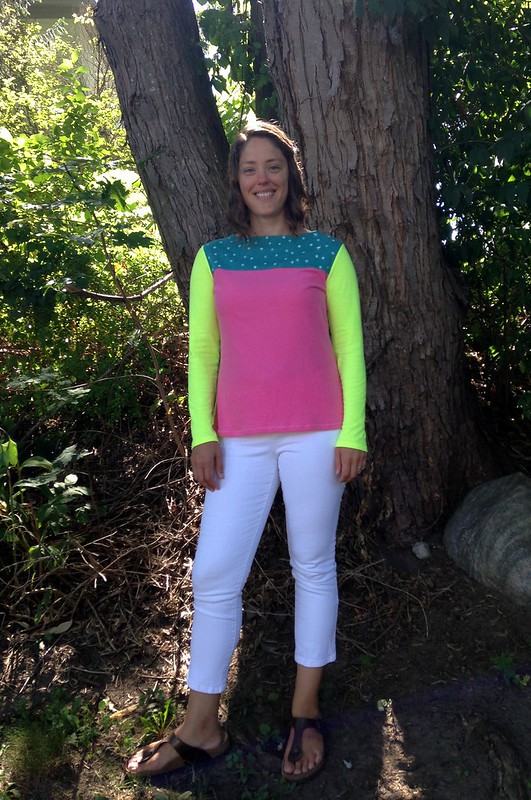
I made View B.  I was inspired (like so many others) by some of Boden’s color-blocked t-shirts, and I had in mind to make this out of some Riley Blake stripe and polka dot fabric that I had seen at fabric.com.  While I had originally traced a size 14 for the bust and blended out to the size 16 at the waist and hips, in the end I took it back to a straight 14.  The 16 gave me little “wings” at the sides, but the straight 14 was great.

Now, before I show you, remember, this is a wearable muslin.  What I mean by that is, that these are not my normal color pairings.  When I finished this shirt, though, I did text my Mom and sister a picture with the caption, “The ’90’s are BACK!”  I’ve probably been watching too much Saved By the Bell lately.  Really, though…those styles are what we are all wearing again, just tweaked a little.  Everything old is new again…

Butterick 6132 (test version)

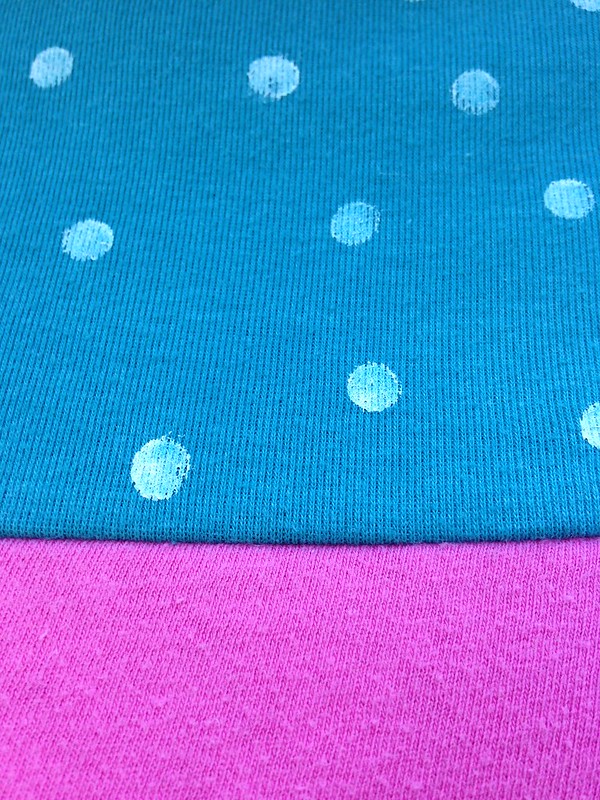
When I showed some of my friends, I noticed they were a little quiet…until I told them this was just a test.  I actually don’t love these colors together, but I was working with the leftover knit sheets I had in my stock.  I also experimented with adding the painted dots on the teal section.  Here is the shirt before dots:

Butterick 6132 (test version)

It was a little boring for me, so I took some inexpensive white acrylic paint and added some textile medium.  I used the eraser end of a pencil and dipped it in the paint and dabbed it on.  Then I followed the directions on the bottle of textile medium for how to make it permanent.

Butterick 6132 (test version)

I’m happy with the change.  It was quick and easy, which I like.  The hardest part was letting it sit for a week or so in order for the paint to cure before I heat set it.

Butterick 6132 (test version)

Butterick 6132 (test version)

Butterick 6132 (test version)

So, the final analysis:  I would make this again.  This one gets to stay in the Pile o’ Possibility!


The Refashioners 2015 Contest Submission

Standard

It’s finally time to show you all my secret project!  Are you ready?  I’ve been putting a ton of time in on my submission for the 2015 Refashioners Challenge, and I finished on Tuesday morning at 1 a.m.  Hooray!

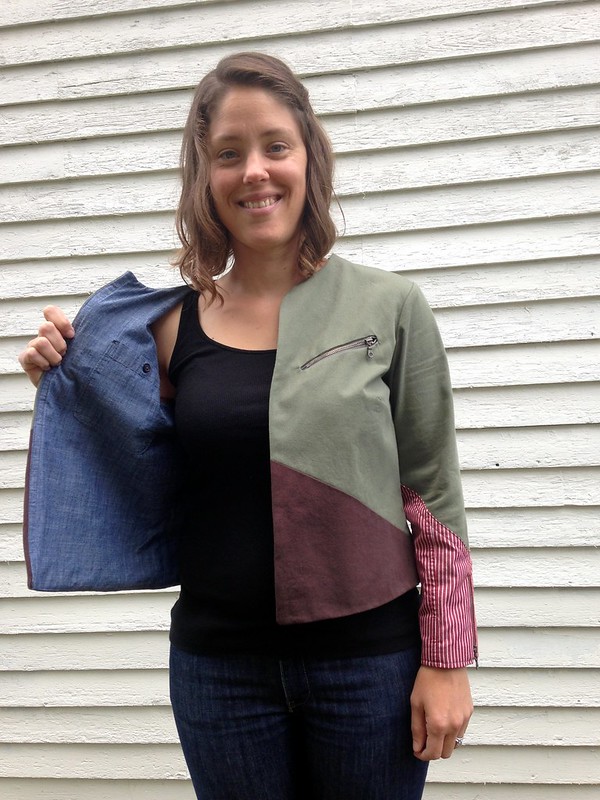
Oh!  You want to know what I actually made?  That does seem important!  Here it is:  I made a jacket using Simplicity 1699 as my base pattern.

The Refashioners Challenge 2015

The challenge was to make something out of a men’s button down shirt.  Several bloggers were asked to participate and show off their refashions.  Then the contest for the general public began.  I like turning old things into new things, but the original deadline wasn’t one I could meet.  However…when the deadline changed to September 27, I was IN!

Now you know there must be an onslaught of pictures.  Ready?

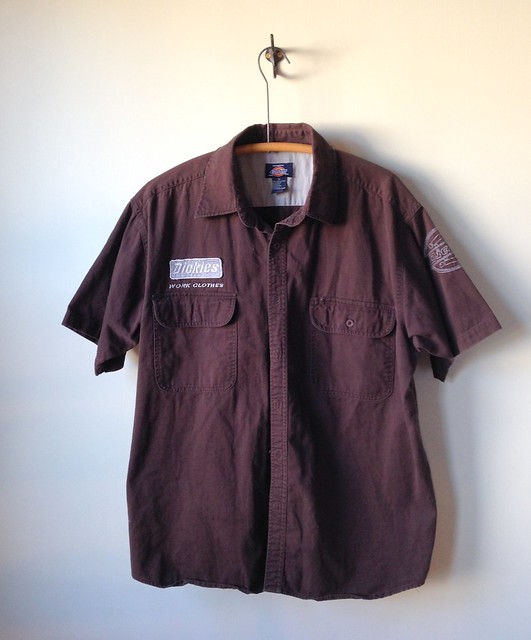
I began my process with Simplicity 1699 and four men’s button down shirts from the thrift store.

The Refashioners Challenge 2015

The Refashioners Challenge 2015

The Refashioners Challenge 2015

The Refashioners Challenge 2015

The Refashioners Challenge 2015

The Refashioners Challenge 2015


I wanted a fairly simple silhouette for my garment so that I could do some interesting piecing with the fabric.

The Refashioners Challenge 2015

My husband helped me take a screen shot of the line drawings on the fabric so I could draw in style lines.  I lengthened the sleeves from 3/4 to long and then worked on color blocking on the body and sleeve.  You can see that faintly on the tracing paper.  I put a lot of thought into how the various parts would interact with one another visually from different angles.

I also decided I wanted all my seams covered in some form or other.

The Refashioners Challenge 2015

The Refashioners Challenge 2015

The Refashioners Challenge 2015

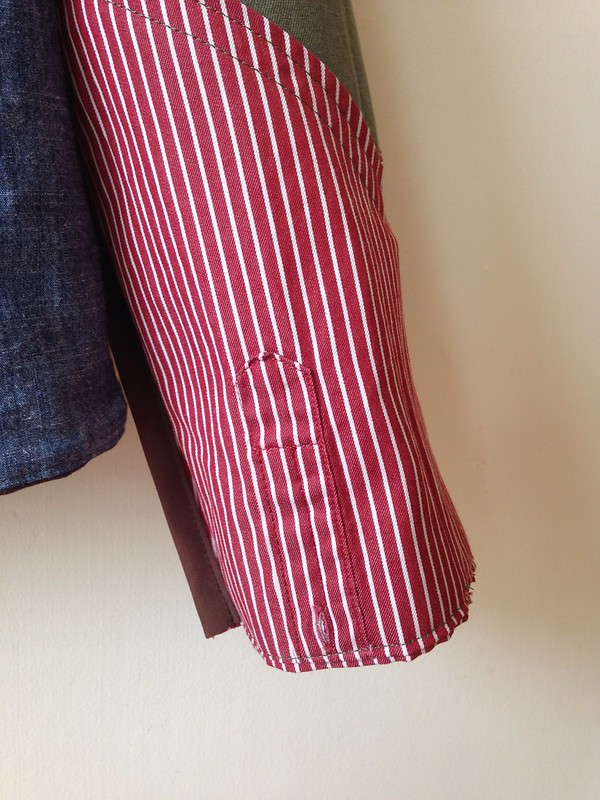
The original sleeve placket from the cuffs became a secret detail on the inside.

The Refashioners Challenge 2015

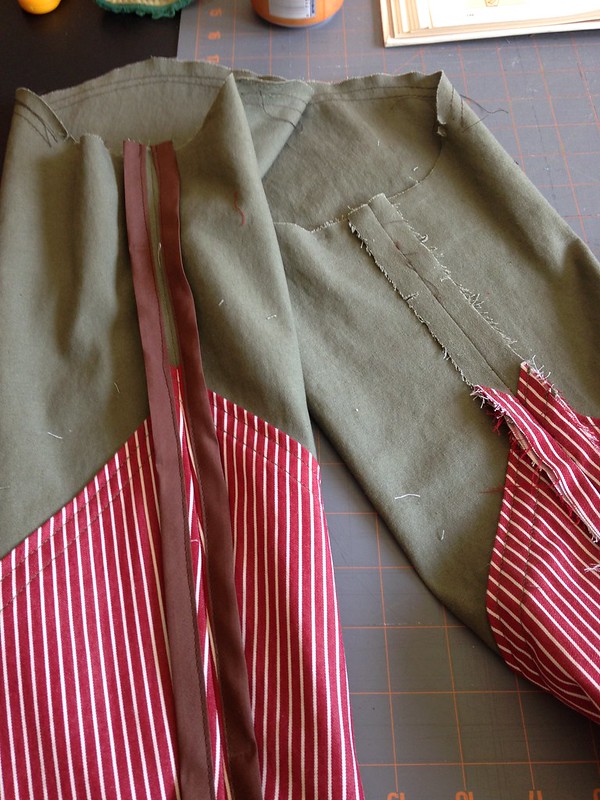
It took a little head scratching to figure out the sleeves because I also decided that I wanted to learn how to put in some exposed zippers for added interest (a.k.a. “flair”).

The Refashioners Challenge 2015

The Refashioners Challenge 2015

The pattern originally had pleats in the shoulders, which just seemed off with the look of the jacket.  They always bothered me, but I didn’t know how to get rid of them.  When I asked for critiques from my husband and my Moms’ Group (we’ll call them my “design group” from here on out 😉 ), they all agreed the pleats would have to go.  Luckily, my friend Maggie from Pintuck & Purl knew what to do and helped me understand the steps I needed to take to chop off those pleats!

The Refashioners Challenge 2015

I also wanted to learn to do bound seams for the insides of the sleeves.

The Refashioners Challenge 2015

The sleeves were a ton of work, but I am so happy with how they came out.  Look at the finished sleeve binding!  I love it!  I can definitely see why people love this finish in jackets.

The Refashioners Challenge 2015

The Refashioners Challenge 2015

The Refashioners Challenge 2015

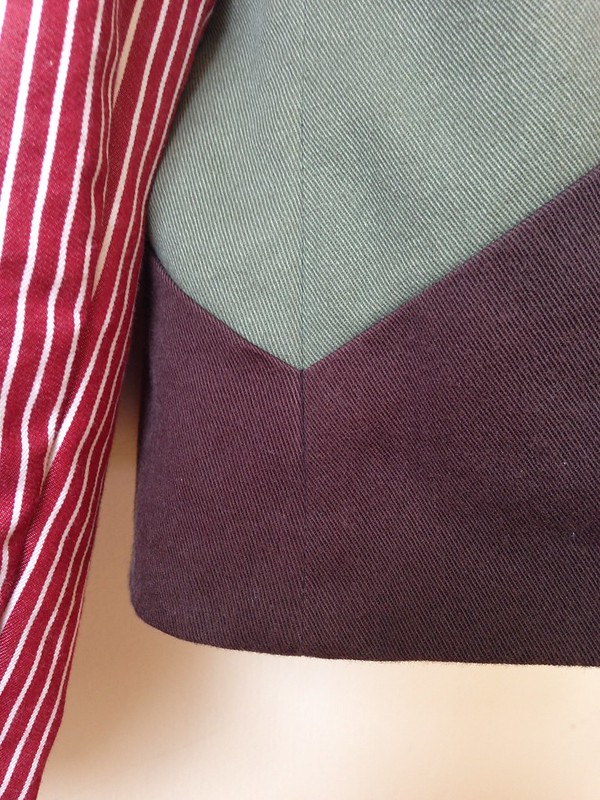
As for the body of the jacket, I added color blocking for interest and practicality.  I was worried that I might not have enough fabric in each shirt to do a solid color.  I’m so glad I did the color blocking.  I love how is looks and it’s so awesome when you line of those angles just right.

The Refashioners Challenge 2015

The Refashioners Challenge 2015

I also added a lining to the body, per the pattern instructions, which I did manage to get out of one shirt.  I even preserved the pocket in just the right spot.  It was nice to have that lining to cover all the seams in the main part of the jacket.

The Refashioners Challenge 2015

The Refashioners Challenge 2015

The back seam also required some attention when, after piecing it, I realized that the button placket on the seam did not look as cool as I’d thought it would.

The Refashioners Challenge 2015

My solution was to add a strip of red, which also made a nice design detail.  I basted it with a washable glue stick (So awesome!  You should try it!), and then topstitched it.

The Refashioners Challege 2015

The Refashioners Challenge 2015

After some thought and discussion with my design group, I realized the front needed…something.  How about some more exposed zippers?!  Perfect!  I was learning how to put them at an edge; why not in the middle of fabric, too?

The Refashioners Challenge 2015

It got pretty crazy over here.  At one point, I even had two machines going so I could go back and forth between them without changing thread.  I always thought that was crazy, but…it’s more like CRAZY AWESOME!

The Refashioners Challenge 2015

When I finally finished and cleaned up on Tuesday (not at 1 a.m.–after I had actually slept), I made myself a little pattern envelope for all my pieces.  It seemed like this was now its own pattern, rather than a slightly altered version of the original.

The Refashioners Challenge 2015

Because I’m sure you haven’t had enough pictures yet, here are the fancy, polished-looking ones, so you can get a full view of everything.

The Refashioners Challenge 2015

The Refashioners Challenge 2015

The Refashioners Challenge 2015

The Refashioners Challenge 2015

How about some outside shots?  Let’s do the calm ones first.  🙂

The Refashioners Challenge 2015

The Refashioners Challenge 2015

The Refashioners Challenge 2015

The Refashioners Challenge 2015

What do you think?  Reversible?  I’ve had several people say yes.

And now for how I really feel about this project:

The Refashioners Challenge 2015

I’m hoping to revisit that face (with happy jumping and screaming) if I win, but either way, I decided that I needed to define how this could still be successful no matter what.  In order to do that, I needed to create a garment that I would love and be proud of whether or not it was chosen as the winning piece.  I’m happy to say that I’ve met that goal!  I really like this jacket.  It’s some of my very best work.  I didn’t cut corners, and I made something of a higher quality than most of my past makes, not to mention all the new skills I’ve learned.  Of course, I still hope to win the contest, too.  🙂  Keep your eye on the Makery blog to see how things progress.

Oh!  And of course I’ll update you, too.  🙂

Happy Independence Day! (Red + White Corset Tank)

Standard

Happy Independence Day to all my American readers!  British readers, I’m glad we’re friends again.

July 4th (American Independence Day) is one of my favorite holidays to spend with my extended family.  This almost never happens any more, and so I usually find myself missing my parents as I plan out whatever red, white, and blue outfit I can come up with for the day.  My Mom, especially, always got into July 4th, telling us we had to wear red, white, and blue.  And if my Aunt Jane was with us…well, it usually got out of control!  Picture temporary tattoos with flags or glitter or both, all kinds of sparkly nail polish, and really whatever weird or embarrassing thing they could come up with.  I would roll my eyes and say how ridiculous it all was, but now that I rarely get to be with them on Independence Day, I miss all the craziness.  And I still find myself looking for a red, white, and blue outfit come July 4.

For the past few years, I’ve wanted to make my own version of this Alabama Chanin corset tank, so I finally decided now was the time to do it.  My friend Mary (also mentioned in this post) gave me some unused white t-shirts, and I cut them up according to the pattern in Alabama Stitch Book by Natalie Chanin, and sewed them back together to make my own tank.  I’ve made this pattern before and liked it.  Rather than hand-sewing the shirt, I chose to use my machine for speed, and instead of beading my tank like they did in my inspiration picture, I used a double strand of red button/craft thread to hand-sew my seam allowances down in a way that I liked.

Happy Independence Day!  (Red + White Corset Tank)

Front

Happy Independence Day!  (Red + White Corset Tank)

Back

I also chose to bind the bottom edge.

Before making this, I tried to raise the neckline using the instructions in Alabama Studio Sewing Patterns (also by Natalie Chanin), but I took a wrong turn somewhere and ended up with things just as they had always had been.  The low cut is definitely flattering, but it’s a bit too low for my comfort level, so I had to enlist an undershirt for a little extra coverage.  I’ll try to raise the neckline again another time.

Happy Independence Day!  (Red + White Corset Tank)

Happy Independence Day!  (Red + White Corset Tank)

While sewing this, I was watching a movie with a baseball theme, and pretty soon, all I could see was a baseball-inspired shirt.  I guess I could wear it to a game or for the 4th of July!

I kept my knots on the inside, although the shirt is reversible, so I can also flip it inside out, if I want something a little different.

Happy Independence Day!  (Red + White Corset Tank)

detail, shoulder and neckline area

Happy Independence Day!  (Red + White Corset Tank)

detail, hemline

All I needed was some blue jeans and I’m ready for the 4th of July!

Happy Independence Day!  (Red + White Corset Tank)

Happy Independence Day!!!

P.S.–I may take a little time off this month.  I’m not sure what that will look like or how often I will or won’t post, but if it seems quiet over here this month, don’t fret.  I’ll get back up to speed in August.

Me-Made-May ’15: Week Four

Standard

Welcome to Week Four of Me-Made-May ’15!  This was another good week with fewer repeats than I had expected.  Let’s get straight to the pictures!

Friday’s theme was “animals”.  I dug out this t-shirt that I self-drafted (with the help of Design-It-Yourself Clothes by Cal Patch).  I had planned to make some changes to it, but after putting it on, I decided it still worked.  Another point for immediate gratification!

MMM'15 Day 22 (Pattern and Branch) #mmmay15

Day 22: Self-drafted t-shirt #mmmay15


MMM'15 Day 22 (Pattern and Branch) #mmmay15

Day 22: Self-drafted t-shirt (close-up) #mmmay15


MMM'15 Day 22 (Pattern and Branch) #mmmay15

Day 22: Self-drafted t-shirt (detail) #mmmay15

You’ve seen this one before!  This was another wear of my pink Summer Blouse (but this time with new boots–major thrifting score!!).

MMM'15 Day 23 (Pattern and Branch) #mmmay15

Day 23: Summer Blouse from Weekend Sewing by Heather Ross, made from a vintage sheet #mmmay15

Note the lovely clip-on earrings scored at Brimfield.

MMM'15 Day 23 (Pattern and Branch) #mmmay15

Day 23: Summer Blouse from Weekend Sewing by Heather Ross, made from a vintage sheet (close-up) #mmmay15

Now for one that long-time readers will recognize.  This dress was in my first post for this blog.  It was a pairing of Alabama Chanin reverse applique and beading with a pattern from The Party Dress Book by Mary Adams.  It was beyond my skill level at the time, but it was so worth it, imperfections and all.

MMM'15 Day 24 (Pattern and Branch) #mmmay15

Day 24: Dress pattern from The Party Dress Book by Mary Adams with Alabama Chanin style reverse applique and beading, made from knit sheets #mmmay15


MMM'15 Day 24 (Pattern and Branch) #mmmay15

Day 24: Dress pattern from The Party Dress Book by Mary Adams with Alabama Chanin style reverse applique and beading, made from knit sheets #mmmay15

The bodice actually has three layers of fabric for the reverse applique.  I was hoping the extra layers would also provide stability to the top, which they do.  (Yea!)

MMM'15 Day 24 (Pattern and Branch) #mmmay15

Day 24: Dress pattern from The Party Dress Book by Mary Adams with Alabama Chanin style reverse applique and beading, made from knit sheets (detail) #mmmay15

My photographer (my daughter) told me we absolutely HAD to have a twirling shot.  This circle skirt is pretty awesome.

MMM'15 Day 24 (Pattern and Branch) #mmmay15

Day 24: Dress pattern from The Party Dress Book by Mary Adams with Alabama Chanin style reverse applique and beading, made from knit sheets #mmmay15

Next is this Alabama Chanin corset from Alabama Stitch Book by Natalie Chanin.  This is such a great tank.  It has fit me at various sizes and has such interesting lines.

MMM'15 Day 25 (Pattern and Branch) #mmmay15

Day 25: Corset tank top from Alabama Stitch Book by Natalie Chanin, made from an oversized t-shirt #mmmay15

MMM'15 Day 25 (Pattern and Branch) #mmmay15

Day 25: Corset tank top from Alabama Stitch Book by Natalie Chanin, made from an oversized t-shirt (close-up) #mmmay15

It’s also reversible!  I usually wear it like you see it above because I like to see the seam allowances, but you can also wear it as below for a more subtle effect.

Check out the starfish we found!  (Don’t worry, we put it back.)

MMM'15 Day 25 (Pattern and Branch) #mmmay15

Day 25: Corset tank top from Alabama Stitch Book by Natalie Chanin, made from an oversized t-shirt; reversible #mmmay15

These shorts are a free pattern from Anna Maria Horner.  I really needed some shorts a few summers ago, so I made these from some Amy Butler Nigella fabric that was a home décor cotton.  At that point, I just used pinking shears on all my seam allowances after sewing, so I always have little frays and strings hanging down inside, but the fact that I am starting to think about finishing my seams on a regular basis shows me how far I’ve come.  Maybe someday I’ll be a patient sewer…or maybe I’ll be so fast and AWESOME, I won’t have to be patient!  Even better.  😉

MMM'15 Day 26 (Pattern and Branch) #mmmay15

Day 26: Pleasant Pathways Shorts by Anna Maria Horner for Janome (free pattern) using Amy Butler Nigella home décor weight fabric #mmmay15


MMM'15 Day 26 (Pattern and Branch) #mmmay15

Day 26: Pleasant Pathways Shorts by Anna Maria Horner for Janome (free pattern) using Amy Butler Nigella home décor weight fabric (close-up) #mmmay15

You will probably not be surprised to see yet another Alabama Chanin make.  These are a summer staple for me.  This is the Fitted Top from Alabama Studio Sewing + Design by Natalie Chanin.

MMM'15 Day 27 (Pattern and Branch) #mmmay15

Day 27: Fitted Top from Alabama Studio Sewing + Design by Natalie Chanin, made from an oversized t-shirt #mmmay15


MMM'15 Day 27 (Pattern and Branch) #mmmay15

Day 27: Fitted Top from Alabama Studio Sewing + Design by Natalie Chanin, made from an oversized t-shirt (close-up) #mmmay15

It’s also reversible.

MMM'15 Day 27 (Pattern and Branch) #mmmay15

Day 27: Fitted Top from Alabama Studio Sewing + Design by Natalie Chanin, made from an oversized t-shirt; reversible #mmmay15

Try not to be shocked.  This one’s from Alabama Chanin, too.  This is the Long Fitted Dress from Alabama Studio Sewing + Design.  Maybe you can tell that the top in the above picture is really just the top part of this dress.  You might also recognize the fabric from Day 21.  I got a lot of mileage out of this sheet and the t-shirt I cut up for neck and armhole binding.

MMM'15 Day 28 (Pattern and Branch) #mmmay15

Day 28: Long Fitted Dress from Alabama Studio Sewing + Design by Natalie Chanin, made from a knit sheet and a t-shirt (trim) #mmmay15

The dress has a small train, which I love.  Yes, it means you have to hold your dress up a like a lady of the olden days, but that’s kind of fun.  I could have cut it off, but I kept it.  It makes me feel fancy.  😉

MMM'15 Day 28 (Pattern and Branch) #mmmay15

Day 28: Long Fitted Dress from Alabama Studio Sewing + Design by Natalie Chanin, made from a knit sheet and a t-shirt (trim) #mmmay15

I like to wear this one with the seam allowances showing, too, but you could easily turn them to the inside.

MMM'15 Day 28 (Pattern and Branch) #mmmay15

Day 28: Long Fitted Dress from Alabama Studio Sewing + Design by Natalie Chanin, made from a knit sheet and a t-shirt (trim) (details) #mmmay15

Most of these makes are from pre-blogging days, so it’s fun to get them out.

Next week’s Me-Made-May post will cover the last three days of May.  Three more to go!  I can’t believe it.  See you then, if not before!

Me-Made-May ’15: Week Three

Standard

Here we are at the end of week three of Me-Made-May.  I’m excited to show you some more pictures.  I was expecting a lot more repeats by this time, but I’ve been digging deep in my closet and storage to try to keep things changed up.  It’s encouraging that I’ve made more garments than I thought I had.  It also makes me want to sew even more!

Since May started on a Friday, the weeks are running Friday to Thursday (at least as far as my blog posts are concerned).  Fridays come with a little extra challenge for anyone who wants to take it on, and week three’s challenge was “Something Old”.

Me-Made-May '15 (Pattern and Branch) #mmmay15

Day 15: Summer Blouse from the book Weekend Sewing, made from a vintage sheet #mmmay15

The shirt I’m wearing is “old” in that I made it before I really got traction with sewing and before beginning the blog.  It’s also made from a vintage sheet.  If you read the last post, you’ll recognize this shot.  I found a vintage sheet that almost matched my shirt at Brimfield!

Me-Made-May '15 (Pattern and Branch) #mmmay15

Day 16: Pajama shirt as everyday shirt from McCall’s 6848 #mmmay15

This shirt is made from McCall’s 6848, which is a pajama pattern.  You may recognize the fabric from the Mother’s Day skirt in last week’s Me-Made-May post.  It’s a sheet that someone gave me.  I love the fabric and I wanted to see if this shirt would translate into an everyday shirt.  I’d also thought of making it from a knit for exercising and/or day-to-day wear, but I’m not sure.  I like it in these pictures, but when I was wearing it, I kept seeing an old pair of scrubs I used to wear as pajamas.

Me-Made-May '15 (Pattern and Branch) #mmmay15

Day 16: Pajama shirt as everyday shirt from McCall’s 6848 (close-up) #mmmay15


Me-Made-May '15 (Pattern and Branch) #mmmay15

Day 16: Pajama shirt as everyday shirt from McCall’s 6848 (close-up) #mmmay15

The back yoke is actually the hem of the sheet.


Me-Made-May '15 (Pattern and Branch) #mmmay15

Day 17: Ankara peplum from Simplicity 1699 #mmmay15


Me-Made-May '15 (Pattern and Branch) #mmmay15

Day 17: Ankara peplum from Simplicity 1699 (close-up) #mmmay15

This shirt is made from Ankara fabric and Simplicity 1699.  I think, in my imagination, where I actually tweak and fit patterns to be just right, I would add an inch to the bodice of the shirt just above the waistline since this sits about an inch high, but in real life, I still love to get a project done and move on.  Maybe someday…


Me-Made-May '15 (Pattern and Branch) #mmmay15

Day 18: Alabama Chanin style reverse applique scarf/wrap #mmmay15

Day 18 turned into a bit of a photo shoot, so even after narrowing down my choices, I have a lot of pictures to show you.

Me-Made-May '15 (Pattern and Branch) #mmmay15

Day 18: Alabama Chanin style reverse applique scarf/wrap #mmmay15

This scarf/wrap is really versatile.  I designed it from some of my husband’s old t-shirts in reverse applique a la Alabama Chanin.  It was a lot of fun to work on and while I don’t wear it as often as I would like, I think it’s still one of the pieces I’m most proud of.

Me-Made-May '15 (Pattern and Branch) #mmmay15

Day 18: Alabama Chanin style reverse applique scarf/wrap (close-up) #mmmay15


Me-Made-May '15 (Pattern and Branch) #mmmay15

Day 18: Alabama Chanin style reverse applique scarf/wrap (close-up) #mmmay15


Me-Made-May '15 (Pattern and Branch) #mmmay15

Day 19: Alabama Chanin style reverse applique shirt #mmmay15

You’ve seen this one before!  The challenge with a repeat garment, especially since I’m taking pictures every day, is to find a new way to style it.  I do that in normal life, too, but when I find a good outfit, I also repeat it.  I’m trying not repeat whole outfits this month so I can give you something a little more interesting than seven of the same outfits repeated each week.  It’s a good creative exercise.

Me-Made-May '15 (Pattern and Branch) #mmmay15

Day 19: Alabama Chanin style reverse applique shirt (close-up) #mmmay15

This picture makes me feel like I’m in an Alabama Chanin book.  Not sure why they haven’t called me to model yet…


Me-Made-May '15 (Pattern and Branch) #mmmay15

Day 19: Alabama Chanin style reverse applique shirt (detail) #mmmay15


Me-Made-May '15 (Pattern and Branch) #mmmay15

Day 20: Exercise shirt, McCall’s 6848 #mmmay15

I used to be so good at exercising regularly, but my main motivation to exercise this spring has been because I made a new piece of exercise clothing.  I made this shirt and it looked so awesome with the chevron fold over elastic as an edging, but when I wear it, it gapes more than I would like.  I think I may go back and fiddle with the neck and armholes to see if I can get a fit I’m happier with.

Me-Made-May '15 (Pattern and Branch) #mmmay15

Day 20: Exercise shirt, McCall’s 6848 (close-up) #mmmay15

This shirt is also from McCall’s 6848.  You can see my first gym-ready version of it here.

Last, but not least for this week is an Alabama Chanin sleeveless shirt.

Me-Made-May '15 (Pattern and Branch) #mmmay15

Day 21: Alabama Chanin sleeveless shirt #mmmay15

I love this shirt, but I think if I make it again, I’ll make it one size larger.  I’d love something with a slightly looser fit.

Me-Made-May '15 (Pattern and Branch) #mmmay15

Day 21: Alabama Chanin sleeveless shirt (close-up) #mmmay15

I made this shirt from a knit sheet (the main part) and an old t-shirt (the binding).

Me-Made-May '15 (Pattern and Branch) #mmmay15

Day 21: Alabama Chanin sleeveless shirt (detail) #mmmay15


Me-Made-May '15 (Pattern and Branch) #mmmay15

Day 21: Alabama Chanin sleeveless shirt (detail) #mmmay15

I love the Alabama Chanin patterns year-round, but especially for the summer.  I have a feeling I’ll be making more in the warmer months.

That wraps up another week of Me-Made-May.  Thanks for following along.  I’ll report back with more soon!