Tag Archives: Butterick

Bathing Suit Finished!

Standard

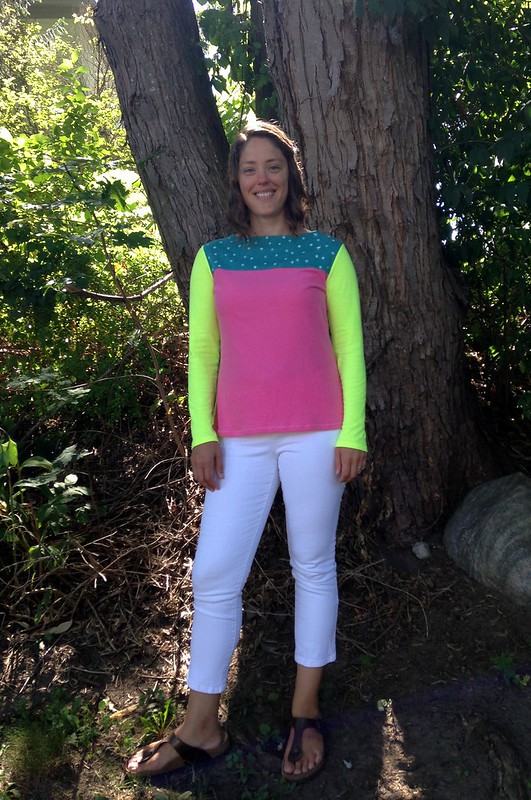
It happened!  I finished my bathing suit and…I think it works!

Bathing Suit Finished!

When we last met here, I had finished the bottom, but not the top.  During this week, I worked on joining up all the pieces and adding elastic to the neckhole and armholes.  That last bit wasn’t a part of the pattern, but I really like the look it provides, and I was hoping to solve a few problems with it.

Bathing Suit Finished!

There was a small part on the front neckline where I didn’t catch my outer fabric very well when I was sewing all the layers together.  There was no invisible way (that I could think of) to fix that.  Even using clear thread, it would have been visible.

I also wanted to stabilize those openings and give them more support so that they would be stronger and hopefully not gape when wet.

Finally, I was hoping the edging would magically tighten and take in the little bit of excess under the arms.  So…that didn’t happen (which I expected, but you always hope for that happy accident!), but I’m more optimistic about the other things.

When I began to apply the elastic, I realized it was a make-or-break moment.  The suit would either be much better for the addition or it would be ruined.  I bet on the side of better and went for it.

It worked!

Bathing Suit Finished!

Bathing Suit Finished!

After letting go of my perfectionism, I ended up with a swimsuit that isn’t perfect, but is actually finished and is, I think, a wearable first draft.  I’ve tested it briefly.  Now to see how it does over a whole day at the beach.

If you happen to be working on your own bathing suit and want to try applying elastic like I did, check out this tutorial on the Kadiddlehopper blog.  I used the advice here on both the stitched and turned elastic for my leg holes as well as the bound edges in the top.  I actually have this blog post printed out and saved in a binder so I don’t lose it!

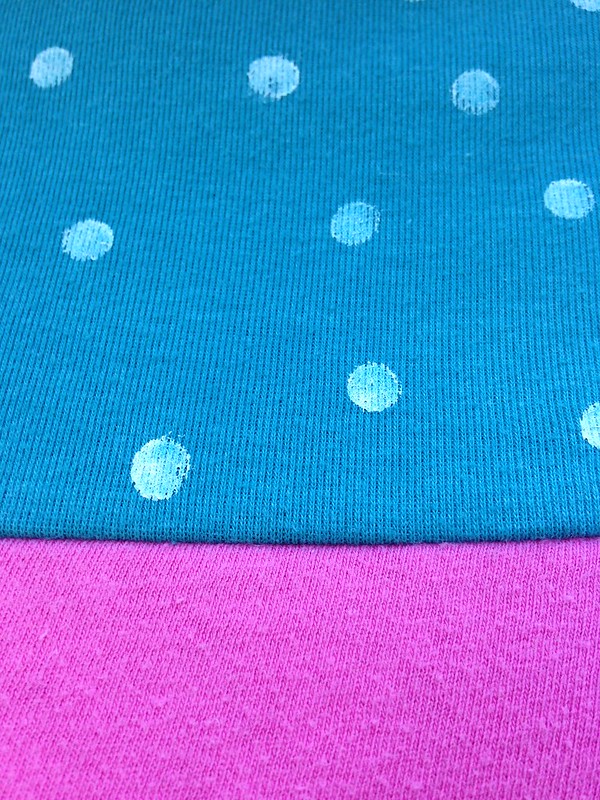
As for the few other details on this suit, here they are:  I fully lined both the front and back of the top and bottom.  I also used powermesh from the Imagine Gnats shop as the lining fabric in the built-in bra of the top.  I have nothing but good to say about buying from there–super fast shipping and great service.  All my elastic was 3/8″ swimwear elastic, and I used wooly nylon thread in my bobbin, with 100% polyester Güttermann thread in the top.  I used a walking foot, plus a stretch needle and Jalie’s method (found in the pattern) of sewing a long zigzag stitch first (width: 4.5, length: 0.5) and then going back and doing a straight stitch while stretching the fabric slightly (length: 2.5) at the actual seamline.  For pattern and fabric details, see my first post on this swimsuit.  If you have any questions, feel free to leave them in the comments and I’ll do my best to answer them.

Bathing Suit Finished!

Bathing Suit Finished!

Thanks to everyone who encouraged me!  It means so much, and it really helped me finish well.  My neighbor’s mom, who I just love and who is an amazing seamstress herself, is now convinced that I can sew anything.  Little by little, right?

Here’s some fun for your weekend.

Recommendations:

  • I have really been loving the Instagram feed of @suzyquilts.  There is something about her bright and beautiful pictures and her patterns…and I don’t even quilt!  (Well, I do have a quilt that’s been in-progress since 2008, but I’m talking quilting as a regular practice.)  I love the stripes she uses in her Kris Kross quilt.  Tempting…  You can also find her website here.
  • If you like the crop top look, but not the idea of baring your midriff, Allie J. will show you how to “make your own (fake) crop top” in this tutorial.
  • We like thinking games in our house, and one of the games we play on the iPad is Monument Valley.  They bill it as “an illusory adventure of impossible architecture and forgiveness”.  It feels a little bit like trying to figure out an M.C. Escher visual puzzle with calming, completely non-scary background music.  Good for any age.
  • Explore.org has links to lots of wildlife cameras.  It’s pretty cool that you can see African wildlife, ospreys in Maine, or pandas in China any time you want.

Bathing Suit Progress…and a Breakthrough

Standard

I think it’s time for a progress report.

Making bathing suits (year three)

But first, how about some mental anguish?  😉  As I was procrastinating and freaking out about this project, I had a breakthrough that now seems completely obvious (funny how that happens sometimes).

I expect to create the perfect suit.

Despite the fact that I rarely allow myself to be a perfectionist in my sewing, despite the fact that I understand that skills take time to build and ‘finished is better than perfectly unfinished’, I’m putting a perfectionist’s pressure on myself with this project.  Of course I’m procrastinating and freaking out!  That’s completely unrealistic!  I may have made suits before, but it takes time (and considerably more practice) to become skillful.

I guess it just goes to show that perfectionism can sneak up on anyone.

Once I realized this, I decided it was time to chill out.  So, I put on some surfing to distract me and psych me up to sew bathing suits and got going.  Now we can talk progress.

This is year three of attempting to create a bathing suit that I love.  The last two years have (sadly) been fails.  Year one was a pretty spectacular fail due to my not clueing in to some very awful print placement, forgetting to add in the necessary internal support, and the fact that it came out too big.  That suit just got cut up to become bottoms.

Making bathing suits (year three)

Making bathing suits (year three)

In year two I made every iteration of the Soma Swimsuit by Papercut Patterns.

Soma Swimsuit Test Suits

I wanted to practice and then hopefully create a tankini by hacking my favorite bikini view.  Unfortunately, I have no practice constructing bras, so I couldn’t create the desired support well.  I wore the tankini once, but by the end of the day, the structural elements started to come out of their places, so…no good.  I also decided I wanted bottoms that offered fuller coverage.

Soma Swimsuit Hack by Pattern and Branch

So here we are at year three.  I finally found a fabric that I completely love at the Fabric Fairy (she has a lot of excellent swimsuit prints), but I can’t find a tankini pattern that I’m really excited about.

Making bathing suits (year three)

I’m using the bottoms of the Jalie tankini (#3023), but I’m not jazzed about the top.  It’s good, but I wanted something a little different.  So my solution (which I realize may lead me to another fail) is to use lisette/Butterick 6295, a work-out top that I really like, and to add extra elastic to the neck and arms.

Making bathing suits (year three)

Here’s where I am as of Wednesday evening:

Making bathing suits (year three)

After putting so much time and energy into searching for a pattern I love, I’ve decided that this is what I really want:

I want a pattern designer to create a tankini pattern that has interesting details to set it apart from the crowd, offers full bottom coverage and the option for internal support up top (in the form of underwires).  I think you could (please!) also include a sports bra pattern as another view with the same optional underwire support and cool details.  That would make me so happy.  Jalie?  Fehr Trade?  Closet Case Files?  Someone?  Please?

Until then, I’m working away at this as well as several bathing suit experiments that will not be for me.  After this, I just want to make something easy for myself.  I want to return to my selfish, simple, sewing ways.  Well…until I find the next exciting challenge.

Recommendations:

  • I’ve mentioned how much I like the podcast Thread Cult and I’ve also mentioned the 3-D printing company Nervous System.  Guess what?  In episode #40, Christine interviews one of the founders of Nervous System about 3-D printed clothing, and it is FASCINATING.  The dress Nervous System made is a thing of beauty (and wonder!).
  • It’s been so much fun to discover new artists via Instagram.  One of my current favorites is Anisa Makhoul (@anisamakhoul on Instagram).  I love her saturated colors and cool style.
  • Watching surfing movies has helped me make it through the last few winters, but now it’s bleeding into other parts of life as well.  I’ve decided it’s my new figure skating–fun to watch when doing projects (as I mentioned above–good for when you are sewing bathing suits!).  If you want to start down the surfing rabbit hole, let me enable you.  The World Surf League app, which is free, lets you watch surfing live when events are on (or you can go to their website).  I follow them on Instagram (@wsl) so I always know when an event is happening.  My favorite is when I can watch the women surf.
  • I have to dedicate this video to my husband’s family.  I think they played this song a lot when he was growing up, but I doubt they did it like this.

A New Button-Down Shirt: Butterick 5526

Standard

It is a lovely, lovely thing to sew from a pattern you have made before and made positive fitting changes to.  I’m just learning how to fit things to my own body, and I used this pattern (Butterick 5526) for one of my first attempts, making a broad-back adjustment to it before trying a first draft.  In making this second shirt, I didn’t change anything.  Someday, someday, I will try a swayback adjustment, but since I can wear the shirt comfortably without it (and the fabric pools in my back, where I don’t normally see it), it just doesn’t feel as urgent.

Butterick 5526; Button-down Shirt

Butterick 5526; Button-down Shirt

Butterick 5526; Button-down Shirt

Butterick 5526

Butterick 5526

The real feature of this edition of the shirt is this cool fabric.  I got is last summer at Field’s Fabric in Kalamazoo, MI.  If I remember correctly it’s from Robert Kaufman fabrics, and is a cotton.  Here’s the cool part:  it’s not actually purple.  It’s a trick on your eye.  The fabric is made of red threads woven perpendicularly to blue threads, and your eye sees it as purple.  Color theory in action!  (For an interesting read on color, page through Josef Albers’ book entitled Interaction of Color.  Mind blowing!)  The weave also gives the fabric a fascinating effect (I want to say “iridescent”, but that’s not quite right) in the light.

Butterick 5526; Button-down Shirt

I chose to topstitch this shirt in red and used plain red buttons.  I searched high and low for cool, unique buttons, but in the end, these seemed right.

Butterick 5526; Button-down Shirt

In future editions of this shirt, I’d like to use French seams inside, but I was sort of afraid they wouldn’t make it around the curves and I would get lumps.  However, Lauren of the blog Lladybird is the one who I copied convinced me to try this pattern after I saw her many versions, and she uses French seams, so I should give it a try, too, perhaps.  For now, let’s pretend the insides of my shirt, which I finished with a zigzag stitch and which consequently frayed in the wash, are a “design feature”.

Butterick 5526; Button-down Shirt

And lest you think I’m aiming for the “moody” look in these posts, I’ve been sick all week, and I was still recovering when I took these (and the next few posts’) shots, so it might show.  I feel like I have to say this because when I take blog photos now, I always hear my Grandma’s voice in my head telling me to smile.  I tried, Grandma!

How about some “in progress” shots?

Butterick 5526 with a broad back adjustment

Butterick 5526 with a broad back adjustment

Butterick 5526; Button-down Shirt

Butterick 5526; Button-down Shirt

I’ve had this shirt done for a while and it’s gotten lots of wear.  The color is one I wear often, and the weight of the fabric is really, really nice.  It’s more substantial than my gingham version (which is not high quality fabric, really), and it feels like it will hold up a lot longer, too.  I love Robert Kaufman fabrics.  Even if I’m wrong about this being from them, I still love Robert Kaufman fabrics.

Butterick 5526; Button-down Shirt

Butterick 5526; Button-down Shirt

Butterick 5526; Button-down Shirt

I hope you all have a good weekend.  I’m already feeling better than I was yesterday when I took these photos, so that’s hopeful.  Now how about some fun recommendations?

  • Thanks to the Thread Theory blog for featuring the Strathcona Henley and Jutland Pants that I made for my husband along with some other amazing things created from their patterns.  Check out all the great projects!  The coats blew my mind, and I was definitely eyeing the shorts for ideas for the future.
  • Also on the Thread Theory blog, several cool videos on how various sewing items are made.  I really liked that the scissors they showed are still largely made by hand, and seeing how pins and needles are made was fascinating.
  • This music video by OK Go is CRAZY (crazy awesome).  They always have the best music videos.  Do you think they did it in one take?

As Promised: Butterick 5526 Women’s Button Down Shirt with a Broad Back Adjustment

Standard
As Promised:  Butterick 5526 Women’s Button Down Shirt with a Broad Back Adjustment

Hi, friends!  Here we are today with lots of pictures and words on Butterick 5526, which is a women’s button down shirt.

Butterick 5526 with a broad back adjustment

Butterick 5526

Butterick 5526

After my last button down, which was a little bit tight through the back/shoulder area, I decided to learn about how to do a broad back adjustment and measure things on the pattern before I cut my fabric.  The ever-helpful Maggie from Pintuck & Purl put me on the right track, and I found my final and very detailed answer courtesy of The Perfect Fit volume of the Singer Sewing Reference Library.  I cannot recommend these books enough!  One of the best parts is that they are often easy to find used at a very low price!  Mine were a gift, but I have bought one or two volumes that I didn’t have.

Singer Sewing Reference Library

Now is the point where things will get technical.  If you are just here for the pictures and general stuff, feel free to start scrolling at this point.  I’ll let you know when it’s over.

The book instructed me to have someone measure my back between the creases of my arms.

Making a broad back adjustment

I measured about 6″-7″ down from the prominent bone at the base of my neck.  The instructions said to measure 4″-6″ down, but I went a little lower so I could measure at the top of my arm creases.  My back width was 16 3/4″, and the book advised a minimum ease of 1/2″-1″ for a blouse, meaning my garment should measure 17 1/4″-17 3/4″ across the back.  The back width of the pattern was 16 1/2″, so I needed to add 1 1/4″ total or 5/8″ to the pattern piece (since the pattern piece was only half of the back of the shirt).

The book gives you instructions for making a minor adjustment and a major adjustment.

Making a broad back adjustment

Because of the amount I needed to add, I used a major adjustment.  The minor adjustment was appropriate for a total addition of 1/2″ for sizes under 16 and 3/4″ for 16 and larger.  The major adjustment is good for 2″ total in sizes under 16 and 3″ total in sizes 16 and up.  By ‘total’ I mean the amount across a full size back pattern piece.  If you are adding to a pattern piece representing half of the back, as I was, you would cut those ‘total’ amounts in half.  I chose the major adjustment because the amount I needed was more than the amount listed under the minor adjustment instructions.

Butterick 5526 with a broad back adjustment

One puzzling part that I ran into is that the example shows a pattern piece without princess seams.  My pattern has princess seams.  I was a little worried since this was my first time making this adjustment.  What I ended up doing was taping the pattern pieces for the back and the side back together where they would be sewn together at the underarm and doing the adjustment across both pieces.  Then, I just crossed my fingers and hoped for the best.  The good thing was that, although I love the fabric I chose, it was also very inexpensive (it may have been around $3-$5 a yard), so if I really messed up, I wasn’t out too much money.

Butterick 5526 with a broad back adjustment

The above picture probably isn’t the most helpful because I set the pieces together after the fact.  I should have taken in-progress pictures, but I didn’t think of it.  Below are the individual back and side back pieces after the adjustment.

Butterick 5526 with a broad back adjustment

Butterick 5526 with a broad back adjustment

Butterick 5526 with a broad back adjustment

After making the adjustment to the pattern, I cut everything out, and sewed it all up.  This wasn’t a difficult pattern, but I was really happy that I had my last shirt under my belt.  It helped me to have an idea of how long things were going to take.  Shirts have a lot of little steps, but they are really satisfying to make.  I followed the directions as written, with the exception of going back and zigzagging my seam allowances that hadn’t been topstitched down.  At some point I may use a more polished finish.

Butterick 5526 with a broad back adjustment

In my initial tracing of the pattern, going by my measurements, I made a 16 in the bust and graded out to an 18 for the waist and hips.  I found this to be very comfortable, and I wore it to the wedding I mentioned in the last post, but I sort of felt like there were little “wings” at the sides.  So, after getting home, I basted the side seams to be a little smaller, guessing how the shirt might have fit had I cut a straight size 16.

Butterick 5526 with a broad back adjustment

I was worried that it would be tight across the middle, but it’s not at all.  It still has plenty of ease, but it removes the “wing” effect.  For my next shirt, I retraced the waist and hip part of the pattern and cut it down to a 16.

Butterick 5526 with a broad back adjustment

The most technical parts are done!  Read on for less detailed information.  🙂

For others interested in making this pattern, I would say that this still has a fair amount of ease.  If you like your shirts to fit more closely, you may want to measure the pattern pieces and decide if you want to size down further.

Butterick 5526 with a broad back adjustment

The less technical details of the shirt include pink topstitching.  I got some nice Gutermann thread for this.  I also found some crystal buttons at a nearby quilt store, Loom ‘N Shuttle.  I like the fanciness it gives the shirt.  😉

Butterick 5526 with a broad back adjustment

I also cut the cuffs, collar, collar stand, and plackets on the bias.  I was hoping it would work out ok since I was going to interface those parts with a fusible interfacing, and it worked out great.  You can see that  a little bit in the picture below.  I really like the effect.

Butterick 5526 with a broad back adjustment

I found out about this pattern by reading Lauren’s blog, Lladybird.  She has the power to make me want to try out just about any pattern, and she wasn’t wrong on this one.  I’ve got another one in progress with more of the fabric I bought last summer, and I’m contemplating future versions in basic white and black.  This pattern is a winner.

Butterick 5526 with a broad back adjustment

Butterick 5526 with a broad back adjustment

Butterick 5526 with a broad back adjustment

Butterick 5526 with a broad back adjustment

Butterick 5526 with a broad back adjustment

Butterick 5526 with a broad back adjustment

Now I just have to go back and try the broad back adjustment on Simplicity 1538.  I think that one needs a larger adjustment, though, so I put it on the back burner while I work on a few other projects.

One last thing before I go…I love getting recommendations, sewing and otherwise, from other bloggers.  If you’ve ever listened to the While She Naps podcast, you’ll notice Abby and her guests sharing recommendations at the end of the show.  I love that.  So, when I have something fun that I am really enjoying, sewing or otherwise, I’m going to put it at the end of the post in case you want to try it, too.  This isn’t advertising.  No one is paying me to write this blog.  It’s just stuff that is fun for me right now or a really great reference that I like.  That’s why I’m going to call it:  This is fun now…at least until I think of a better title.  Feel free to suggest titles–I’m listening.

This is fun now:  Today’s recommendation (other than the Singer Sewing Reference Library) is an etsy jewelry shop called Adam Rabbit.  I’ve been a fan for a few years now and my family has been nice enough to get me some of the jewelry in the shop the last few Christmases.  If you like chunky, rough gemstones and a style you might find in Free People or Urban Outfitters, you may enjoy this one.  The owner occasionally has deals for Instagram followers, too.  Enjoy!

Field Trip: Denver, Colorado

Standard

My latest field trip is way outside my normal stomping grounds!  Earlier this month, my husband and I took a trip to Denver, Colorado for a wedding.  We almost never get away just the two of us, and definitely not to far-away places, so this was a pretty big deal!  We had such a great time at the wedding and a lot of fun exploring Denver and the surrounding area.

Of course there was sewing involved.  I used the wedding as a chance to challenge myself to come up with a creative outfit.  In the end, I took apart a bridesmaid dress that I had in storage and turned it into a skirt (which involved a lot more work that I thought it would!).  I also made a button down shirt with a pattern that I had been planning to try out (Butterick 5526).  This included making a broad back adjustment to the pattern before I cut it out (hopefully more on that in a future blog post).  After that, it was all about finding great colors to finish things off.  Here’s my final ensemble:

Fancy Wedding Clothes!

Wedding clothes!

I found the sweater on sale at J.Crew, and the earrings and bobby pin (which are harder so see, but they had gorgeous Swarovski crystals) on clearance at TJ Maxx.  I already had the tights, which was a good thing because white tights for women are harder to find that I thought!

Also…check out these shoes!

Fancy Wedding Clothes!

Thank you, Boden sale (and Christmas money!).  I had been saving up for some black heels, but in the end, the fancy shoes won out.

All of the colors together just made me so happy!  I love color!  This wasn’t anywhere near my original outfit ideas, but I’m so happy with how it all turned out.  It was so comfortable, and I know I’ll wear all the pieces again, both together and separately (actually, I’m wearing the shirt and earrings as I type).

The wedding and reception took place in a really cute barn outside of Denver.  The bride was gorgeous and everything was so beautiful.  Lots of our friends were there, and we all had a great time.

When we weren’t at the wedding, we explored the cute mountain town of Evergreen.  I have to recommend The Muddy Buck coffee shop if you are ever there.  I didn’t get any good pictures of it, but here are a few of Evergreen:

Evergreen, Colorado

Evergreen, Colorado

Evergreen, Colorado

My friend and I kept saying we couldn’t believe it was a real town.  It was so cute.  We felt like we were at a theme park or something.  The only thing I didn’t like was the curvy mountain roads!  They were good highways, but they are so curvy and very dark when the sun is down.

I also got a good (luckily not first-hand) education while in Colorado:

Colorado

Colorado

After spending some time in more mountainous areas, we took a day to head into Denver and explore there.  The bride’s parents had given us a bunch of fun recommendations of things to try in the area, and one of them was the Denver Biscuit Co.  I highly recommend this one.

Denver Biscuit Co.

I ordered the DBC Club.  Delicious.

We also spent a little lot of time in Fancy Tiger Crafts!!!!

Fancy Tiger Crafts in Denver, Colorado

When I got there, it was even bigger better than I had imagined!

Fancy Tiger Crafts in Denver, Colorado

Fancy Tiger Crafts in Denver, Colorado

Fancy Tiger Crafts in Denver, Colorado

And, I must say, their sales staff is just lovely!  I admitted to one of the ladies that I was kind of freaking out inside with excitement.  She said she felt the same way for the first month when she started working there.  🙂  Everyone was very friendly and really helpful.

Fancy Tiger Crafts in Denver, Colorado

Fancy Tiger Crafts in Denver, Colorado

Fancy Tiger Crafts in Denver, Colorado

During this next paragraph, you should read between the lines that MY HUSBAND IS AWESOME.  I was in Fancy Tiger Crafts for 2.5 hours.  Yes.  It’s true.  There was JUST. SO. MUCH.  I couldn’t make a decision.  I knew I wanted a few crafty badges (like Girl Scout badges for crafters), and I decided to get Deer and Doe’s Datura Blouse pattern…but then I got stuck.  I had fabric money, but what to spend it on?  They say that beggars can’t be choosers, but I say that when you are on a budget, every purchase has to count.  I didn’t want to buy something I wouldn’t use or wear.  Choice overload.

Fancy Tiger Crafts in Denver, Colorado

Fancy Tiger Crafts in Denver, Colorado

It was at this point that my husband gently suggested that we might want to go over to the Denver Biscuit Co. (before they closed), get some lunch, and come back afterward.

It was just what I needed.  Food and a little time to think.  When we went back, I found four fabrics to make up two Datura Blouses and with some help on the yardage calculations from the lovely Jaime herself, I was out of there in 15 minutes.

Lesson learned.  Sometimes you need to take a step back when you get overwhelmed to give yourself time to think.

Want to see what I got?

Fancy Tiger Crafts in Denver, Colorado

I also picked up two knitting badges for some friends.  I’m hoping this loot will serve me well when summer sewing fever hits.

Believe it or not, we even had time to do a little more exploring after that!

Denver, Colorado

Other fun highlights from the trip included pizza at Beau Jo’s in Idaho Springs and Evergreen, Tattered Cover Book Store, Revampt, and the mountains!

Colorado

Colorado

These pictures don’t even begin to do them justice.

It was a great trip and a real blessing to be at such a special wedding with so many friends.

Next time (hopefully):  the nitty gritty on sewing Butterick 5526.

This is a Test. This is Only a Test. Butterick 6132

Standard

And now, back to what is becoming our regularly scheduled programming–sewing.  This blog certainly didn’t start out as a sewing blog, but it seems to be heading in that direction, something I both love (because I love sewing), and am a little bit surprised at (because I love SO MANY THINGS).  But, I’ll go with the sewing for a little bit.  I do have some non-sewing ideas, but I’m still working on the huge batch of projects I set myself to toward the end of summer, so all the other stuff will have to wait.  Believe it or not, I’m making my first piñata right now, but that will most likely never make it onto the blog.

What I do have is a little bit of a backlog of sewing projects to show you.  You may or may not remember that in August I made myself a huge list of projects, narrowed down alittle, then traced all my patterns, cut out all my fabric, and began to sew.  Then, after getting a bunch done, I put everything on hold to do the Refahioners 2015 contest and my first ever pattern testing for Megan Nielsen (keep your eye on her site–she has a really cute girl’s pattern coming out soon).  One of my goals within the batch sewing that I was doing was to make wearable muslins so that I could determine if I liked the patterns I was trying and if any fitting was needed.  I’ve had a few good makes (the Coco dress from Tilly and the Buttons and McCall’s 6848 shorts) and a not-so-favorite (the Hemlock Tee from Grainline Studio).  Today’s pattern, Butterick 6132 was another win.

IMG_9136

IMG_9137

I made View B.  I was inspired (like so many others) by some of Boden’s color-blocked t-shirts, and I had in mind to make this out of some Riley Blake stripe and polka dot fabric that I had seen at fabric.com.  While I had originally traced a size 14 for the bust and blended out to the size 16 at the waist and hips, in the end I took it back to a straight 14.  The 16 gave me little “wings” at the sides, but the straight 14 was great.

Now, before I show you, remember, this is a wearable muslin.  What I mean by that is, that these are not my normal color pairings.  When I finished this shirt, though, I did text my Mom and sister a picture with the caption, “The ’90’s are BACK!”  I’ve probably been watching too much Saved By the Bell lately.  Really, though…those styles are what we are all wearing again, just tweaked a little.  Everything old is new again…

Butterick 6132 (test version)

When I showed some of my friends, I noticed they were a little quiet…until I told them this was just a test.  I actually don’t love these colors together, but I was working with the leftover knit sheets I had in my stock.  I also experimented with adding the painted dots on the teal section.  Here is the shirt before dots:

Butterick 6132 (test version)

It was a little boring for me, so I took some inexpensive white acrylic paint and added some textile medium.  I used the eraser end of a pencil and dipped it in the paint and dabbed it on.  Then I followed the directions on the bottle of textile medium for how to make it permanent.

Butterick 6132 (test version)

I’m happy with the change.  It was quick and easy, which I like.  The hardest part was letting it sit for a week or so in order for the paint to cure before I heat set it.

Butterick 6132 (test version)

Butterick 6132 (test version)

Butterick 6132 (test version)

So, the final analysis:  I would make this again.  This one gets to stay in the Pile o’ Possibility!


Works in Progress

Standard

I thought it would be nice to take a little break from clamming and show you what I’m working on.  Once, I asked my husband to make me only work on one project at a time.  He is a wise man, and did not attempt to do this.  Seems like having multiple projects happening all at once is the way my creativity works best.  At least that way, if I’m procrastinating on one project, I can move ahead with another.

As I mentioned previously, I’m working on sewing something I said I would never sew:  a bathing suit.  This is one of the projects I am procrastinating on.  Here’s what I’ve got so far.

Works in Progress:  bathing suit

Cutting out the bathing suit

Works in Progress:  bathing suit

The bathing suit so far


In case you are interested, here is the pattern that I’m using.

Works in Progress:  bathing suit

Works in Progress:  bathing suit

So far, it’s going ok, thanks to numerous blog posts around the web, but I keep avoiding it because I’m afraid I’ll mess it up.  That’s pretty silly, though.  I mean, really.  If I could master bathing suits, I would probably be tapping into one of the few areas of home sewing that’s actually still cost-effective.  It would be SO GREAT…so I’ve got to get moving.  You can all hold me accountable to actually finish it.  Plus, I need a bathing suit that fits.

One of the projects I am using to procrastinate on my bathing suit is this shirt, made with a pattern from Alabama Studio Sewing + Design by Natalie Chanin (one of my all-time favorite sewing books).  This is the sleeveless t-shirt top.

Works in Progress:  Sleeveless T-Shirt TopSo, this was meant to be a quick project.  I need a few of those to motivate me through the long projects.  The book I got this from is all about hand-sewing, which is really fun, but when I need a quick project, I cheat and machine-sew one of the garments.  They come together really fast and all the patterns that I have tried have been flattering at various sizes.  This one is made from a bed-sheet and an old t-shirt.  (Incidentally, the bed sheet is partly made from recycled plastic bottles AND I got it at a thrift store, so it’s like it’s been recycled multiple times!)  But…

I decided it needed some details, so I added the contrast binding and then tried to add some crochet trim.

Works in Progress:  Sleeveless T-Shirt TopAbove is the marking I made for the trim, but the trim was too white, so I dyed it in black tea.

Works in Progress:  Sleeveless T-Shirt Top

Works in Progress:  Sleeveless T-Shirt Top

Works in Progress:  Sleeveless T-Shirt Top

Works in Progress:  Sleeveless T-Shirt Top

Above is the original white, and the tea-dyed piece, but now the white still seems too white and the tea-dyed piece looks…dirty.  See what you think:

Works in Progress:  Sleeveless T-Shirt Top

Not to fear, though!  I decided to procrastinate on the t-shirt with this!

Works in Progress:  Long Fitted DressThis garment is the Long Fitted Dress, also from Alabama Studio Sewing + Design.  This was the quick project that was to save me from the avoidance of the other two.  But then I faced a few decisions.  What color binding to add?  Contrast like the t-shirt or the same fabric?  How about keeping the binding the same as the dress and adding some crochet details to this garment?  (I’m starting to sense a trend in both crocheted details and decision-making leading to procrastination.)

Works in Progress:  Long Fitted DressMaybe something like this?  (The trim on the bottom would actually be on the back side.  There is a small train on the dress–similar to a high-low hem but, being a maxi dress length, it’s more like a small train.)

I was trying to actually make a decision, but it was tricky.  I tried the dress on to see how it looked and realized that the fabric is pretty thin and, rather than skimming curves, it reveals the curves and lines that you usually want fabric to skim over.  So now I’m procrastinating on this project, too.

But I did get something done today!  I have a very weedy garden, but I actually weeded a small part of it.  Want to see?  Yes, you do!  (Because if you stop reading now, I can’t tell, so I’m just going to assume you are still going strong.)

Works in Progress: Garden

Before…

Works in Progress: Garden

After!

I also made a little sign with paint pens on some bits of slate to mark our morning glories and moon flowers.  I’m hoping they take over the deck rails.

Works in Progress: Garden

Lastly, check out my leeks.  They flower every year and look so cool.  They also attract all kinds of very waspy looking insects, so I admire them from afar or in the evening, just to be safe.

Works in Progress: Garden

What are you procrastinating on?