Tag Archives: Hey June Handmade

Mill Yardage + Pattern and Branch = Neon Pink Polartec Seaforth Pants! Think Pink for Spring!

Standard
Mill Yardage + Pattern and Branch = Neon Pink Polartec Seaforth Pants!  Think Pink for Spring!

It’s funny how something can stick in your head for years, and then when the moment is right, you call it up for inspiration. Years ago, I was on the beach, talking to some other moms, and one of them was wearing a pair of shearling fleece sweatpants. They looked so cozy, and I thought what a great idea they were for a beach that is pretty much always either breezy or windy and which is usually significantly cooler than whatever town you are coming from.

Last year, as it got colder and my thoughts turned to winter sewing, I was looking through my main Polartec fabric source, Mill Yardage, and saw some neon pink shearling fleece. I love neon pink, I love shearling, and I love Polartec, so I kept it in mind. I had a few ideas of what I might want to make with it, but the strongest came in the form of that memory of the shearling fleece pants.

Mill Yardage has an inspiration board on their website, and I thought this would be an awesome addition. It said that if you sent in an idea they decided to make for the page, they would send you the same amount of fabric. These pants were a fun idea I wanted to see in the world, and if they also sent me fabric, I could make my own pants. After mulling it over for months, I e-mailed them and shared my idea.

In a short time, I received an e-mail back! They liked the idea, and asked if I would be willing to make the project. I already wanted to make this project, so I said yes! They generously offered any fabric and notions I needed from their site to make the pants, so I sent in my requests, and faster than I could have imagined, had a package of fabric at my door. I was thrilled.

Here was my plan.

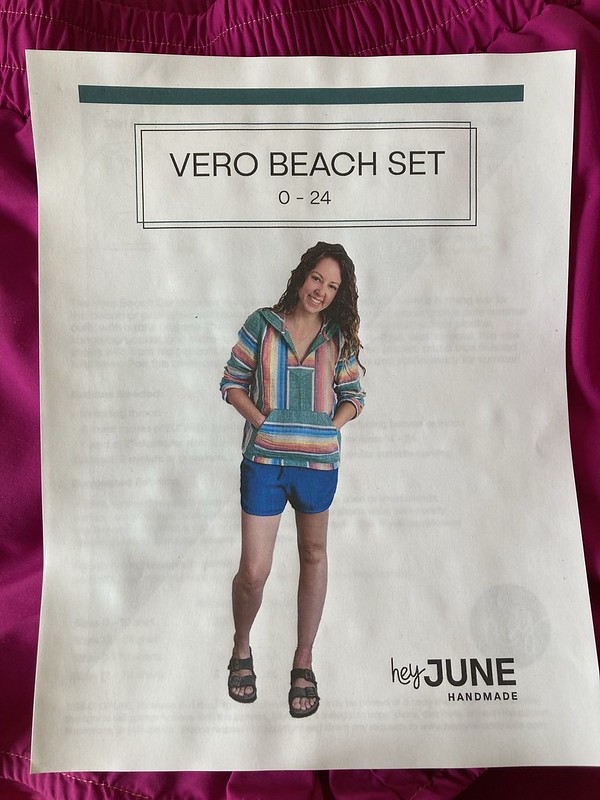
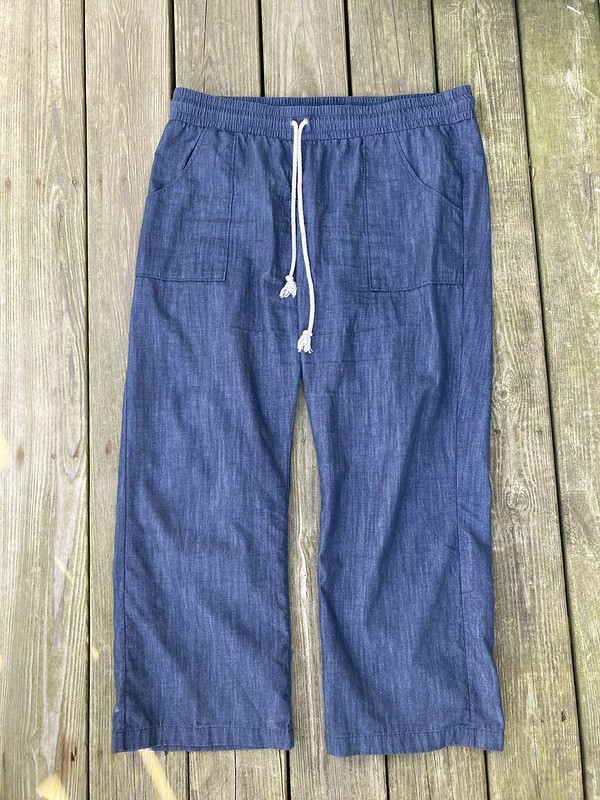
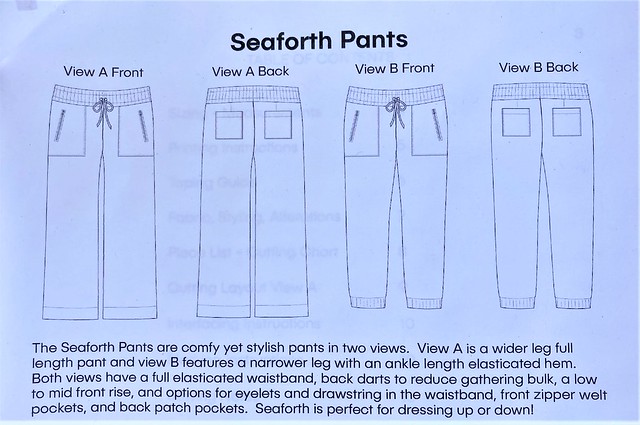
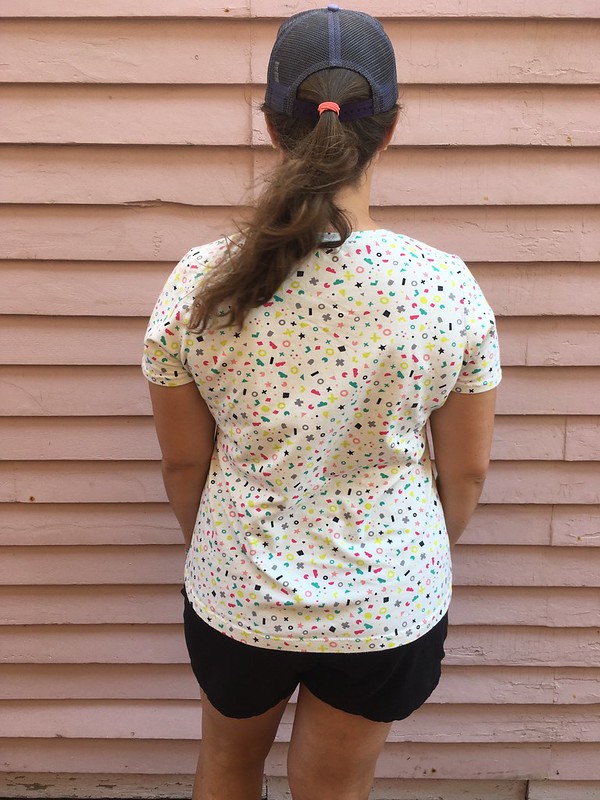
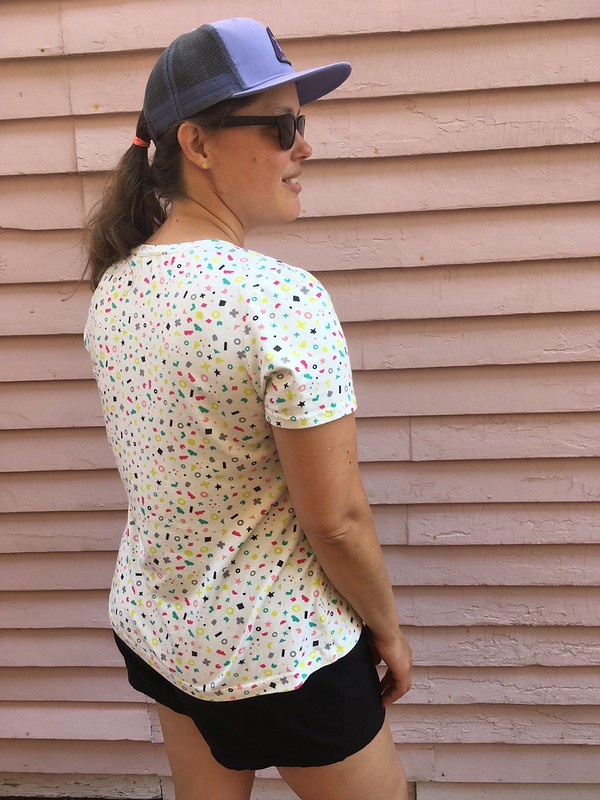
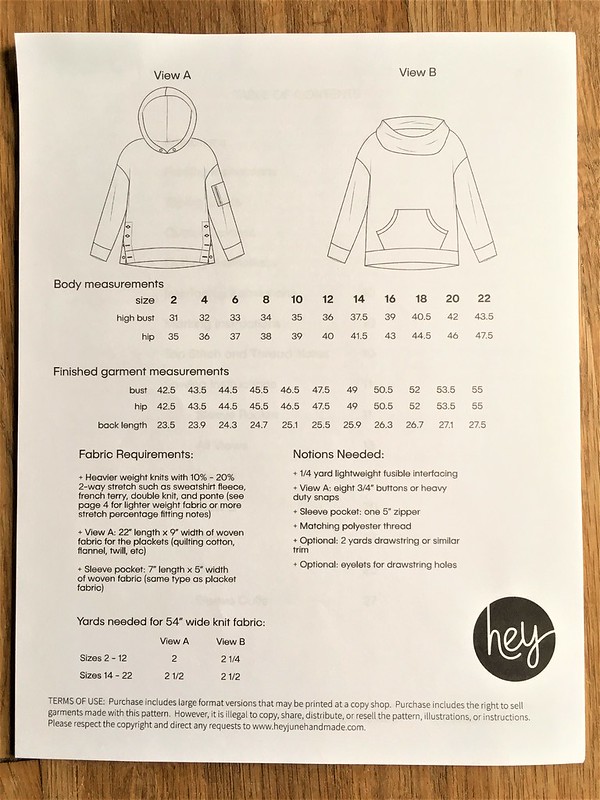
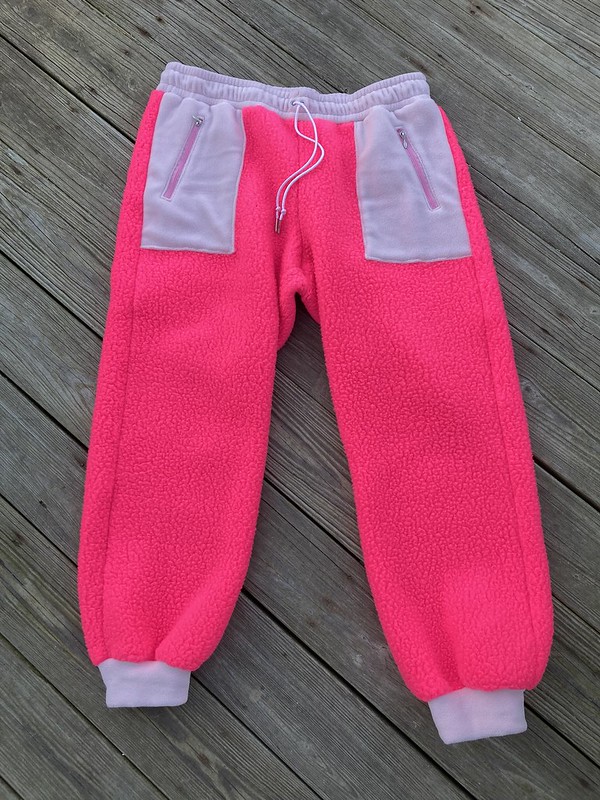
I wanted to take the Seaforth Pants from Hey June Handmade, a pattern for elastic-waist, wide-leg pants drafted for woven fabrics, and use View B, which has a narrower leg as my base for this project, since I suspected the pattern could work well for knits as well as the wovens it was drafted for. I wanted to make these in fleece and add a cuff to the bottom for the coziest sweat pants ever. I didn’t want slim joggers. I wanted roomy sweat pants that would feel soft and wonderful when you put them on.

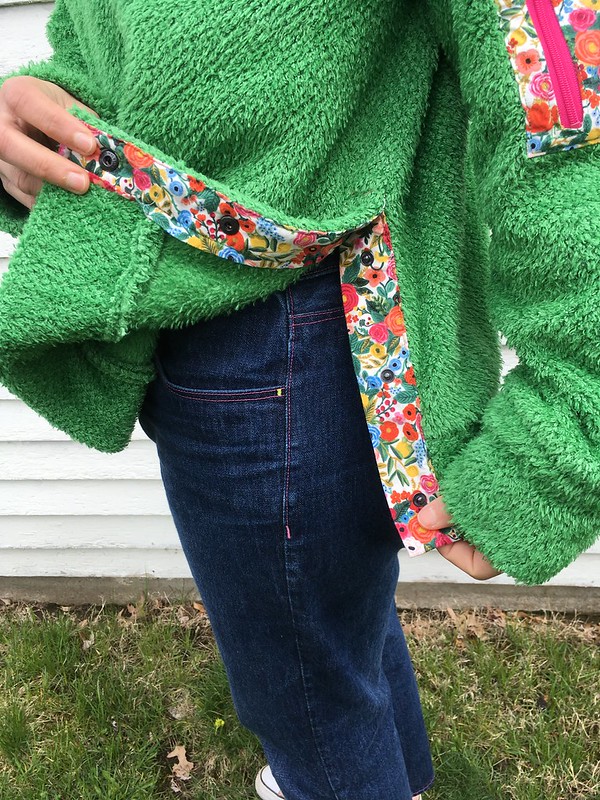
To attempt this, I chose three yards of the long-dreamed-of Polartec Thermal Pro large and small clump shearling in “hot pink” which is nice and wide at 62 inches. I liked the idea of pants with different shades of pink, but I wasn’t sure about the bulkiness of the fabrics I was choosing. I felt confident I could make the shearling work for the pants. Or maybe I just wanted the pants I envisioned so much that I was going to MAKE them work no matter what. You can form your own opinions on that. 😉 But which fabric was the right color for all the extra parts while also not being too thick? I poured over the website time and time again trying to decide. What helped me the most in the end was the box of swatches my husband got me a few years ago. I could feel the fabrics and layer them to see how thick everything would be. So, with a mix of trepidation and confidence, I requested half a yard of Polartec Classic 200 double velour/recycled fleece in “rose petal” because it was the perfect shade of pink for my vision (and 60 inches wide–yay!).

Mill Yardage + Pattern and Branch = Neon Pink Polartec Seaforth Pants!

I have made View B of these pants before, so I already had the pattern pieces cut out. I tried on the pants I had made previously just to get a sense of whether or not I wanted to make any changes to the pattern, and to figure out how long I wanted them. The fit of the pattern seemed good as it was. I wanted the inseam to be about three and a half inches longer that what View B is drafted for with a cuff that was two and a half inches tall. If you were following the directions as written for View B, you would lose one and a half inches to the hem allowance, so if I didn’t fold the hem up, and used a half inch seam allowance as in the rest of the pattern, I would need a cuff that was three inches tall for a finished height of two and a half inches. I measured my ankles, did some sketching, and then made a little pattern piece out of tracing paper. I would have to see if this would work.

Mill Yardage + Pattern and Branch = Neon Pink Polartec Seaforth Pants!
High-tech calculations! Haha. I changed things a bit before the final iteration.
Mill Yardage + Pattern and Branch = Neon Pink Polartec Seaforth Pants!
My cuff pattern piece

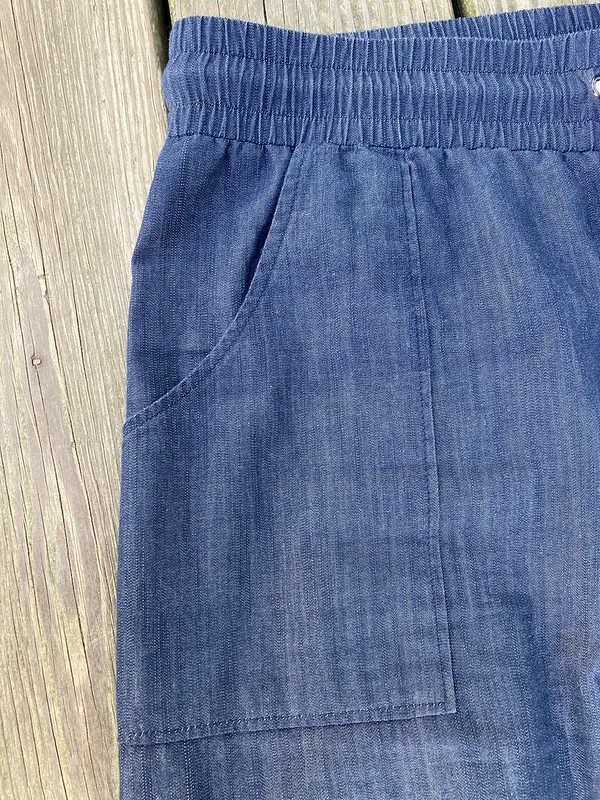
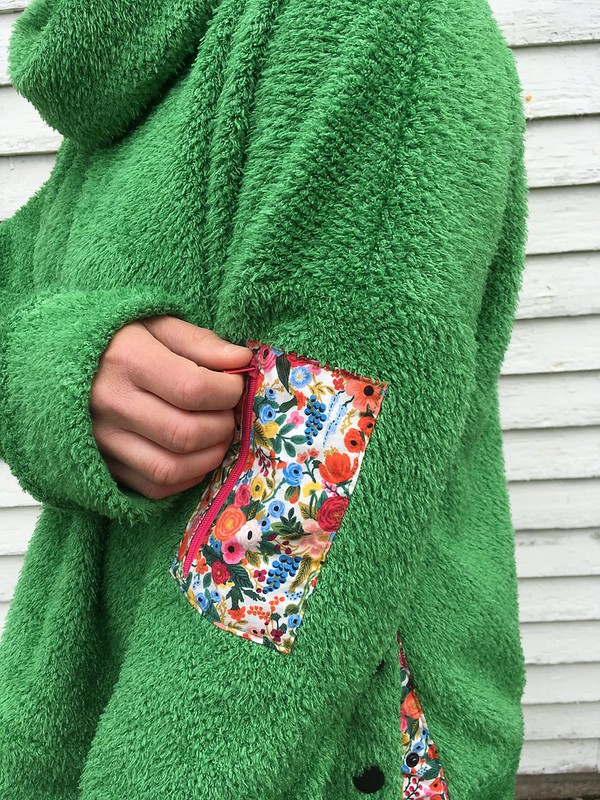
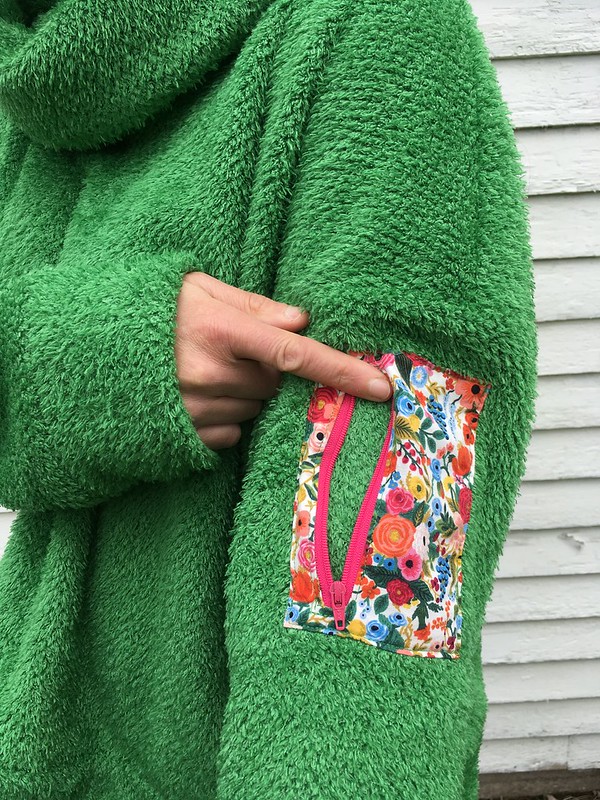
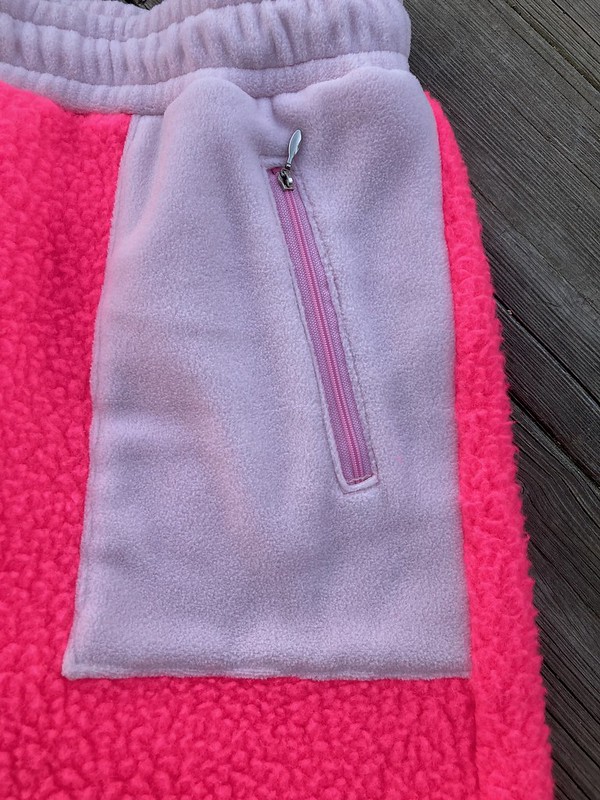
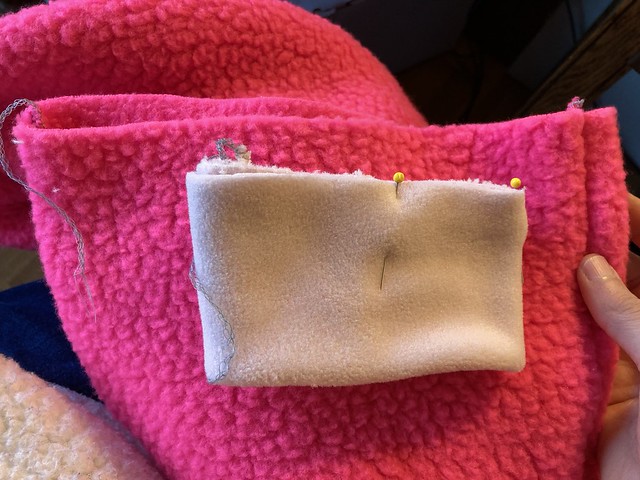
Putting the pants together was not hard, although the pockets required a bit of focus. I relied on my sewing machine for the pockets, using a straight stitch since I didn’t need a lot of stretch in those seams. My stitching was a little wobbly, but I knew that once I wasn’t staring at it up close, I wouldn’t notice it. I used sew-in interfacing where interfacing was necessary, because you can’t iron this fleece without melting it, and I basted and pinned things in place until I had sewn them down.

Mill Yardage + Pattern and Branch = Neon Pink Polartec Seaforth Pants!
Front pocket
Mill Yardage + Pattern and Branch = Neon Pink Polartec Seaforth Pants!
Back pocket

Once all the pockets were on and it was time to put the actual pants together, I got illogically nervous about whether or not they would fit. It didn’t matter that I had tried on the pair I had already made. What if I blew it and this idea didn’t work? So, to make myself feel better, I serged the inseams and crotch seam and then basted the outseams together just in case. Guess what? They were fine. The pattern hadn’t mysteriously morphed into something else. What a shock! My fears were unfounded!

It was coming out great.

Mill Yardage + Pattern and Branch = Neon Pink Polartec Seaforth Pants!
My pants before adding a waistband and cuffs
Mill Yardage + Pattern and Branch = Neon Pink Polartec Seaforth Pants!

So, I serged up those outseams, put on my waistband, and then got ready to figure out the cuffs.

Mill Yardage + Pattern and Branch = Neon Pink Polartec Seaforth Pants!

The cuffs were about half as wide as the lower pant legs. Polartec 200 does stretch, but it was asking a lot of it to stretch so much that I could just sew those cuffs on to the bottom of the bulky Thermal Pro.

Mill Yardage + Pattern and Branch = Neon Pink Polartec Seaforth Pants!

I thought about it for a few days, and then mulled over my options with my best problem solving friends. In the end, I machine stitched around the bottom of the pants with a basting stitch and then gathered them. I then hand basted the cuffs to the pants and tried them on.

Mill Yardage + Pattern and Branch = Neon Pink Polartec Seaforth Pants!
I used this box to hold the circumference I needed while hand basting

They seemed good, so I used my sewing machine, which I’m more skillful with than my serger, to sew them together with a zigzag stitch.

Mill Yardage + Pattern and Branch = Neon Pink Polartec Seaforth Pants!
Wonky, but attached…

Then I went around again with my serger to neaten everything up. And it worked! The pants were perfect!

Mill Yardage + Pattern and Branch = Neon Pink Polartec Seaforth Pants!
Cuffs serged on and looking much neater
Mill Yardage + Pattern and Branch = Neon Pink Polartec Seaforth Pants!
Success! Yay!
Mill Yardage + Pattern and Branch = Neon Pink Polartec Seaforth Pants!
Yes, these pants ARE extremely bright in person. I love them.

Mill Yardage + Pattern and Branch = Neon Pink Polartec Seaforth Pants!

That being said, if you decide to try this, you may have more luck making the cuffs from something really stretchy like a thinner Power Stretch or just skipping the cuffs altogether and binding the bottoms of the pants with binding or something. HOWEVER, if you are as stuck on an idea like this as I was, the old adage holds true that where there is a will, there is usually a way.

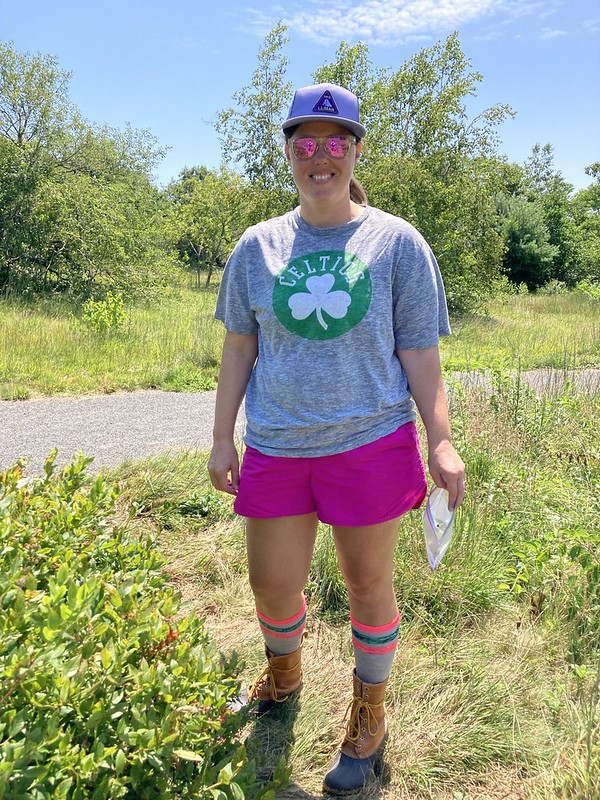
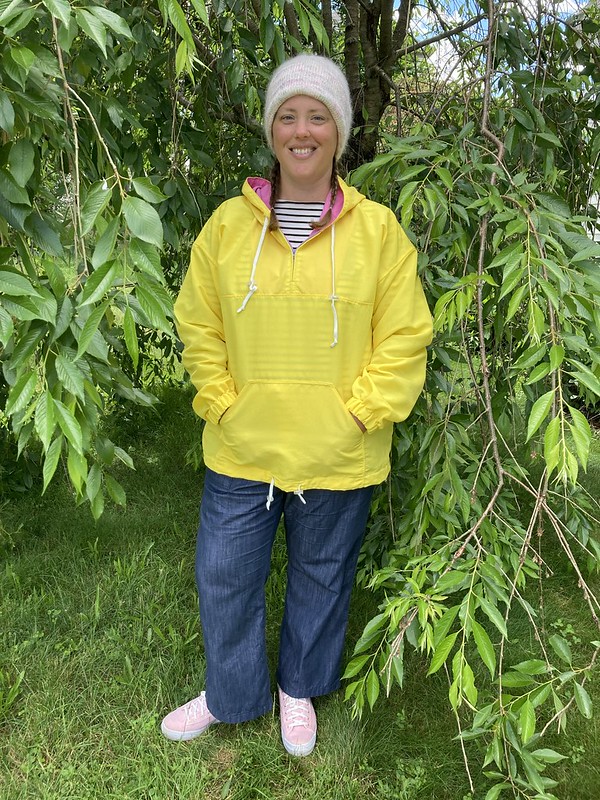
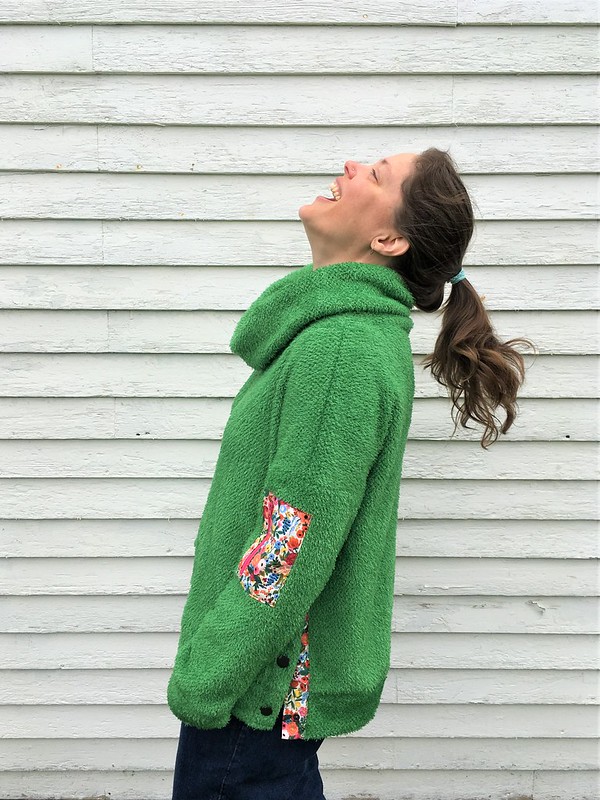
When I finished these, I was THRILLED. These pants were exactly what I was going for! Spring may be right around the corner, but at least where I live in New England, these pants will get more wear than just in winter (these will come to the beach with me). Here is what I can tell you about wearing these. They are extremely soft, and they are extremely warm. That Thermal Pro is no joke. As soon as I put these on, I felt the warmth.

Mill Yardage + Pattern and Branch = Neon Pink Polartec Seaforth Pants!

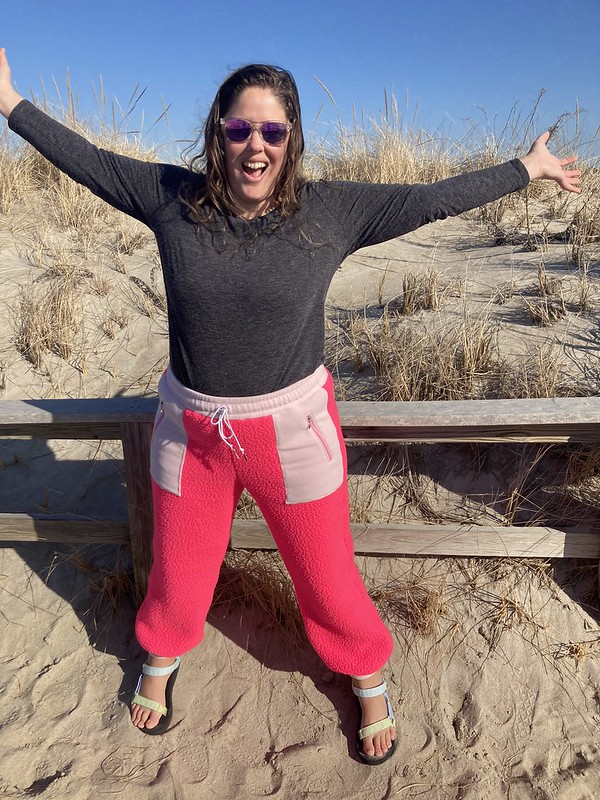
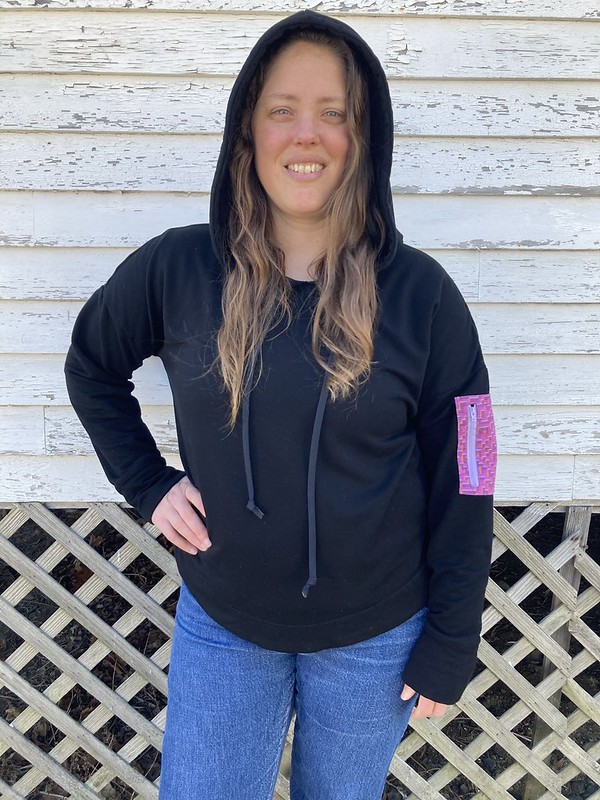
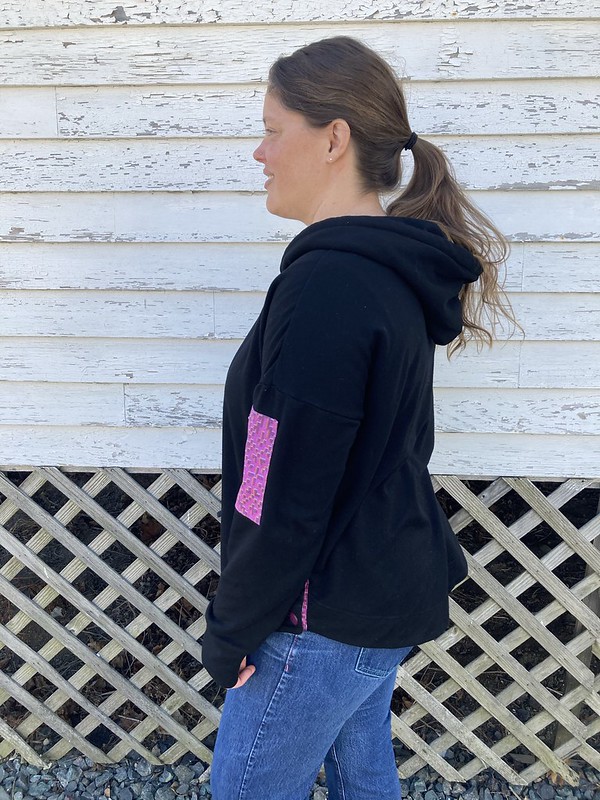
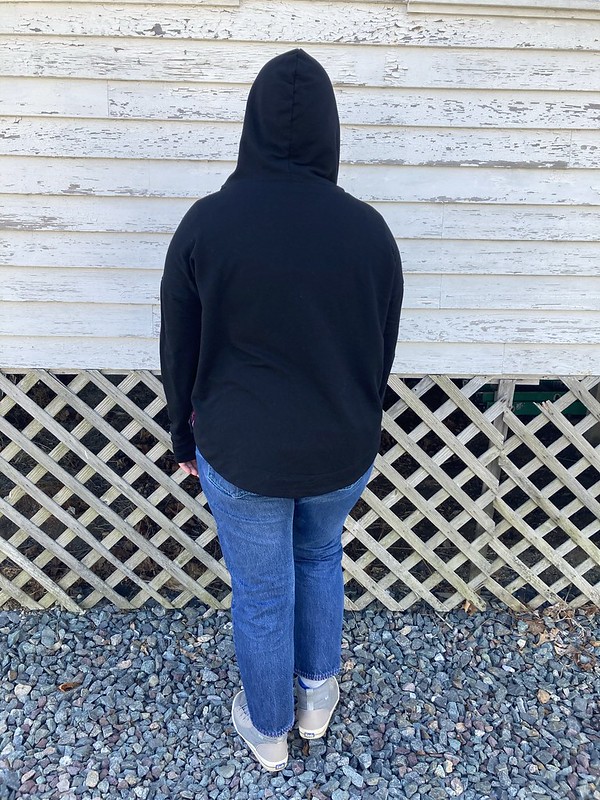
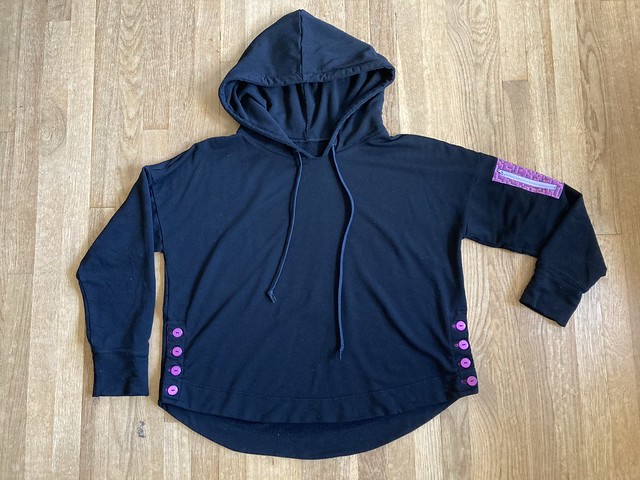
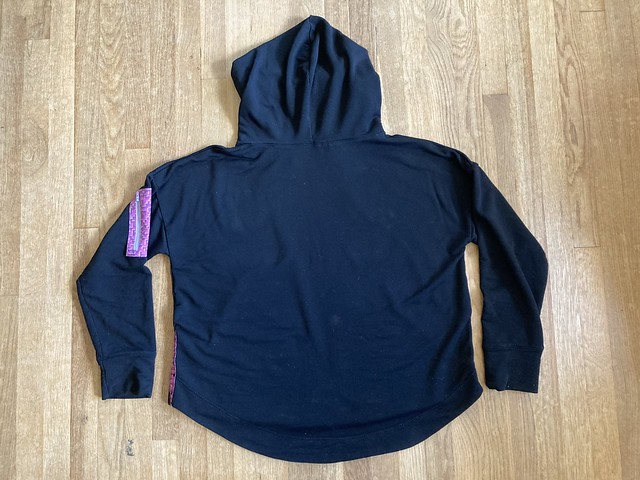
In our area, as soon as there is a whiff of spring and a nice-ish day, people kind of lose it and race to the beach. Seriously. People do not waste nice weather here. So, naturally, I had to go too. 😀 The beach was probably twenty degrees (Fahrenheit) cooler than our town and windy, which was perfect for testing the pants. The wind does come through a bit, but less so than, say, this sweatshirt I made.

Mill Yardage + Pattern and Branch = Neon Pink Polartec Seaforth Pants!
These sweat pants are beach approved!

If you were wearing this fabric in winter with a base layer, you would probably feel pretty good. For a cool, but not bitterly cold wind, it was just right. You can easily believe that I saved all my scraps in the hopes of more fun projects when the temperature dips again next fall/winter.

Mill Yardage + Pattern and Branch = Neon Pink Polartec Seaforth Pants!

I think that all the things recommended on the website for this shearling fabric (coats, vests, heavy blankets) would be perfect applications. For instance, wouldn’t this be a fun lining for a winter-worthy jean jacket? Or a shearling vest? And, the Polartec 200 was not too bulky for all my accent pieces. In fact, it was just right. I would say it feels just a little bit thicker than a beefy t-shirt.

After sewing this pattern in fleece, I have a few tips on ways to reduce bulk if you try this yourself.

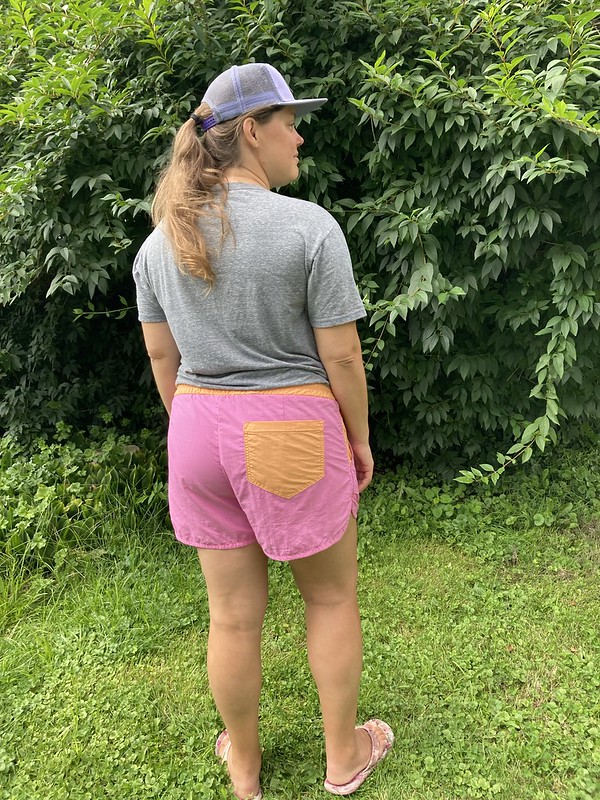
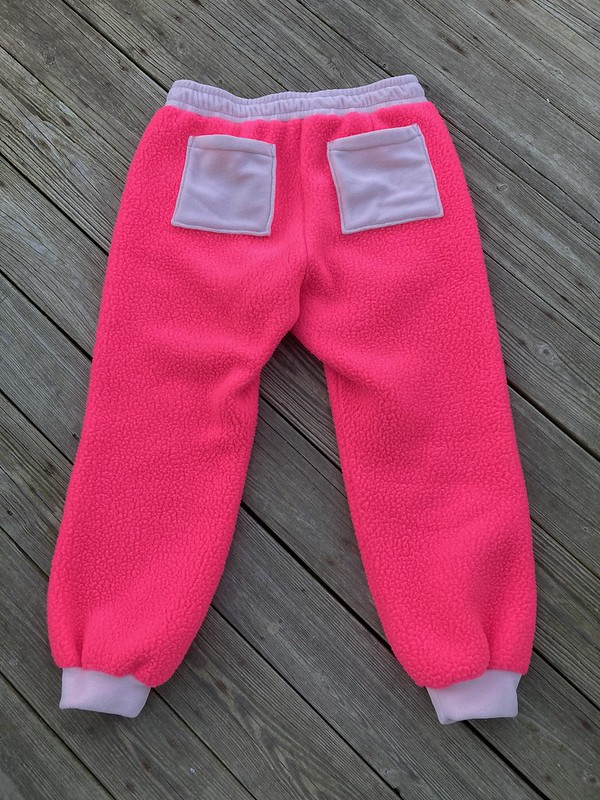
Increase the seam allowance on the pockets where they are topstitched to the pants just a bit to make them even easier to sew on. When folding those same seam allowances under, cut out a little square where they overlap right at the corner. Just don’t cut too far in. On your back pockets, just fold the tops over once and stitch down since the raw edge won’t fray. I would also probably eliminate the back darts on the pants. If you opt not to remove the darts, you can cut the dart folds open on the inside after sewing them rather than folding them to the side to make things a little less bulky in the back.

Mill Yardage + Pattern and Branch = Neon Pink Polartec Seaforth Pants!

Anyone can have regular sweat pants, but it’s the people who make their own clothes who can have extraordinary sweat pants. 😉

Mill Yardage + Pattern and Branch = Neon Pink Polartec Seaforth Pants!

Thanks again to Mill Yardage for providing this excellent fabric. As of this writing, both fabrics look like they are still available.

I’ll leave you with this song and dance from the Movie “Funny Face”. Think pink!

Summer Adventure Clothes: Butterick 4526 Bathing Suit and Romy Rash Guard

Standard
Summer Adventure Clothes:  Butterick 4526 Bathing Suit and Romy Rash Guard

I have finally achieved my dream from last summer. It may have taken me until nearly the end of this summer, but I did it nevertheless! That being said, I give myself an A+ for effort and concept, but only a C for execution.

So what did I make? Well, it’s really a “system” of clothes for summertime exploration. I made a bikini + rash guard that can be paired with my Supplex shorts for all manner of summer trips, whether they include water or not.

My daughter and I spent last summer exploring the area around where we live, and it was then I realized that the optimal clothes for this would include underwear that could get wet, shorts that could also get wet (or at least dry quickly), and a rash guard that could be worn as a t-shirt or be swapped for a t-shirt as needed. I made the Vero Beach Set shorts by Hey June Handmade in a quick-drying Supplex earlier this summer. Now I also have a basic sports bra and underwear style bikini from Butterick 4526 (View D) to be worn with a rash guard version of the Tilly and the Buttons Romy top.

Summer Adventure Clothes:  Butterick 4526 Bathing Suit and Romy Rash Guard

The system works–it’s very comfortable and does what I want in terms of function. Where the rash guard and suit go a bit off the rails is in the fit/polish section of things. That being said, the fit is no worse than you would find in ready-to-wear (RTW) clothes, but those of us who sew know we can make better than RTW. (Sewing power!)

Let’s talk about each pattern.

Tilly and the Buttons Romy as rashguard

I bought a copy of the Romy top online from Chateau Sew & Sew, a new-to-me shop based in Louisiana, earlier this year with plans to make a unique t-shirt. I even have some great fabric set aside for it. As I was thinking about rash guards, though, I wondered if such a stylish shirt would also make a cute rash guard.

Summer Adventure Clothes:  Butterick 4526 Bathing Suit and Romy Rash Guard

I didn’t want one that was too tight, but they are swimwear and typically tighter than a t-shirt, so I sized down one size to a 6 (Tilly has her own sizing system, so I’m using her size numbers here). I cut out my top from some poly/spandex swimwear fabric my husband got me last year from spandexbyyard.com. It feels substantial and didn’t seem see-through, so I didn’t line it. Also, I knew I would have a suit underneath if I was wrong about the opacity. Luckily, it was pretty darn opaque, as you can see from the photos of me wearing it further down. It stayed that way when wet, too.

Summer Adventure Clothes:  Butterick 4526 Bathing Suit and Romy Rash Guard

I serged whenever possible, and used a dashed zigzag stitch on my regular machine when I couldn’t (I’m blanking on the name of that stitch right now…). It was a pretty easy, enjoyable sew. Tilly’s instructions and pictures are really top-notch (and fun with all the bright colors).

Summer Adventure Clothes:  Butterick 4526 Bathing Suit and Romy Rash Guard
Nice finishing detail on the inner front of the shirt!

When I was done, I tried it on, and…something was just off. The shoulder fit was weird and the front draped in a way it wasn’t supposed to.

Summer Adventure Clothes:  Butterick 4526 Bathing Suit and Romy Rash Guard

My husband helped me figure out a solution. I just folded the excess under in the front and zigzagged with that same dashed zigzag stitch. It wasn’t perfect, but it was better.

Summer Adventure Clothes:  Butterick 4526 Bathing Suit and Romy Rash Guard

It’s very comfortable, but if I make this again, I really hope the larger size will fit my shoulders a bit better because I’m not sure how to fix it if it doesn’t! Also, I should note that the arms are comfortable, but if this were a regular t-shirt, I would want the sleeve hem circumference to be just a bit wider, so hopefully a larger size will fix that too.

Summer Adventure Clothes:  Butterick 4526 Bathing Suit and Romy Rash Guard

It’s very comfortable to wear. It does float up a bit because it’s not super tight, but that doesn’t matter since I’m just wearing this for fun, not for any kind of sport competition. It stays wet for awhile after you swim in it, but it’s surprisingly comfortable despite that. I went swimming and then wore it afterward for a few hours while we did some exploring, and it worked great.

Summer Adventure Clothes:  Butterick 4526 Bathing Suit and Romy Rash Guard

Butterick 4526, View D

Before making this, I went back and forth on whether to use this pattern or buy the Cottesloe Swimsuit from Megan Nielsen. Stylistically, they are very, very similar. Long ago, I made Butterick 4526, View C (one of the one-pieces), and had to count it as a fail due to poor pattern placement on my part, and excessive ease on the part of the pattern (not to mention, I forgot to sew in a shelf bra–haha, whoops!). Still, I already had this pattern, so I decided to give it one more try, but with the modification that I would make my finished size in this pattern match up with the finished measurements of the Cottesloe suit in my Megan Nielsen size.

Summer Adventure Clothes:  Butterick 4526 Bathing Suit and Romy Rash Guard

I know there is always a lot of discussion in the sewing community about the ease in Big 4 patterns. I typically like the amount of ease included and nearly always make my size according to my measurements. The place I don’t trust the included ease is in situations like this–with a pattern that is a few years older (this is copyright 2005) and is for a garment that is supposed to have negative ease.

My decision to size down meant that even though my measurements put me in a 20/22 bust (C/D cup) and 22 waist and hip in the Butterick pattern, I needed to size down to a 14 bust (C/D cup) and 16 waist and hip. That’s pretty significant! To figure this out, I measured all the necessary pattern pieces minus seam allowance.

Summer Adventure Clothes:  Butterick 4526 Bathing Suit and Romy Rash Guard
Here are finished sizes for any of you that might be attempting to make this pattern.

Except for showing you the photo of all the finished sizes above in case you are also sewing this, I won’t bore you with my notes, but trust me when I tell you there was a lot of measuring and math going on! The sizing down I did was possible because I had fabric with at least 50% stretch. Since my fabric was quite stretchy, I also didn’t add any extra length. This worked out well, thankfully.

Summer Adventure Clothes:  Butterick 4526 Bathing Suit and Romy Rash Guard
Butterick 4526, view D, front
Summer Adventure Clothes:  Butterick 4526 Bathing Suit and Romy Rash Guard
Butterick 4526, view D, back

Before sewing, I read through the instructions for this pattern. I think they would have been great at a time when we didn’t have the performance/swimwear fabrics we have now with their excellent stretch and recovery, when many people used sewing machines that may not have had a zigzag stitch, and almost no one had sergers. If you happen to be sewing with vintage fabric on a vintage machine, these instructions will probably work great for you. If you are using modern fabric and tools, there are better ways to sew a bathing suit.

Summer Adventure Clothes:  Butterick 4526 Bathing Suit and Romy Rash Guard
You definitely don’t see too many darts in swimsuits these days!
Summer Adventure Clothes:  Butterick 4526 Bathing Suit and Romy Rash Guard
There’s even a dart in the lining!

Because I had modern fabric, a machine that could sew a zigzag, and a serger, I used the instructions in the Cottesloe sew-along. I also looked back at an older, but extremely helpful bit of information from a 2013 post on the Kaddiddlehopper blog all about swimwear. (If the link doesn’t work, you may be able to find it by Googling “Kadiddlehopper SwimAlong 2013 tips for a professional finish”.) This post gave me professional results on my first really successful bathing suit that I wore for years. Because of this post, I only used 1/4″ elastic at the neckline and used 3/8″ for the arm and leg holes. I really wish I had done that for the Mairin suit I made last year. (The leg holes on that suit do not feel secure. 1/4″ elastic there is just not enough!) I used 3/4″ elastic for the bottom of the bikini top and for the waist of the bottoms. I would have tried 1″, but didn’t have any. Luckily 3/4″ was great. I only used my serger for a few parts (basic construction). For inserting elastic, I used my regular machine with polyester thread in the needle and wooly/bulky nylon in my bobbin, another tip I picked up from the aforementioned blog post. I used a stretch needle, a walking foot, the lightest pressure on the presser foot (one on my machine) and a three-step zigzag (THAT’S what it’s called!) with a height of 6 and a length of 0.5, but you should test all that on scraps for yourself. I don’t think that particular height and width are typical. I like them because when I sew them on my test scraps and then stretch hard in both directions, the stitches don’t pop.

I used up some leftover shiny lining for the top and the more cottony-feeling lining I got from Spandex by Yard last year on the bottoms. (Spandex by Yard is where I got the pink swimwear fabric from too, also last year.) Both linings work great, and I never notice the difference when wearing this.

Summer Adventure Clothes:  Butterick 4526 Bathing Suit and Romy Rash Guard
Butterick 4526, view D, front inside
Summer Adventure Clothes:  Butterick 4526 Bathing Suit and Romy Rash Guard
Butterick 4526, view D, back inside

The suit looks a little tortured when you see it flat, but it fits pretty well when it’s on. It’s not a perfect fit, but it’s very secure and supportive, and really does the job.

Conclusion

I really like this sort of bathing suit system. It’s really comfortable and has the functional benefits of a bikini with the modesty of a tankini, and the comfort and versatility of regular activewear clothes. While sewing doesn’t always save money over RTW, I think swimwear (like bra making) is an exception. I know I saved money on the outfit as a whole.

I would make this style of bikini again to wear under a rash guard as a more versatile and comfortable tankini, although I don’t know if I would use the Romy as a rash guard pattern again. There are a lot of other great patterns out there that I would probably try instead.

If I do make this style of suit again, I would happily fork over the money for either the Megan Nielsen Cottesloe or the newly released Jalie Claudia Bikinis. The Cottesloe is basically the more modern, better-fitting version of Butterick 4526 with the one and two piece options, plus Megan Nielsen’s excellent instructions. Jalie’s Claudia is a little different and doesn’t have the one-piece option, but comes from a company that has vast amounts of experience drafting swimwear and other performance-wear with a truly amazing size range. Either way, you couldn’t go wrong. As for Butterick 4526, I’m glad I tried it, but I’m ready to move on.

Finally, I would definitely make more Vero Beach shorts. Those get an A+ for concept and an A+ for execution and fit. The system as a whole works and is really, really great for outdoor summertime adventures. I’m so happy I finally got around to making it, even with its imperfections.

Hey June Handmade Vero Beach Shorts in Woven Supplex

Standard
Hey June Handmade Vero Beach Shorts in Woven Supplex

Hi, everyone! I hope this finds you well. As you may have noticed, posting to the blog gets a bit patchy in the summer, so after taking July off, I’ll probably post a bit in August, although not as regularly as usual. It matches my sewing though. Even though I LOVE summer sewing, I also love being outside with my family and cooking and baking with summer produce, so the summer sewing never ends up being quite as plentiful as I imagine it will be.

Last summer, my youngest daughter and I spent a lot of time exploring the area around where we live. Sometimes we were in the woods, sometimes we were at the beach or by a river where we might want to swim. I hoped that by making us some shorts in woven Supplex, a texturized nylon fabric that feels a lot like cotton, but is wicking and breathable (etc., etc.), we would have bottoms we could wear on our adventures this summer that could get wet and then dry quickly. It was all about versatility! The shorts from the Vero Beach Set by Hey June Handmade seemed perfect for this.

Hey June Handmade Vero Beach Shorts in Woven Supplex

During the winter, I ordered several cuts of woven Supplex from The Rainshed with the intention of making our adventure shorts, as well as a few other things I had in mind.

Hey June Handmade Vero Beach Shorts in Woven Supplex
Newly washed and dried woven Supplex and Taslan (the generic name for Supplex) ready and waiting to be sewn up!

(You can see the “sweatshirt” I made with the yellow Taslan/Supplex as part of my Spring Outfit here.) Normally when I batch sew, it is groups of different patterns, but this time, I made three of these pairs of shorts at once–two for me, and one for my daughter.

For my shorts, I sized up one size from where my measurements put me. The instructions suggest doing this if you have a fabric with no give to it, and that definitely applies to this Supplex. I also like a good bit of ease, and sizing up made these fit just right. For my daughter, I chose a size based on her waist and hoped the shorts would fit, as she isn’t quite in adult sizes yet. We used the line drawing as a coloring page, since we had gotten two colors for her shorts, and she colored in everything the way she wanted it as a guide for me.

Hey June Handmade Vero Beach Shorts in Woven Supplex

One thing to note, that I didn’t initially realize, is that the binding for the shorts is not visible on the outside if you follow the pattern directions. Of course you could reverse the directions around Step 19 if you want it to show.

Hey June Handmade Vero Beach Shorts in Woven Supplex

After cutting out her shorts and mine, I realized that I still had enough fabric left from hers to cut out another pair, and since I liked her colors, and she didn’t mind, I cut out some shorts with her fabric, but with the colors in the opposite positions for me.

Hey June Handmade Vero Beach Shorts in Woven Supplex
Front of the Vero Beach Shorts. Mine are top left and bottom. Top right are for my daughter.
Hey June Handmade Vero Beach Shorts in Woven Supplex
Back of the Vero Beach shorts.

When it came time to sew, I started with a Microtex 90/14 needle, but that made my machine sound like it was punching through the fabric, so I switched to a Microtex 70/10 needle, and that was better. I also found that my thinner silk pins were easier to use than the pins I normally use (which are actually quilting pins). I threaded my serger for finishing seam allowances since this fabric doesn’t press well, and frays a fair amount, and was careful to choose thread colors for both my sewing machine and serger that would look good on all three pairs of shorts so I wouldn’t have to switch (plus I love a good contrast thread color). As far as elastic, I bought what Joann’s had in the appropriate width, which turned out to be Underwear and Pajama Elastic.

Hey June Handmade Vero Beach Shorts in Woven Supplex
Inside front of Vero Beach shorts
Hey June Handmade Vero Beach Shorts in Woven Supplex
Inside back of Vero Beach shorts

A slightly higher machine tension (five on my machine, rather than the normal four) gave me more balanced stitches. I rarely change my tension, but it did help on this project. I ran into a little bit of trouble part way through with skipped stitches. Everything had been going fine, and then I started to have problems. After trying a bunch of things, I didn’t know what else to do, so I called the sewing help hotline (i.e. my Mom) and she suggested cleaning my machine and then changing thread brands. So, I cleaned everything out and switched from Coats & Clark to Gütermann, and it worked! I hadn’t thought of that, but after she said it, I remembered that my machine has the same issue, but in the opposite direction with topstitching thread–Coats & Clark works, but Gütermann doesn’t. Funny, huh?

Hey June Handmade Vero Beach Shorts in Woven Supplex
An up-close look at some of the topstitching and fun details on these shorts
Hey June Handmade Vero Beach Shorts in Woven Supplex
I used leftover yellow Taslan from the windbreaker/sweatshirt in my Spring Outfit to add fun pops of color to my magenta shorts.

When it came to interfacing, I attached self fabric with a washable glue stick, since I didn’t want to try fusing interfacing to this fabric. Ironing nylon fabric like this sounds like a recipe for melted fabric!

Hey June Handmade Vero Beach Shorts in Woven Supplex

I also serged the top edge of the back pockets since my serger is set at a 1/4″ wide stitch width (Have I ever actually changed that? No! Haha). At the time, I wondered if I should have serged other areas in the pockets to eliminate fraying, but after having worn the shorts a lot, it hasn’t been an issue, so I guess whatever I did was fine.

Hey June Handmade Vero Beach Shorts in Woven Supplex
I double stitched around the edges of my back pockets to cut down on fraying and add strength.

Here are a few tips for this pattern: make sure when you trim your seam allowances in step 20, that you use a washable marker or chalk to mark the notches on the curved sides/bottoms of your shorts in a way you can still see after trimming–you will need those marks to help you line up the sides.

Hey June Handmade Vero Beach Shorts in Woven Supplex

I also recommend marking the drawstring holes even if you aren’t inserting a drawstring, just so you know where the front of the waistband is for when you are attaching it to the shorts. I had planned to insert drawstrings in mine, but changed my mind. I was still glad I had those markings, though.

So…how did they turn out? Well, I wish I had about five more pairs, so they are great! And my daughter’s fit well, too. I wasn’t sure how hers would fit since they are a women’s size, but she loves them and they fit great! We have worn them to the beach, wild blueberry picking, for exercise, and as every day wear. I usually wear them as soon as they are out of the wash. I love them. I was afraid the pink and orange ones would be a bit see-through (something I began to worry about after I had cut them out since they seemed fine before that), but unless you are wearing really dark or patterned bottoms underneath it’s not an issue, and if it’s a swimsuit, well, who cares? The magenta ones are completely opaque.

I didn’t take pictures of my daughter since I don’t share pictures of my kids on my blog, but here are some she took of me when we went wild blueberry picking. Try not to be jealous of my outfit–fashion + protection against ticks and mud! What more could you want?! Hahaha

Hey June Handmade Vero Beach Shorts in Woven Supplex
I feel so New England-y! L.L. Bean boots and hat, Celtics t-shirt, anti-tick knee socks, and picking wild blueberries!
Hey June Handmade Vero Beach Shorts in Woven Supplex
These shorts were just right–I never got too hot in them and the big pockets were awesome.
Hey June Handmade Vero Beach Shorts in Woven Supplex
Here’s a picture of some of the wild blueberries–they’re teeny tiny, about the size of a pencil eraser–but delicious! I’ll never reveal our not-very-secret secret spot on the internet, but if you know me in person, feel free to ask. 😉

These shorts are so versatile and comfortable, I would love to sew them up in a bunch of different fabrics–everything from linen to lightweight denim and maybe even athletic knit (worth a try!). They would also make great pajama shorts. The instructions were excellent and the pockets are so nice and large. I really, really recommend these. Knowing my love for nearly always trying new patterns, I can’t say for sure that I will circle back to these, but I hope I do, because they are great.

Hey June Handmade Vero Beach Shorts in Woven Supplex
Picture-taking motivation has been pretty low this summer, so I ran outside when I was already wearing these one day, and had my daughter snap a few pictures of them.
Hey June Handmade Vero Beach Shorts in Woven Supplex

The pullover that’s included in this pattern looks nice, too, so we’ll see if I try that someday. Wouldn’t it be great in double gauze? The more I sew with patterns from Hey June Handmade, the more I love them. The instructions are so good, many of the styles are a great match for me, and I am coming to really trust Adrianna’s expertise and advice in each pattern. She knows what she is talking about!

I’m also really glad that I have tried out woven Supplex. Sometimes I want to sew a garment because the pattern is intriguing and new, and sometimes it’s the fabric I find tempting. I still have some uncut blue-gray yardage that I hope to make into the Itch to Stitch Sequoia Cargos so I will have some woven hiking pants, but we’ll see what happens. Technical fabrics are so interesting, and being able to make your own outdoor gear feels like such a win!

And what’s up next in the queue? I’m working on a rash guard and bathing suit now and am hoping to make the Fibre Mood Lola Top and Elizabeth Suzann Clyde Work Pant pattern in linen after that, but we’ll see! I’ll keep you posted although it may be a bit patchy through the end of summer. 🙂

Spring Outfit Challenge Finale and the Hey June Handmade Seaforth Pants

Standard
Spring Outfit Challenge Finale and the Hey June Handmade Seaforth Pants

It’s the first week of official summer and my Spring Outfit is finished! Hahaha. Let’s just pretend this outfit is still seasonally appropriate where I live, shall we? Let it be noted that I did actually finish the last of it a few days before the end of spring, but it was sadly too late to photograph and write up last week, plus I wasn’t feeling great, so I just didn’t get it to the blog. That means this week, instead of ‘outside in June’ photos, it’s time to wrap up this challenge and move on to some summer sewing! Woohoo!

Spring Outfit Challenge Finale and the Hey June Handmade Seaforth Pants
Just wearing my warm hat and long sleeves in the warm weather…totally normal.

If you have followed this challenge of mine to create a spring outfit (first laid out here), you may be surprised to see a different pants pattern in the title of this post. My initial plan was to make the Folkwear Sailor Pants. However, when the time came to work on the muslin, I read through the directions and realized that these were going to take more than a little time. They are different than normal jeans, and they would benefit from a really detailed muslin where I tried out all the techniques in my test fabric as well as looking at fit. At that point, the weather was warming up, summer sewing was galloping full-speed through my mind, and I just did not want to make these. So I put them on hold. My pattern is traced and my muslin cut out, but they can wait until fall. Maybe I will make them up then.

I have really wanted to make the Seaforth Pants by Hey June Handmade ever since they were released last year, so I bought that pattern and cut them out of some denim-y looking chambray that has been languishing in my stash for the last few years. My goal was to make them fast and hope they would fit. Not only would these complete my spring outfit, they would also be great pants to wear in the summer…more on that in a bit.

First, though, check out my spring outfit! I made it all but the shoes!

Spring Outfit Challenge Finale and the Hey June Handmade Seaforth Pants

Maybe someday I’ll make shoes too, but for now, it was Keds to the rescue. In a perfect world, I would have sought out some oceanside wharf or something to take my pictures at since this outfit is nautical-ish in my mind, but instead you get some occasionally silly pictures closer to home.

Spring Outfit Challenge Finale and the Hey June Handmade Seaforth Pants
One of the aforementioned silly pictures. I think we were joking about Funny Face or something at that point.

Here are the patterns, yarn, and fabric I used from top to bottom. You can find more details on notions and small odds and ends in previous blog posts where I talk about each pattern in greater detail.

+ The Oslo Hat – Mohair Edition by Petite Knit

-mystery yarn that I think is wool plus Farmer’s Daughter Mighty Mo mohair in the color “Stagecoach Mary” from Wool & Co.

+ McCall’s 5303 Sweatshirt circa 1991

Taslan in yellow and Supplex in “Candy” (pink) from The Rain Shed

Spring Outfit Challenge Finale and the Hey June Handmade Seaforth Pants

+ Coco top by Tilly and the Buttons

-Parchment/Black 100% cotton horizontal stripe jersey knit from Fabric Mart Fabrics (sold out)

Spring Outfit Challenge Finale and the Hey June Handmade Seaforth Pants

+ Seaforth Pants (modified) by Hey June Handmade

-old Robert Kaufman Chambray Union Dark Indigo from Pintuck & Purl (sold out)

Spring Outfit Challenge Finale and the Hey June Handmade Seaforth Pants

+ Undergarments

+ Sew It Forward Socks by Ellie & Mac

-old Cotton + Steel cotton/spandex knit from Pintuck & Purl (sold out)

Spring Outfit Challenge Finale and the Hey June Handmade Seaforth Pants

I really like how this outfit turned out, and I think I will get a lot of wear out of most pieces. If I had to guess, I would say that the Oslo Hat and Seaforth Pants will get the most wear, possibly followed by McCall’s 5303. I’m guessing the socks will get the least wear. They are comfortable, but I think I should make them in a slightly stretchier fabric next time or modify the top of the socks since they are somewhat tight on my lower legs. That being said, this is a cool sock pattern and is a thousand times faster than knitting socks.

As far as what I enjoyed making the most, that would have to be the McCall’s 5303 sweatshirt (windbreaker). It was really fun and interesting to make. I loved it. The thing I had the least fun making was The Oslo Hat. It wasn’t hard–just boring to knit. If you’re looking for a pattern with lots of stockinette, so you can just knit without too much thought, though, this might be the pattern for you.

I really enjoyed doing a big coordinated project, and it definitely got me inspired and excited to get sewing. I don’t plan on doing this every season, but it was really fun to do at least once.

The Seaforth Pants by Hey June Handmade

Let’s talk in a little more detail about these pants since this is the first time they are making it to the blog.

Spring Outfit Challenge Finale and the Hey June Handmade Seaforth Pants

Like I said, I have been wanting to make these pants for awhile.

Spring Outfit Challenge Finale and the Hey June Handmade Seaforth Pants

When I saw the post on the Hey June blog where Adrianna, the designer, modified the pattern and made a pair of straight leg pants, I was sold.

Spring Outfit Challenge Finale and the Hey June Handmade Seaforth Pants

It was an easy modification, I already had fabric I could use, and I thought I could finish these much faster than the Sailor Pants I had first planned to make. Added benefits were that I could skip the muslin, I could use these pants in the summer, and they would help me get an idea about how the crotch curve from this company fits me, since I also plan to make the Vero Beach shorts in the near future.

I have challenged myself this month to sew at least thirty minutes a day, six days a week, so I used one day to prep my pattern, another to cut it out, and then it was on to sewing. All of these things took longer than the thirty minutes (and sewing took several days), but that goal really helped me get moving.

I followed Adrianna’s instructions for the modified pants and also swapped the front pockets out for some patch pockets from Simplicity 8841, which I have traced onto stiff cardboard with directions glued on the back.

Spring Outfit Challenge Finale and the Hey June Handmade Seaforth Pants

My goal was speed. I’m not the fastest sewer, but I was ready to be done with this project, as fun as it’s been. I used my serger to construct and finish seams and my sewing machine for whatever I couldn’t serge.

Spring Outfit Challenge Finale and the Hey June Handmade Seaforth Pants
Inside view
Spring Outfit Challenge Finale and the Hey June Handmade Seaforth Pants
Back pocket

I added grommets and a drawstring, and I love how they came out.

Spring Outfit Challenge Finale and the Hey June Handmade Seaforth Pants

I did not add the cool bias binding Adrianna mentions in the blog post at the bottom of the pant legs. I might do that another time, though.

One thing worth noting is that when I compared my measurements to the size chart, the size 18 looked just right, and it is what I chose. When you look at the finished measurements, however, the finished hip measurement is an inch smaller than the hip measurement for the size. This made me really nervous and I almost sized up. Adrianna does talk about this and how to pick your size in the directions. After reading through that, I ended up making the 18, and it worked out great. I don’t have any problems pulling the pants over my hips–I never even think about it–but do read that part carefully (and don’t worry too much) if you make these for yourself.

I managed to finish hemming just in time to wear these to an outdoor ceremony we were attending as a family, and they were perfect. The one thing I will do when I make these again, though, is use the front pockets that are part of the pattern. I love the look of the patch pockets I chose, but if you are sitting on the ground, things do tend to fall out.

Spring Outfit Challenge Finale and the Hey June Handmade Seaforth Pants

Something I have learned from the couple of patterns I have sewn from Hey June is that when Adrianna recommends something, whether it’s a certain type of fabric or a certain type of pocket, it’s there for a good reason. I’ve gone off-book here and there and it’s been fine, but I can tell it would have been better if I had followed the recommendations more closely.

Regardless of all that, though, the pants turned out great, the crotch curve works for me, and I am so happy this fabric didn’t become a shirt dress as I had originally intended. I think it will get so much more wear in the form of these pants.

Spring Outfit Challenge Finale and the Hey June Handmade Seaforth Pants

And that’s it! Spring outfit complete! On to summer!

Spring Sweatshirt: Brunswick + Josie

Standard
Spring Sweatshirt:  Brunswick + Josie

Hey! We’re finally into the spring sewing! Granted, I have lots of smaller crafts and knitted items that remain unblogged, but that’s ok. On to spring! This is actually the only garment I have sewn for spring because I’m hard at work on my Spring Outfit! More on that in a future post.

This sweatshirt is made of the softest Tencel sweatshirt fleece EVER.

Spring Sweatshirt:  Brunswick + Josie

I found it at Pintuck & Purl last year, and I bought the last of it. Kali, who works there, even let me buy the little bit she had been saving for herself so I would have enough for my project (thanks, Kali!). I’ve been curious about Tencel, which is a semi-synthetic (like modal, rayon, or lyocell), but which is made with an earth-friendly process by the company Lenzing. I have a thrifted shirt in Tencel, which is drapey like any rayon challis might be, but this sweatshirt knit was a different ballgame. It is drapey, substantial, not overly heavy, so soft, and stretchy.

I got the idea in my head that I wanted to make this fabric into a Brunswick Pullover, a pattern by Hey June Handmade, with a curved hem like that of the Style Arc Josie Hoody.

Spring Sweatshirt:  Brunswick + Josie

I have made both of these patterns before (Brunswick and Josie), and they are two of my very favorite sweatshirts. I’m actually wearing my Josie Hoody as I type this. After checking, I had just barely enough fabric if I chose View A with the hood rather than the cowl neck. The only issue is that the Brunswick is made for heavier weight, lower stretch knits–actually for two-way stretch knits. None of these things describe this black sweatshirt knit. However, Adrianna, the pattern designer, helpfully included fitting notes for anyone who, like me, veered off-script.

Spring Sweatshirt:  Brunswick + Josie

Per her instructions, I sized down from my measurements (which put me at a 20 bust and 22 hip) to the 16 bust and 18 hip I had used previously. It was so helpful that I could try on the Brunswick I already had, which is still a good fit at those sizes. I also took 1/2″ off the bottom sides of the sleeves and 1″ off the width of the cuffs as suggested. Then I added the Josie Hoody hem shape at the bottom of front and back, knowing I might have to work out some issues when I got to the plackets and hem facings.

Spring Sweatshirt:  Brunswick + Josie

For my arm pocket, I cut into one of the two precious fat quarters of Liberty lawn that I own and underlined it by fusing some black silk crepe de chine to it. Fancy! The fusing made things a little on the stiff side, but it was fine in the end, especially after a few wears. I’ve used lawn for pocket bags in pants before and, let me tell you, it is not a good idea. It’s just not durable enough for that kind of wear and tear. This pocket wouldn’t have as much stress on it, but I didn’t like even the smallest possibility of it wearing through in the future, so underlining it was! I didn’t worry about the lawn on the plackets. They’re interfaced where necessary and don’t come under much strain.

Spring Sweatshirt:  Brunswick + Josie

Things went along pretty well, even at the spot where the plackets joined my modified hems and when I installed grommets for my hood strings.

Spring Sweatshirt:  Brunswick + Josie

The one part I wish I had done differently/better is where the sides of the hood meet in the front. The instructions tell you not to overlap the pieces, but I wonder if I understood it incorrectly. I think they should overlap in the seam allowance and just *kiss* at the seam line (at least in this lighter weight knit). Mine have a gap, so there was probably some user error in there, since Hey June’s instructions have so far proved impeccable.

Spring Sweatshirt:  Brunswick + Josie

I love how this sweatshirt came out. It was worth the crazy hassle to find notions that were color coordinated (why is this so hard?!) and the extra steps to modify the pattern. There is, however, one thing I should have thought about before, but completely missed. It’s not a deal breaker, but here it is. Using a shaped hem with facings actually shortens the sweatshirt from its intended length. The original pattern has you cut the front and back and add a separate piece for the bottom cuff, which adds some length. I didn’t think about that one bit until I put it on at the end. I’m cool with the length it ended up, but if I could travel back in my time machine, I would add the extra length into the body of the sweatshirt.

Spring Sweatshirt:  Brunswick + Josie

Otherwise, I like it. It has a different feel from a low-stretch sweatshirt. It is drapey, stretchy, and has a pleasant weight that isn’t overpowering. I’ve been wearing it a lot, and it’s only increased my love for these patterns and fabric.

Spring Sweatshirt:  Brunswick + Josie

Union St. Tee in Cotton + Steel Jersey Knit

Standard
Union St. Tee in Cotton + Steel Jersey Knit

As summer goes by, I’m sewing less and going outside more, so after this post, things may slow down for a little bit.  You just can’t waste beautiful outside days when you live in a place with cold and snowy winters, you know?  Today’s project is just right for summer.  While I love breezy woven fabrics in the summer, I also wear a fair number of t-shirts.  My go-to winter t-shirt pattern is the free Plantain T-shirt from Deer and Doe, and while that one does have a short-sleeved view, what I really wanted for summer was a great relaxed v-neck with additional options.  The Union St. Tee from Hey June Handmade looked promising, and I absolutely love the Brunswick Pullover pattern that I tried from this company, so, having gotten the PDF as a Christmas present, I decided to try it out this summer.

Union St. Tee in Cotton + Steel Jersey Knit

The Union St. Tee pattern comes with four sleeve lengths and three necklines and can be made with or without a pocket.  It also includes a provision for full bust adjustments if that is a change you usually make.

Union St. Tee in Cotton + Steel Jersey Knit

l

Union St. Tee in Cotton + Steel Jersey Knit

The recommended fabrics are things like “cotton/poly, triblend, rayon blends, bamboo, and modal.”  I have been trying to use what I have on-hand for the most part this spring/summer and I already had some cotton/spandex jersey from Cotton + Steel in my stash that I really wanted to try.  This is not a recommended fabric (it’s actually a fabric that the designer tells you not to use unless you are sizing down for a more fitted t-shirt), but I decided to go for it anyway.  This fabric is (I think) 95% cotton and 5% spandex and is soft and nicely substantial–maybe a midweight.  The design is called “Flotsam & Jetsam” from the Hello collection from Cotton + Steel in its first iteration (those designers have since founded Ruby Star Society with Moda Fabrics), and I got it from Pintuck & Purl during one of their sales.

Union St. Tee in Cotton + Steel Jersey Knit

l

Union St. Tee in Cotton + Steel Jersey Knit

As for the sewing, the instructions and illustrations in the pattern were great.  They are very detailed, and include a link to a video tutorial for sewing a great v-neck.  While mine isn’t completely perfect, it’s really good considering my very limited experience in that area.  One question I have had when applying neckbands is whether to use a straight or a stretch (zigzag) stitch.  I used a straight stitch for this neckband and it turned out great.  I’m always afraid that a straight stitch won’t be stretchy enough and a zigzag stitch won’t look crisp enough, but I have had no problems with the straight stitch I used for this neckband.

Union St. Tee in Cotton + Steel Jersey Knit

When I first tried the finished shirt on, I could see why cotton/spandex isn’t recommended.  This is supposed to be a relaxed t-shirt and the slightly heavier weight and lower amount of drape does make it stand out from the body a bit.

Union St. Tee in Cotton + Steel Jersey Knit

l

Union St. Tee in Cotton + Steel Jersey Knit

My first thought was that it looked like a maternity shirt.  My first impressions of my projects aren’t always positive, and I am learning that I need to wear them several times before really deciding how I feel.  I did that with this t-shirt, and now I love it.

Union St. Tee in Cotton + Steel Jersey Knit

l

Union St. Tee in Cotton + Steel Jersey Knit

I’m so happy that I tried this pattern, and I’d love to make it again in one of the suggested fabrics.  I highly recommend it for the drafting and the very detailed instructions and illustrations.

Union St. Tee in Cotton + Steel Jersey Knit


Hey June Handmade Brunswick Pullover in Polartec Curly Fleece

Standard
Hey June Handmade Brunswick Pullover in Polartec Curly Fleece

It’s still cold spring here, but I think this is my last spring sweatshirt…and it’s a good one.  This is the Brunswick Pullover from Hey June Handmade, my first pattern from this company, and probably not my last.  This is a great pattern.

Hey June Handmade Brunswick Pullover in Polartec Curly Fleece

I made View A with the cowl neck of View B in a size 16 bust and 18 hip. I used a green Polartec Curly Fleece from Fashion Fabrics Club (just like last week’s sweatshirt) and a Rifle Paper Co. quilting cotton from Pintuck and Purl.  The zipper on the pocket was from Wawak (I wanted the specific length called for rather than a zipper I would have to shorten, so I had to order it) and the anorak snaps, thread, and interfacing came from my stash.

Hey June Handmade Brunswick Pullover in Polartec Curly Fleece

l

Hey June Handmade Brunswick Pullover in Polartec Curly Fleece

Hey June Handmade is a company whose patterns I’ve had my eye on for awhile.  Last year, I planned to make the free Durango Tank, but never got around to it.  I saw this pattern release, though, and really liked the pattern as well as the various photos of people’s finished pullovers around the internet.  Katie’s Brunswick with the striped hood and other details was really inspiring as was Loni’s Brunswick with the white outside and Rifle Paper Co. button placket.  This last one was the inspiration that stuck with me as I looked for my own fabric.

Hey June Handmade Brunswick Pullover in Polartec Curly Fleece

Although I prefer paper patterns, this is only available in PDF currently, so I decided to put my preference aside and go for it.  Adrianna Appl, the designer, makes this PDF really easy to use with layered sizing (meaning you only have to print the sizes you need) and loads of information about printing and taping PDF’s, cutting your fabric, and sizing before you even start.  I was impressed from the very beginning by the detail and depth of information.  There is a lot of hand-holding in the pattern in the best way.  Adrianna does everything possible to ensure that you have a good and successful experience sewing her pattern.

Hey June Handmade Brunswick Pullover in Polartec Curly Fleece

I think the thing that really drew me to this pattern is all the fun little details you can add that take this from merely a cozy sweatshirt to cozy sweatshirt with a distinctive twist.  Here are some close-ups of my choices:  a contrast zipper pocket on the sleeve,

Hey June Handmade Brunswick Pullover in Polartec Curly Fleece

l

Hey June Handmade Brunswick Pullover in Polartec Curly Fleece

functional snap plackets on the sides lined with contrast fabric,

Hey June Handmade Brunswick Pullover in Polartec Curly Fleece

l

Hey June Handmade Brunswick Pullover in Polartec Curly Fleece

and a big, cozy cowl neck.

Hey June Handmade Brunswick Pullover in Polartec Curly Fleece

l

Hey June Handmade Brunswick Pullover in Polartec Curly Fleece

A few notes from sewing the pattern:

  • I used a walking foot and a jersey/ballpoint needle as well as a lighter presser foot pressure.
  • To mark the pocket on the arm, I used tailor’s tacks since fabric marker or chalk wouldn’t have shown up well on the fleece.
  • Because I was using fleece, I couldn’t press without melting the fabric, and therefore couldn’t use fusible interfacing.  I opted to hand baste some sew-in woven interfacing at the necessary points.  Where the pattern called for pressing, I finger pressed.
  • It can be a little bit hard to tell the front from the back when the pullover is finished if you used the cowl neck option (unless you memorize which arm the outer pocket goes on), so I made a little tag out of a pretty bit of selvage and sewed it inside the back near the neck seam.

Hey June Handmade Brunswick Pullover in Polartec Curly Fleece

This was a really enjoyable pattern to sew.  I love, love, love the finished product, and I’m so impressed with all the attention to detail in this pattern, that I would love to sew another from this company.  Plenty of patterns out there are good, but I think the quality of this one is a step above.  I’m glad I tried it.  It’s been fun to have a bright colored sweatshirt to fight off the spring rain and chill, too.

And with that, I’ll leave you with one of my favorite outtakes/silly shots:

Hey June Handmade Brunswick Pullover in Polartec Curly Fleece

Many thanks to my long-suffering photographer.  😀