
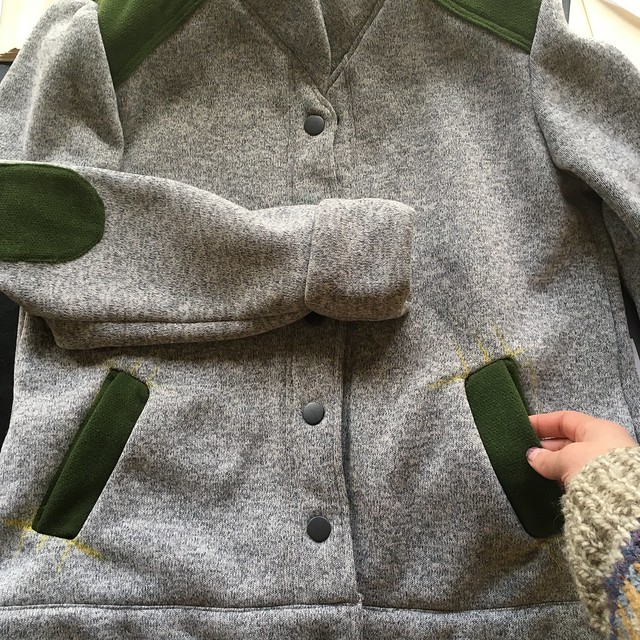
After the post on my cardigan from a few weeks ago, I thought I would follow up with some pictures and a tutorial of the process I used to create the self-welt or stand pockets on the front. This comes straight out of my 1976 edition of the Reader’s Digest Complete Guide to Sewing, my favorite sewing reference. If you also have this edition of the book, I’m using information from pages 284 and 288. This process isn’t hard, but it does require paying attention and being careful. It also requires frequent pressing, unless you have a fabric like this fleece that shouldn’t press.
Make a template
Before starting my pockets, I made a template out of some cardboard so that I could be sure my pockets would be the same size and that my pocket openings would be perfect rectangles.

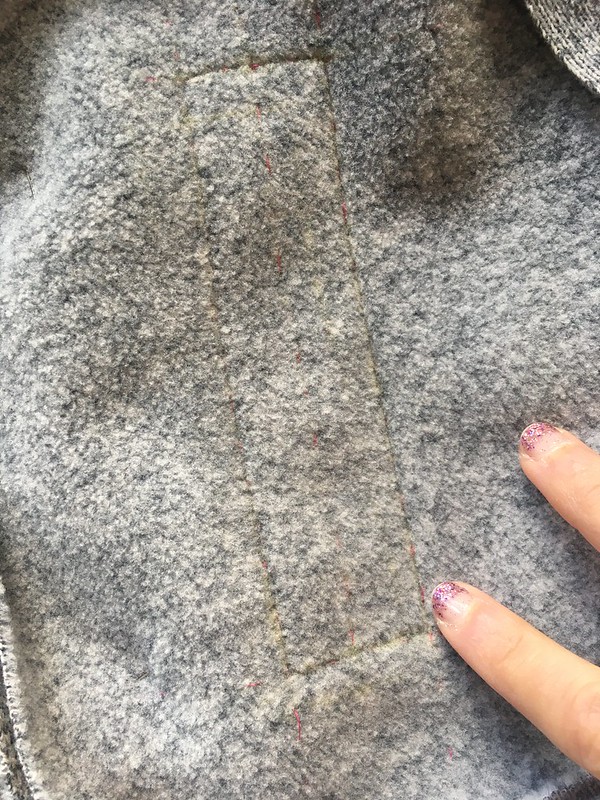
Once I figured out just where I wanted to place my pockets, I traced around my templates with a Chaco liner. Use the marking tool of your choice.
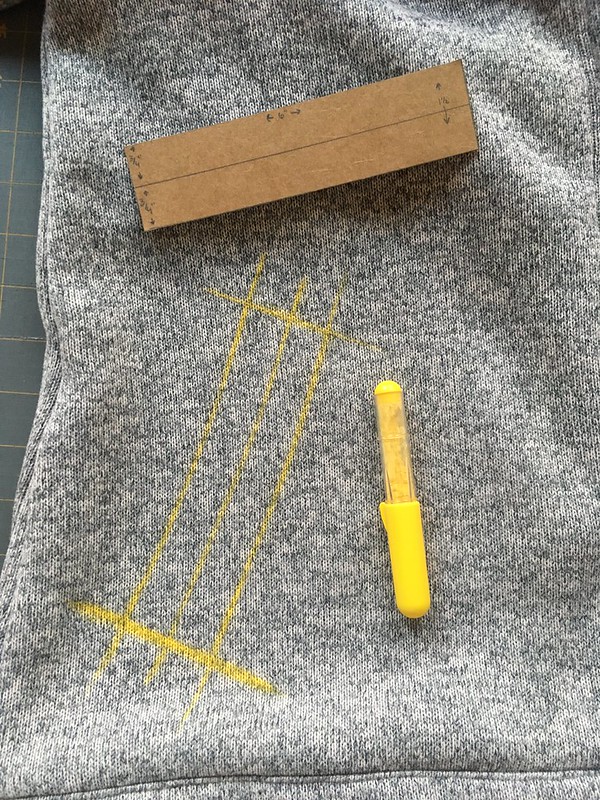
I will tell you that I have used this yellow Chaco liner twice on light-colored materials (this cardigan, and this bag) and it does not always wash out of lighter colored fabrics. I should probably get a different color to try in these situations, but I didn’t really think about that until too late. It’s ok, though. Most people won’t notice it.
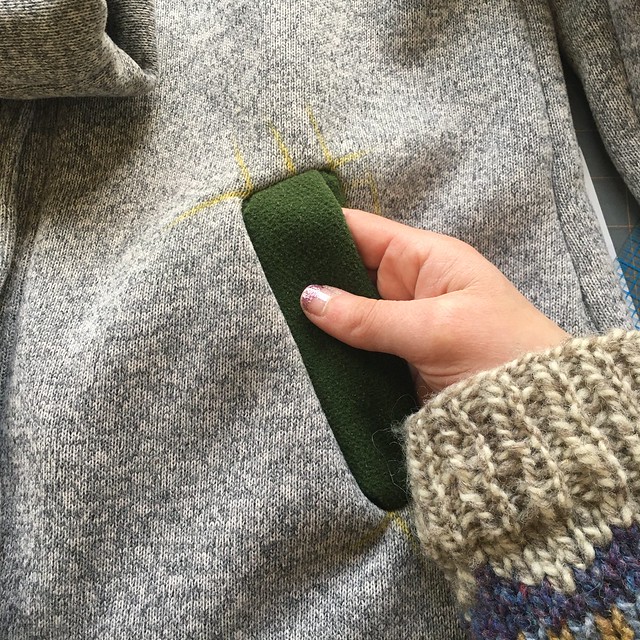
Mark your pocket
After tracing my pocket template, the next thing to do was to thread-trace the shape, extending my lines a bit beyond the corners (at least 3/4″). This helps you to see the shape of the pocket from both sides. The directions say you should also thread-trace a center line through the middle of your rectangle, parallel to the long sides of the pocket. That is up to you. I did this, but didn’t find it as helpful as I thought it would be.

l

Because this is a heavyweight fabric, I didn’t need to interface it. If your fabric is lightweight or loosely woven, you will need to cut interfacing about four inches longer and two inches wider than your pocket opening, center it over the opening and baste around the edges (for sew-in interfacing) or fuse (for fusible interfacing) before you begin to thread-trace. Then thread-trace through both the garment fabric and the interfacing.
Create your welt + pocket bag piece
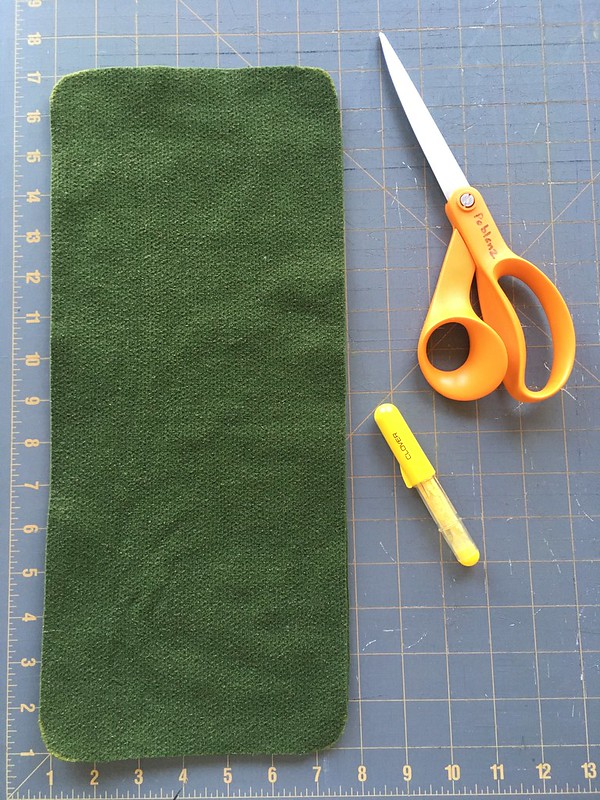
Now it’s time to cut out the fabric that will form your welt and your pocket. You will be cutting out a rectangle with the grainline going the long way on the rectangle. Rather than using fabric from my main garment, I used my accent fabric. The length of your rectangle should equal two times the desired finished depth of the pocket plus two times the desired depth of the welt. The width of your rectangle should equal the width of the pocket opening plus one inch for seam allowance (this gives you a 1/2″ seam allowance on each side). In order to keep lint from catching in the corners of your pocket when you wear your garment, round the corners with your scissors. You could fold your fabric lengthwise and then widthwise and trim all the corners at once so they would have a uniform shape.
Now fold your pocket in half horizontally and mark that line by pressing or with chalk or other marking tool. I chose chalk since I couldn’t press. If marking with chalk, mark on the wrong side.

l

Build the pocket
Now place your pocket piece with its right side on the right side of your garment, aligning the line you just marked with the bottom stitching line of your pocket. Pin in place.

Turn the garment to the wrong side. Using a short stitch length, stitch both layers together by sewing carefully around the rectangle, along the thread-traced lines, starting in the center of one of the long sides and pivoting at each corner. When you come back to the point where you started, sew over a few of your beginning stitches to lock them in place. Do not sew at all on the center line that you (optionally) marked. Now you can remove your thread-tracing.
l
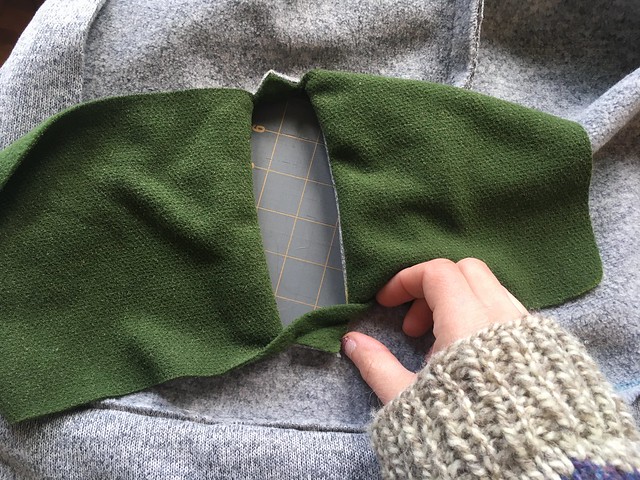
On your pocket piece, mark the center of your pocket, parallel to the long sides. You can also mark 1/2″ in and parallel to the short sides of your rectangle.

Then cut along the middle line through both layers, stopping 1/2″ before each short side. Cut diagonally to, but not through the corners. This will make small triangles of fabric at each end.

Carefully push the fabric through the opening to the wrong side and press (if possible) so that you can’t see the pocket fabric from the front. Pulling on the small triangles you just created should help you square up the pockets. Because I couldn’t press my fabric, I basted the seam allowances on the short sides down and pinned the longer parts of the pockets.
l

l
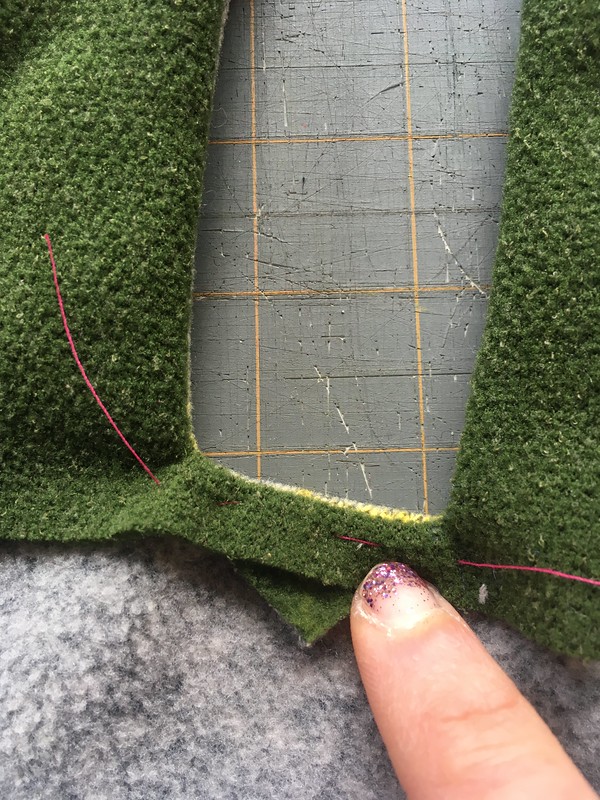
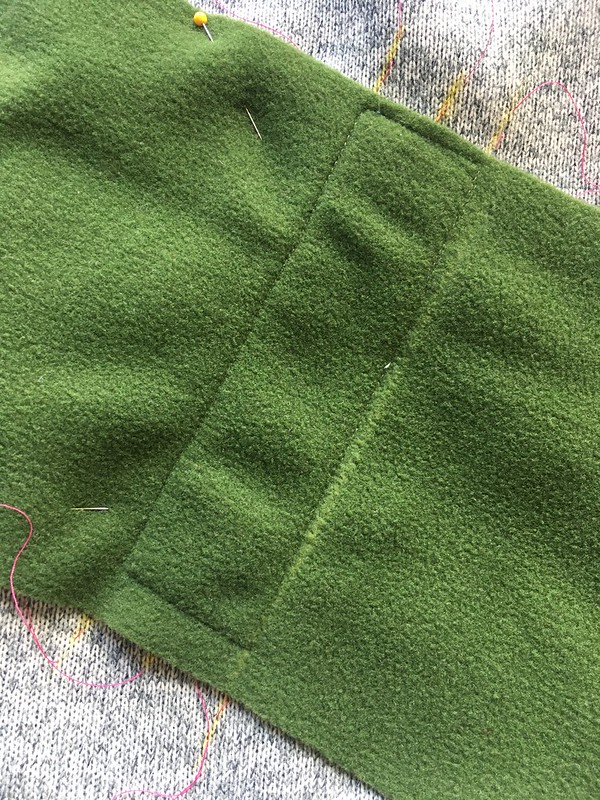
Now it’s time to make your welt! Don’t worry–it’s just a fold of fabric. Working from the back, fold the lower part of the pocket up to cover the opening and then fold back down, creating a pleat that covers the opening of the pocket. Check that it looks good from the right side. It should cover the opening completely, with the fold touching the top opening edge of the pocket. To keep everything where it should be, baste through the fold and then use a whipstitch to temporarily attach the fold to the top of the pocket opening.

Now turn your work to the right side. Fold up the bottom part of your garment fabric so you can see the lower seam allowances of the pocket opening as well as the lower part of the pocket. Stitch through these seam allowances and the lower part of the pocket as close to your original stitching as possible.

Now turn everything back to the wrong side. Fold the long top part of the pocket down and align it with the bottom part of the pocket. You are creating your pocket bag. The right sides of your pocket piece should be facing one another. Pin around the raw edges of the pocket and press the seam allowances on top of the pocket open if possible.
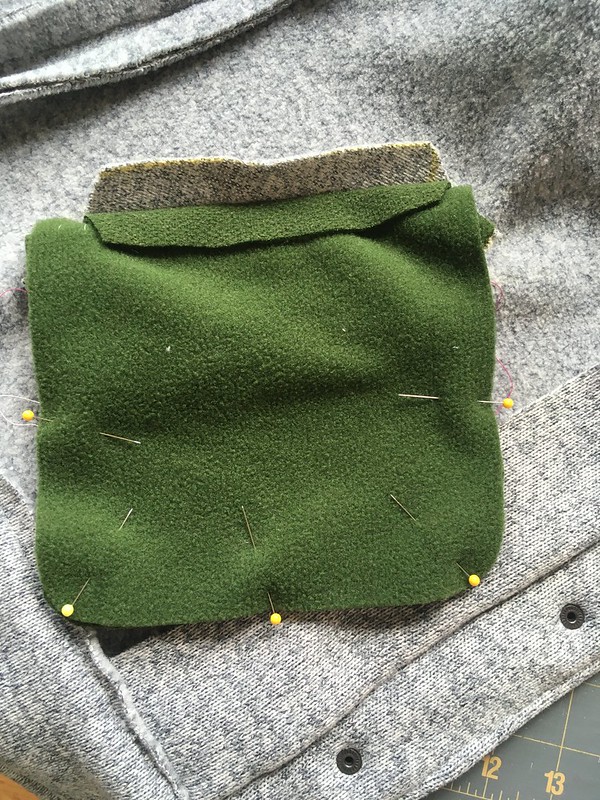
Remember that 1/2″ seam allowance we built into the width of your pocket piece? Time to use it! Flip your garment around to the right side again and fold the garment up out of the way so you can see your pocket. Sew around the pocket, using your 1/2″ seam allowance, starting at the top and sewing over those little triangles on the sides as you go, getting as close to your earlier stitching as you can. Don’t forget to backstitch at the beginning and end! Finish your pocket edges together if necessary for your fabric and give everything a good press if you can so it’s all nice and flat. Then remove your basting stitches.

Good job! You did it!

Wow! That was an amazing tutorial and finished product!!
LikeLiked by 1 person
Thanks!
LikeLike
Thanks for this! I need to try it … someday…
LikeLiked by 1 person
😁 Thanks. You can always save it for just in case. 🙂
LikeLike
This is really cool – and love the detailed photos and explanations of the pockets. Just stumbled on your site while google searching for fleece sewing patterns!
LikeLiked by 1 person
Thanks! I do love Polartec fleece. I would say that and wool are my favorite cold-weather fabrics. I hope you find some good options!
LikeLike