
Awhile back we talked about baby gifts. I want to share one of my go-to baby gifts with you today: flannel blankets.

These blankets are very easy to make (perfect if you are a beginner), and are also very well received. When I had my children, we were given a mound of blankets, but these blankets, made by my Mom and grandmother, were the ones we used the most and were some of my favorites. You can make them in various sizes, but the sizing I’ll give you is great as babies pass out of the infant stage, but still need to be swaddled, nursed, or just tucked into a stroller or car seat. The other thing that I love about them is that since flannel has a nap to it, it sort of grips itself, which is excellent if your baby likes to be swaddled or you need a non-slippery blanket for a mom to throw over her shoulder as she nurses. If you live in a warmer climate, you can also make these out of old sheets or a sheeting material or half flannel, half sheeting.

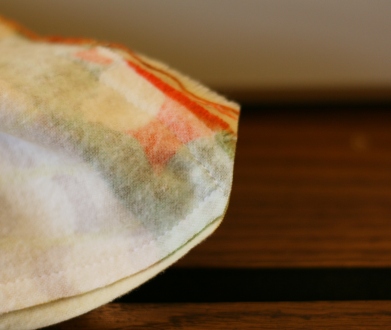
Made by Sue Schwabauer from high quality flannel.

Made by Sue Schwabauer from quilting cotton and high quality flannel. The bottom blanket is a smaller size perfect for a newborn.

These are made from an old sheet (top) and a crib sized duvet cover (bottom).
Now that I’ve talked these up so much, let’s get to the directions!
Materials:
- two lengths of cotton flannel fabric (one for each side), approximately 44″ wide, 1.25 yards long (The goal is to make the blankets approximately square.)
When I buy flannel, I’m often planning to make several blankets. I usually wait until Jo-Ann Fabric has a sale on flannel, and I buy several yards of a print that will work for boys or girls. Then I buy the same amount of yardage in a solid or another coordinating gender-neutral print. At other times, I’ll buy several yards of a “girl” print and several of a “boy” print. My Mom usually gets her flannel at an independent quilt store, and there is a big difference in the feel of the fabric. I have also recycled sheets and crib sized duvet covers, making nice summer-weight blankets. Those are just a few different fabric strategies that you can try depending on your budget and requirements for the kind of blanket(s) you want to make.
- thread color of your choice, contrasting or matching
- self-healing mat, lipped ruler, rotary cutter (and Kevlar gloves if you want to be EXTRA safe) or fabric scissors and measuring tool of your choice
- pinking shears or other fabric scissors
- sewing machine or needle and thread for hand-sewing
Directions:
- Prewash and dry your fabric. You want any shrinking to happen before you sew it up. I don’t use a dryer sheet when I’m drying fabric in case I ever want to use it with something like Heat ‘N Bond or another fusible, as I’ve been told it won’t adhere well if you’ve used a dryer sheet.
- Measure the width of your fabric after it has been washed and dried. For the last blanket I made, the width (including the selvage) was about 42″. I typically buy flannel that is around 44″ wide.
- The goal for this step is to even up the ends of your fabric, so if you have a method you like, use that. If you don’t have a favorite method, you can try what I do. Fold each piece of fabric in half, matching selvages. I often have to scoot mine around a bit to get the selvages to match up without wrinkles. Smooth your fabric out and lay it horizontally on your self-healing mat with the folded edge or the selvages lined up with one of the horizontal measurement marks. (You can cut each piece of fabric separately or lay one on top of the other once they are smoothly folded and cut them at the same time.) Then, take your clear, lipped ruler, and place the lip over the top edge. Line up the right side of the ruler with the vertical measurement mark on the mat that is closest to the end of your blanket. Holding the ruler in place with your left hand (gloved in Kevlar, possibly), use the rotary cutter to cut off the excess fabric and make a straight edge. Do the same for the other end of your fabric. You want the length of the fabric to be similar to the width, but this doesn’t have to be exact, so don’t worry if it’s an inch or two different. Now you have two squarish pieces of fabric that are (in theory) the same size.
 This picture is slightly different from the description in #3, but I wanted you to be able to see the tools I described and the way the fabric is lined up on the self-healing mat.
 - Unfold your fabric and match both pieces with right sides together. Somehow, mine are never truly the same size, so I pick a side or two and line them up as best I can. Like I said, it doesn’t have to be exact. Just try to smooth out any wrinkles as you go so that you don’t have one piece of fabric that is flat and one piece that is bubbly or lumpy when you finish.

- Using a straight stitch and about a 0.5″ seam allowance, stitch around the blanket, leaving about 8″ unsewn in the middle of one edge. Unless your blanket edges all match up perfectly (which mine never do), you may have a side (or two or three) where you are just sort of guessing at the seam allowance. Just do your best to keep your stitching parallel to one edge with something like a 0.5″ seam allowance. As long as it is generally straight, it doesn’t have to be perfect.

- Using your pinking shears or fabric scissors, trim around the edges where you have sewn in order to even the layers up and reduce bulk. You can also clip diagonally at the corners when you are trimming (just don’t clip into your sewing).

Trim around the edges.
Clip the corners.
- Turn the fabrics right side out through the opening you left on one side. I usually use a pin to pull the fabric at the corners out into points.

Turn your fabric right side out.

Use a pin to pull the corner fabric out to a point.
- Smooth everything out and fold the edges in at the opening. You can pin them together if you like. I usually don’t, but do what makes you comfortable.
- Using a wide zigzag or decorative stitch, stitch around the outside of the blanket, staying fairly close to the edge (especially as you sew over the opening you used to turn the fabric right side out). You want to catch the fabric at the opening in your stitching. I think I used about a 0.5 or three-eights inch seam allowance, but as I said, the main thing is to stay close to the edge.

I used a wide zigzag stitch for this blanket.
- Next, fold your blanket into thirds and mark those thirds with a pin.

- Stitch down the blanket from one pin to another (I don’t draw a line, I just start at one pin and aim for the bottom one.) with a straight stitch. You want to end up with two parallel lines running down the blanket to anchor the two pieces of fabric together so they don’t bunch up. You can get creative with how you do this. I think my Mom has sewn a heart or other shape to the middle of the blanket rather than stitching parallel lines, which accomplishes the same thing. When I do the two lines of stitching, I often get a little bit of fabric that bunches up at the bottom, even though I try to make sure the fabric feeds evenly.

Congratulations! You did it! Now fold or package your blanket to give to that special baby in your life.


You directions are great…i have had people ask me if I would make them additional blankets. ;×)
LikeLike
Me, too. Thanks for letting me know about how to make these baby blankets. I’m glad the directions work. It’s always hard to tell if you are being clear when you write things out.
LikeLike